 Aerea World
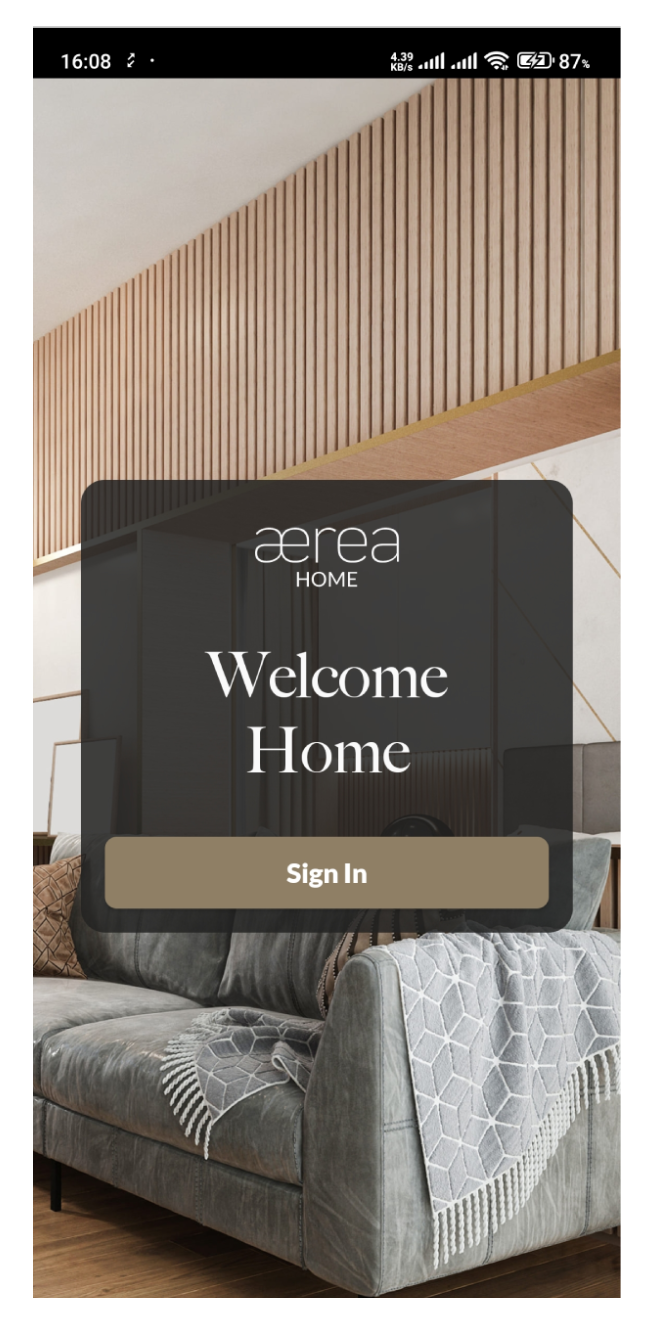
1.1 Login as a new user
How it works
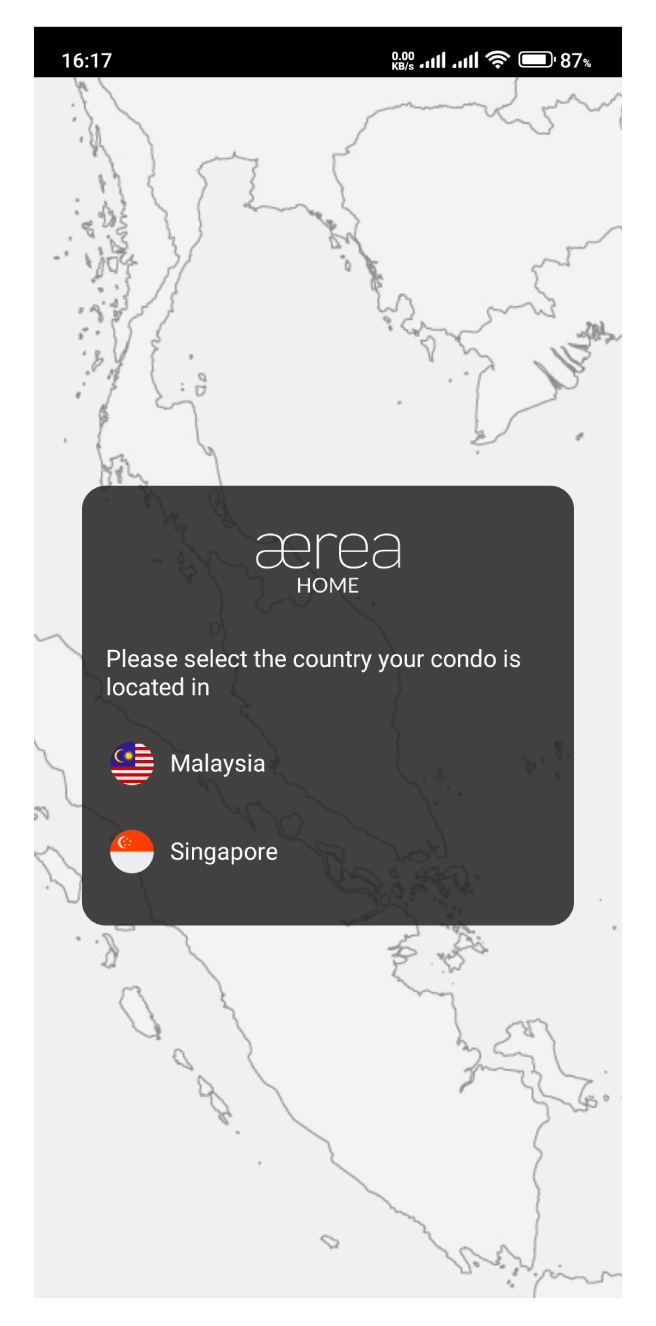


Step 1
Select the country your condo is located in
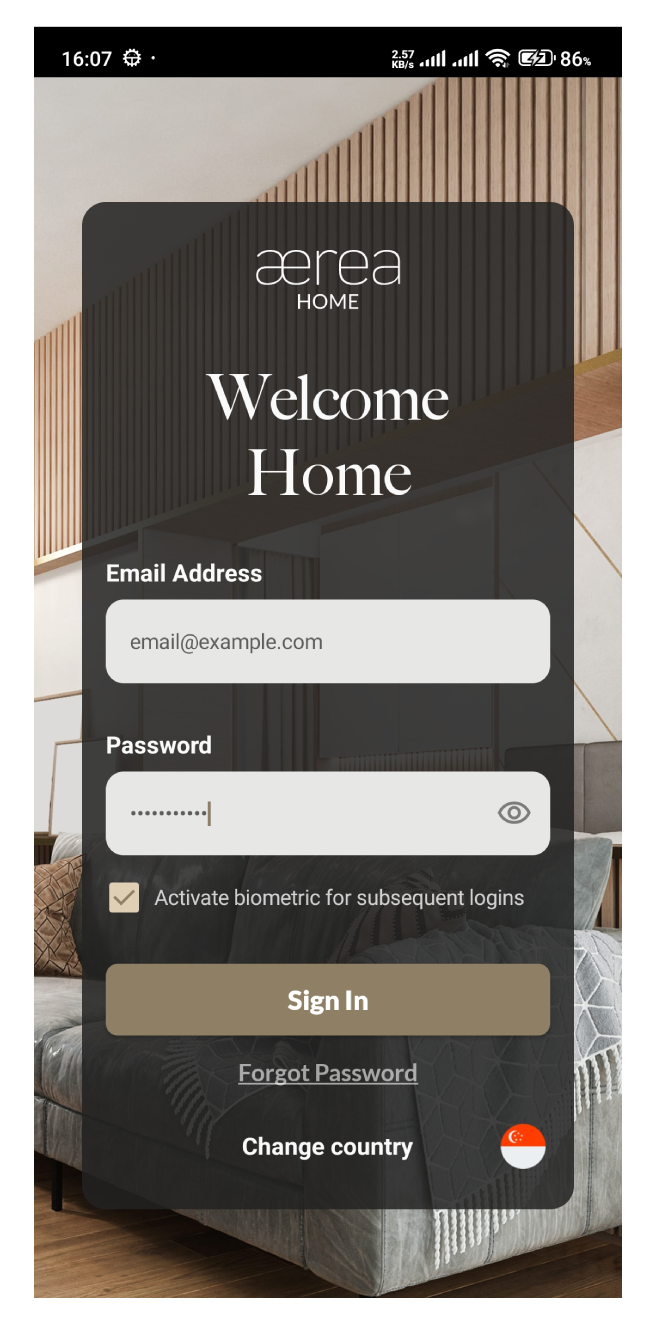
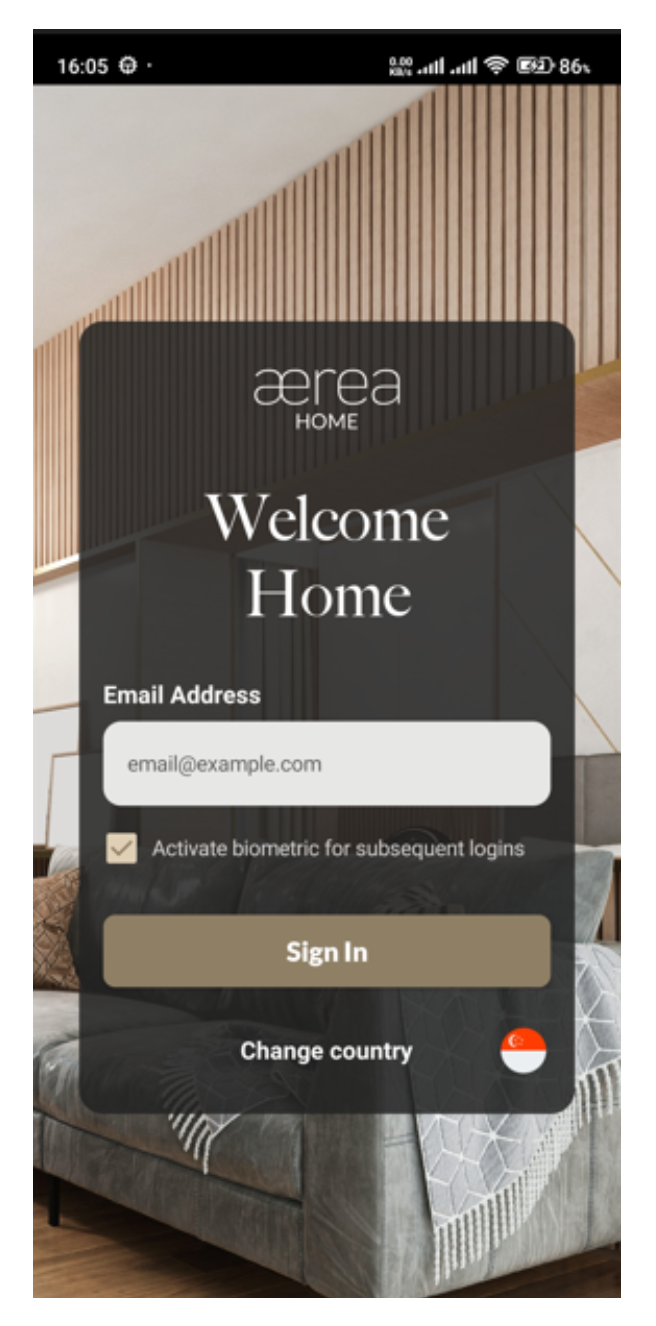
Step 2
Enter the email address associated with your registered account in the provided field. If you want to use biometric for subsequent logins, check the given checkbox. Then, tap Sign In
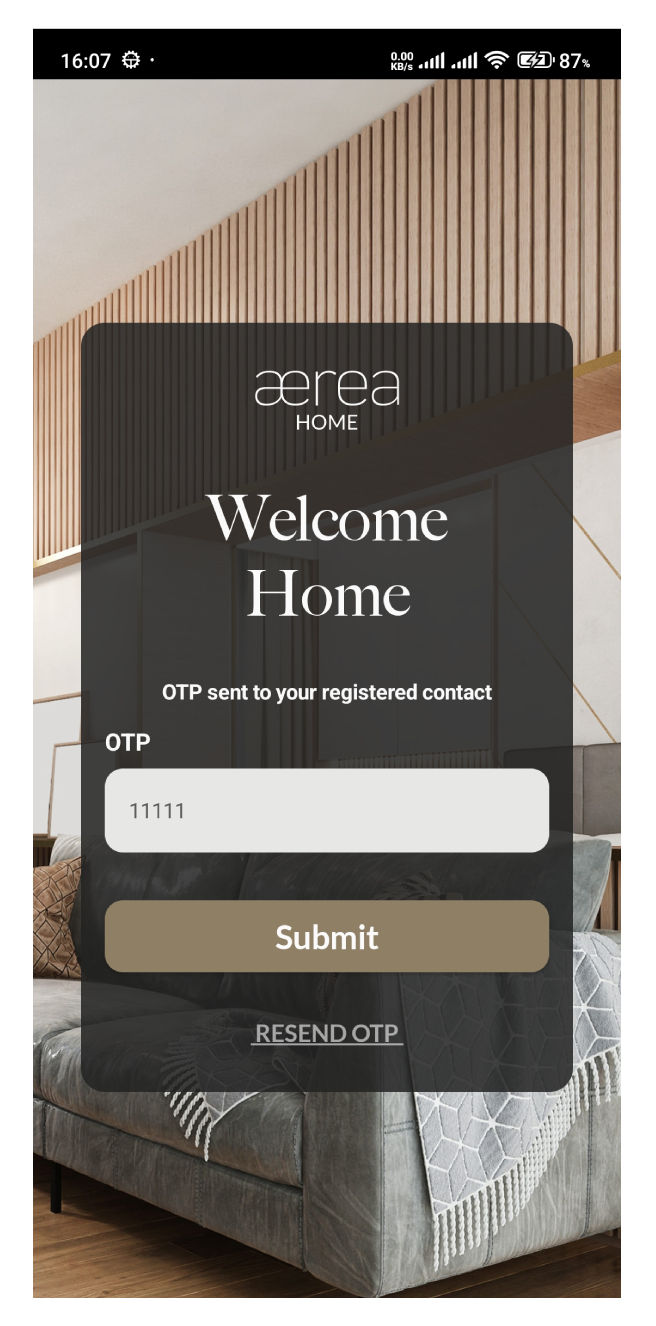
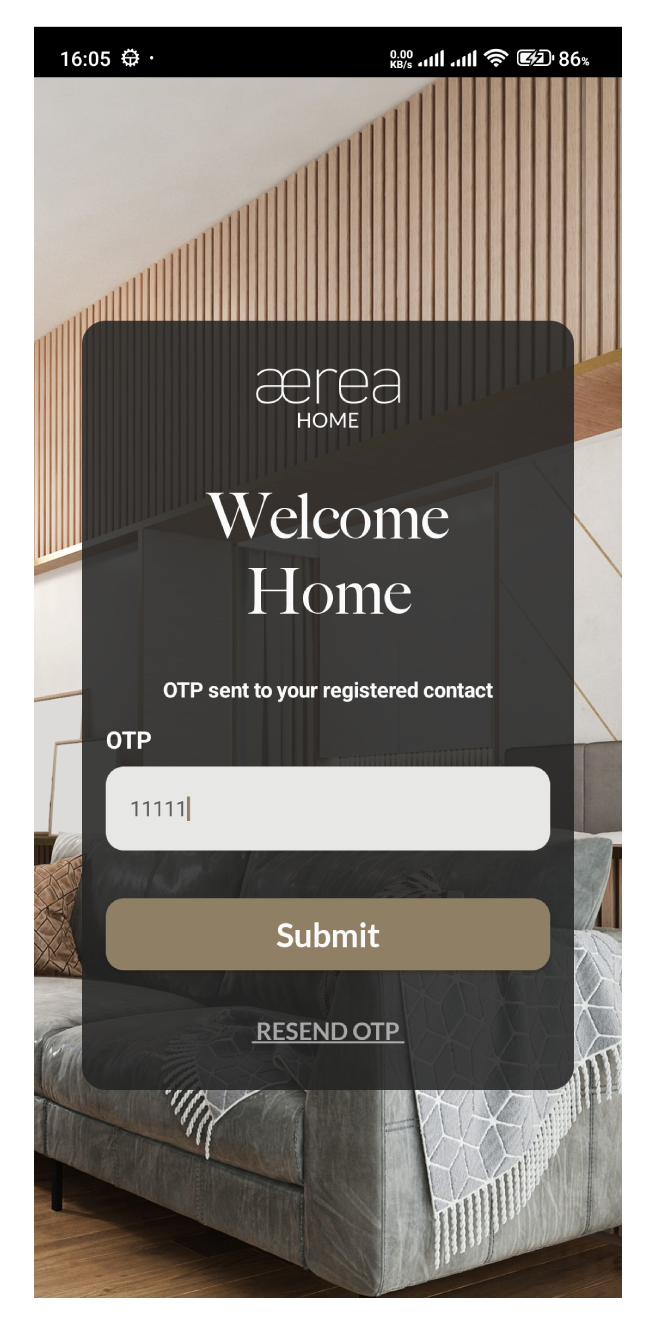
Step 3
Check your email inbox for a one-time password (OTP), enter it in the designated field, and tap Submit
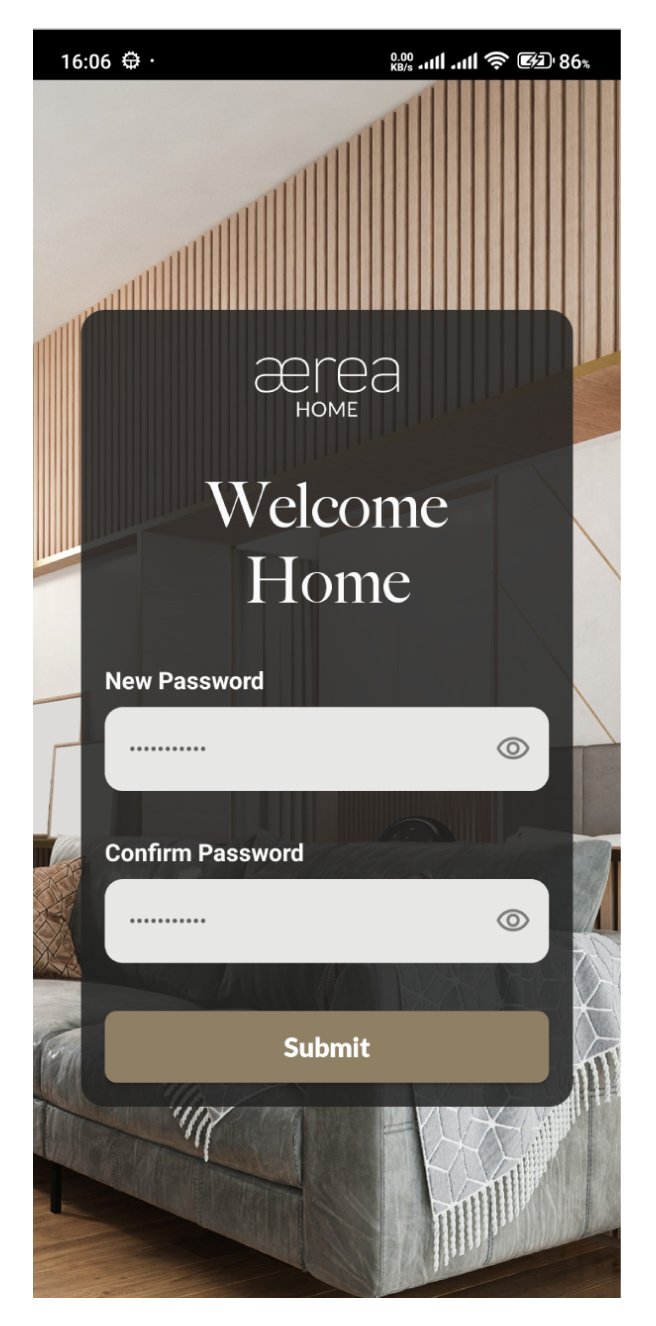
Step 3
Choose a password, enter it in the password field, confirm it by typing it again in the provided field, and tap Submit
1.2 Login as a regular user
How it works

Step 1
Enter the email address associated with your registered account in the provided field. If you want to use biometric for subsequent logins, check the given checkbox. Then, tap Sign In
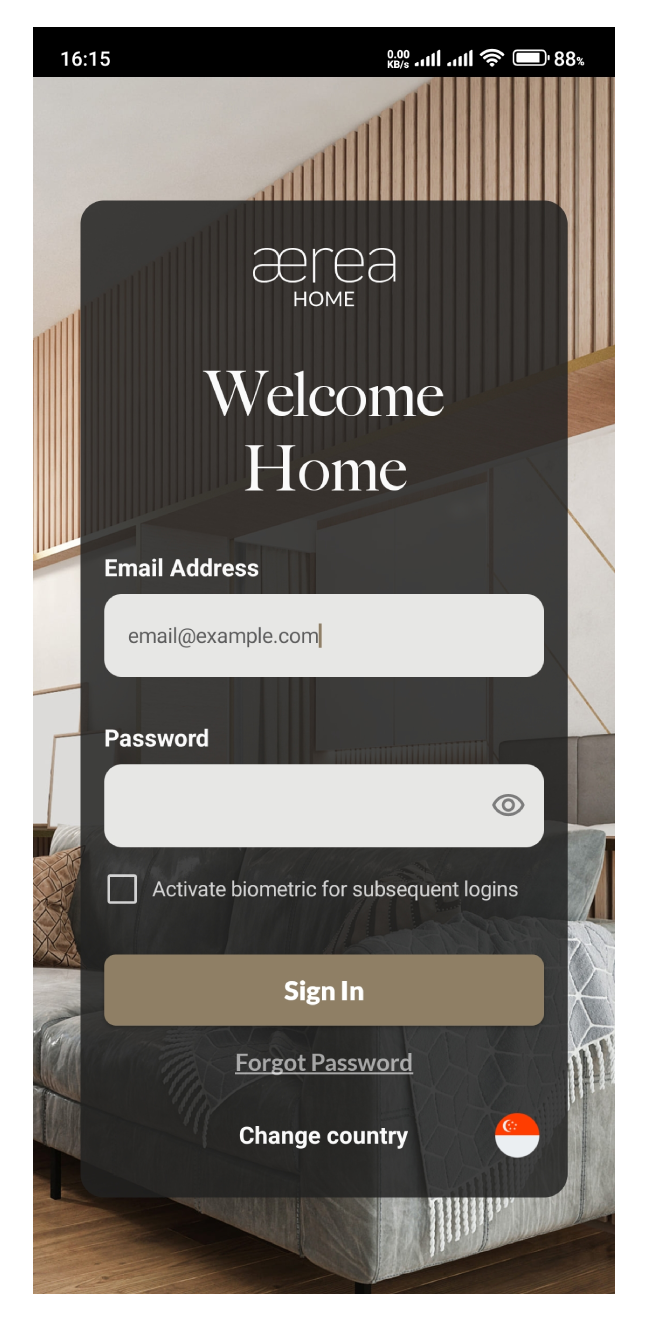
Step 2
If your email address is registered, you'll see a password field. Enter your password there, and then tap on Submit.
Step 3
Check your email inbox for a one-time password (OTP). Enter the OTP in the designated field, and then tap on Submit
1.3 Log in with biometric
How it works
Step 1
If biometric login is enabled, just tap the Sign In button and you will be prompted to use biometric sensors available on your device
1.4 Reset password
How it works

Step 1
Enter your email address in the provided field and tap the Submit button
Step 2
If your email is registered, a password field and a Forgot Password button will appear. Tap Forgot Password
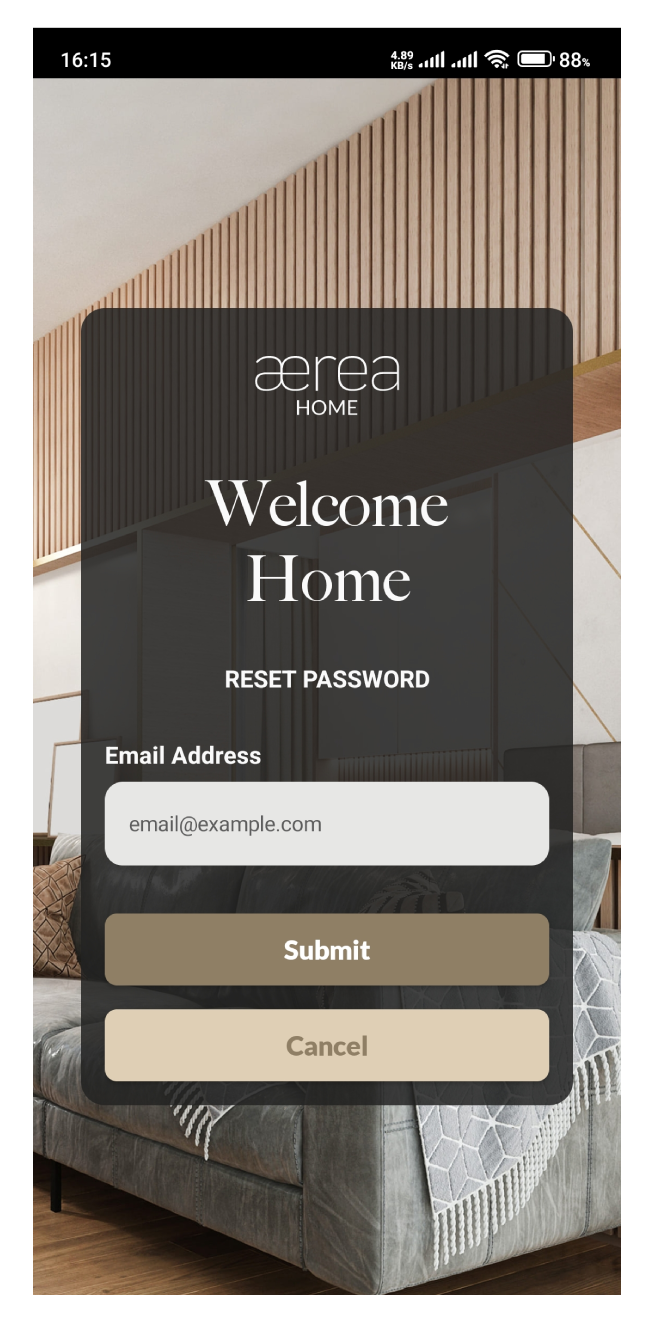
Step 3
Enter your email address again in the provided field and tap the Reset Password button
Step 4
Check your email inbox for a one-time password (OTP). Enter the OTP in the designated field and tap Submit
Step 5
Choose a new password, enter it in the new password field, confirm it by typing it again, and tap Submit
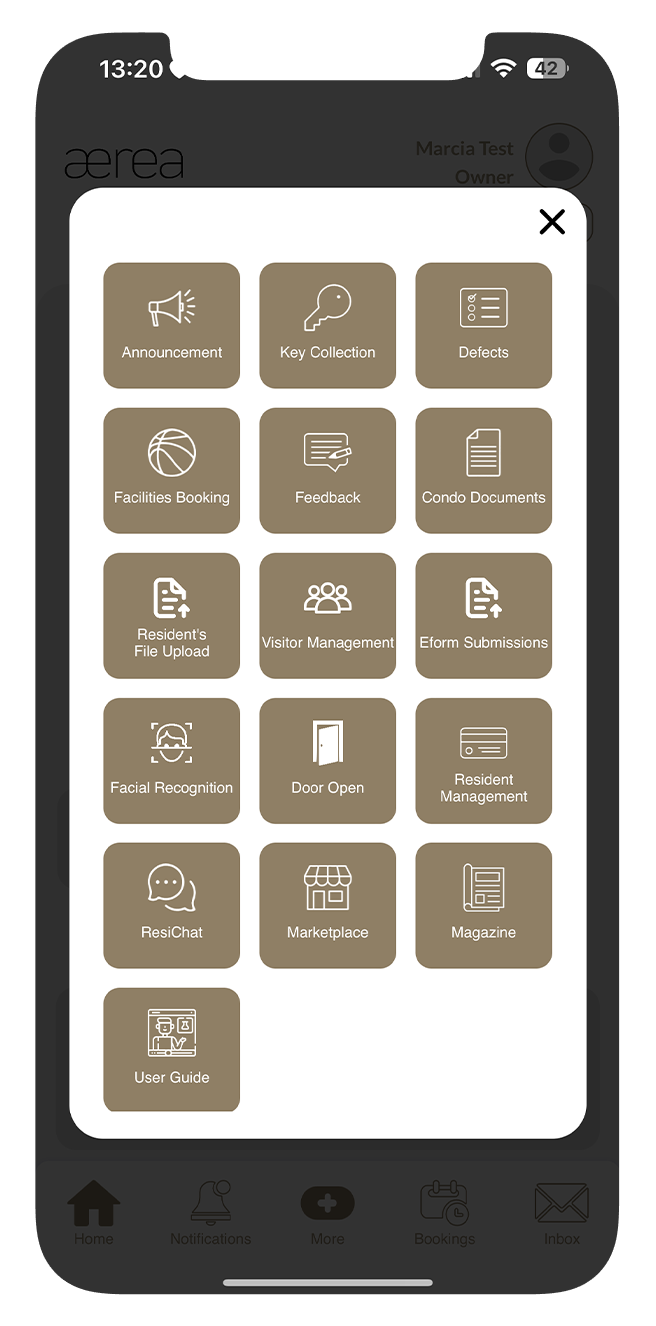
2.1 More Menu
How it works
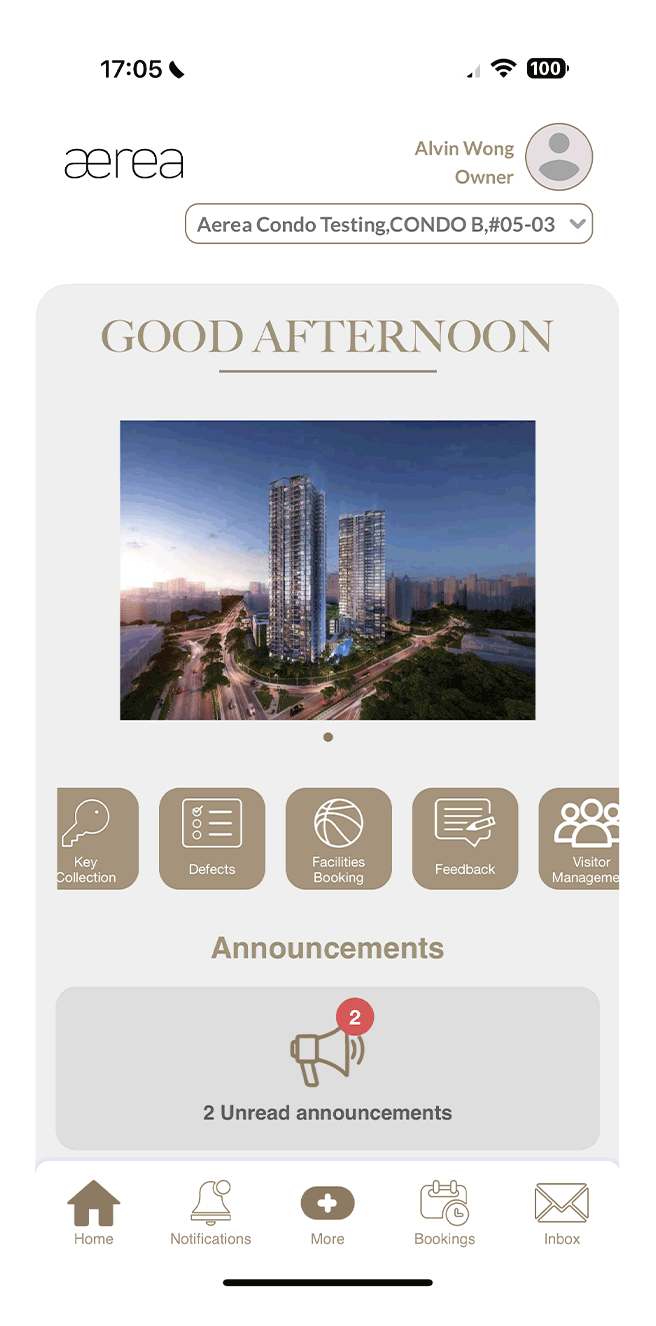
Step 1
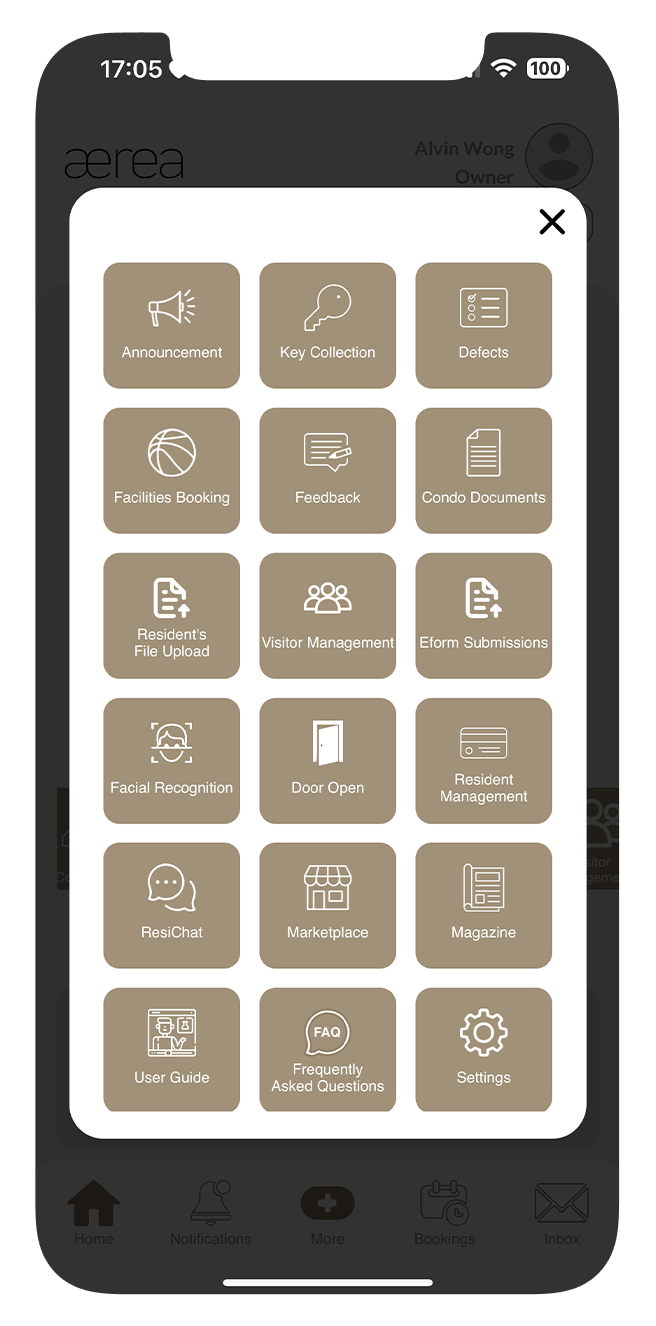
Tap More on the bottom bar to see the full menu.
Step 2
Select the item you want to explore (e.g., Announcement) to navigate to that menu.
3.1 Favorite Menu
How it works
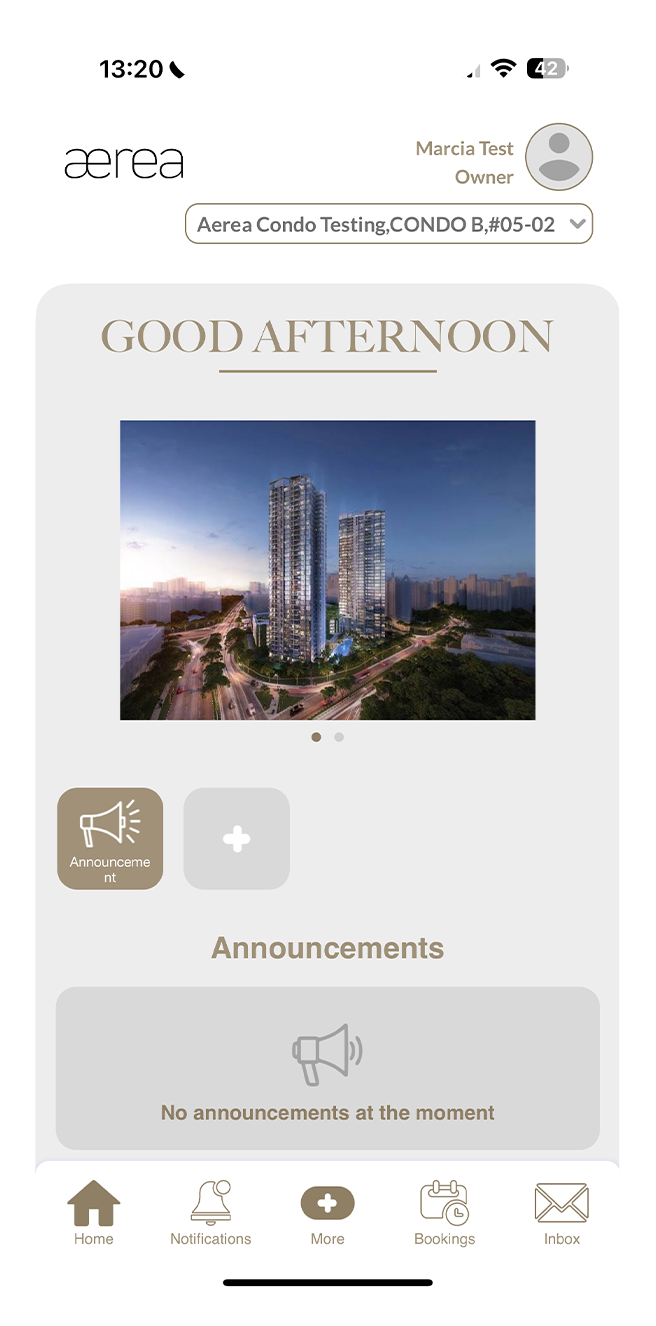
Step 1
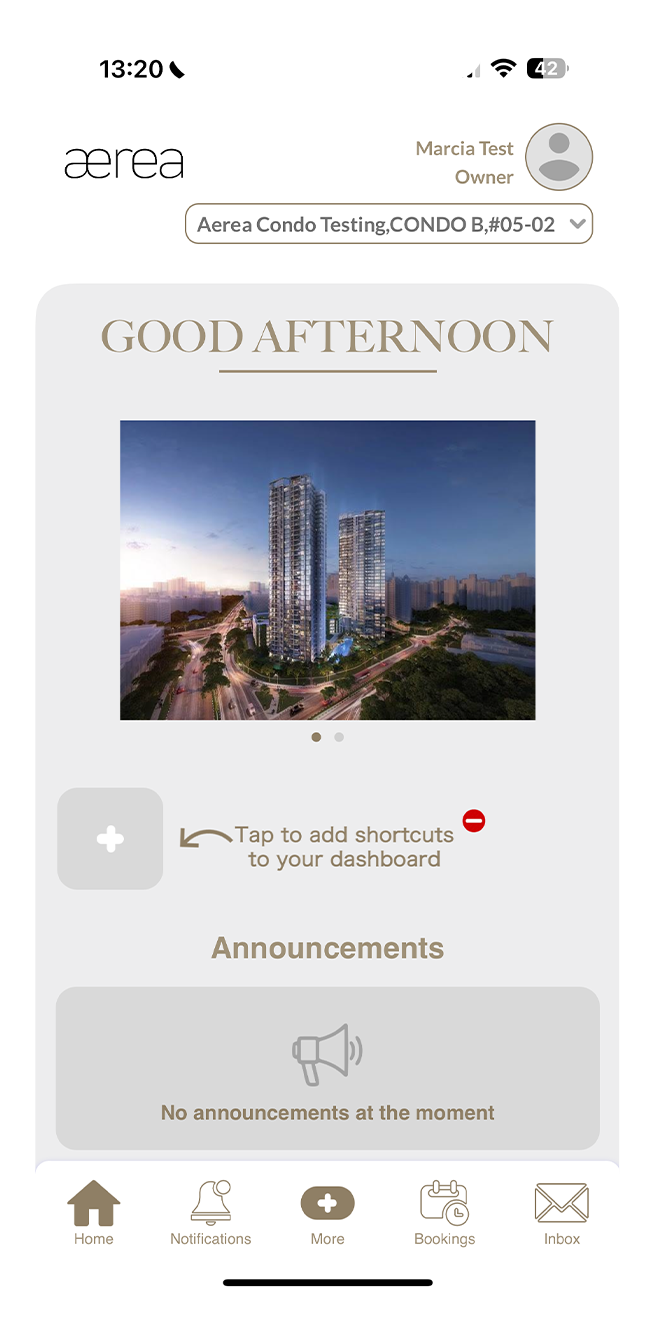
Simply tap on the '+' icon to add menu items to your favorites.
Step 2
Choose the menu item you want to add to your favorites (e.g., Announcement)
Step 3
Once selected, the item will appear in your favorites. To access a specific menu, just tap on its corresponding item in your favorites. You can add up to six items to the favorites.
4.1 Notifications
How it works
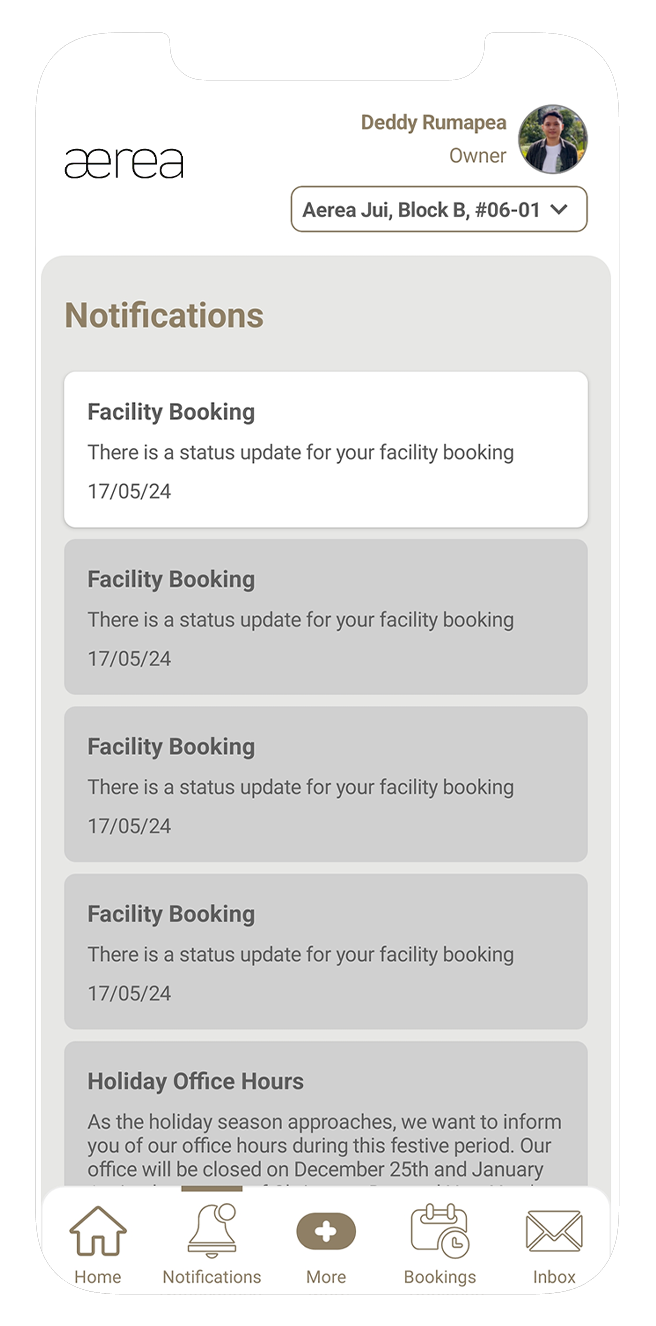
Step 1
Tap on a notification to go directly to the notifications list screen or select Notifications from the bottom bar menu to access your notification history。 Tap on any item in the list to see more details.
5.1 Bookings
How it works

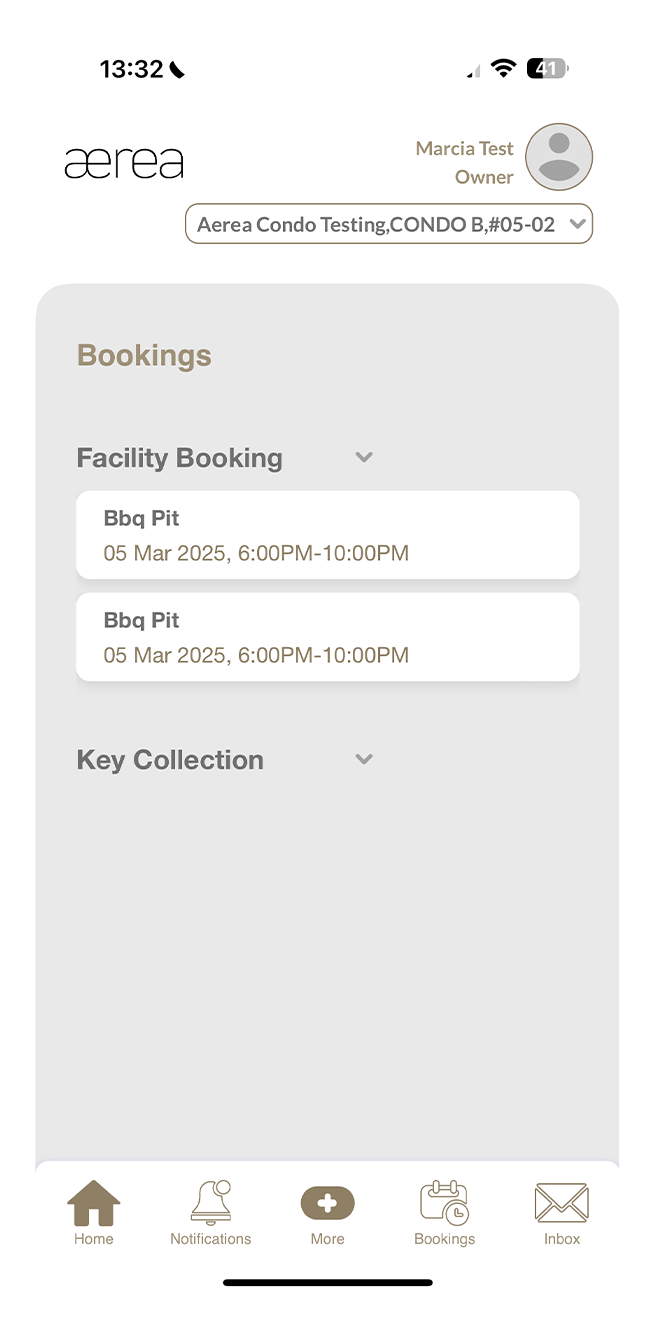
Step 1
On the bookings screen, you'll find lists of facility bookings, defect inspection appointments, and joint inspection appointments.
Step 2
To see the facility bookings list, tap on “Facility Booking.”
Step 3
Tap on any item in the list to view its details.
6.1 Inbox
How it works
Step 1
Open the Inbox screen to see a list of updates from your submissions.
Step 2
Tap on an item in the list to view its details.
7.1 Announcements
7.1 Announcements
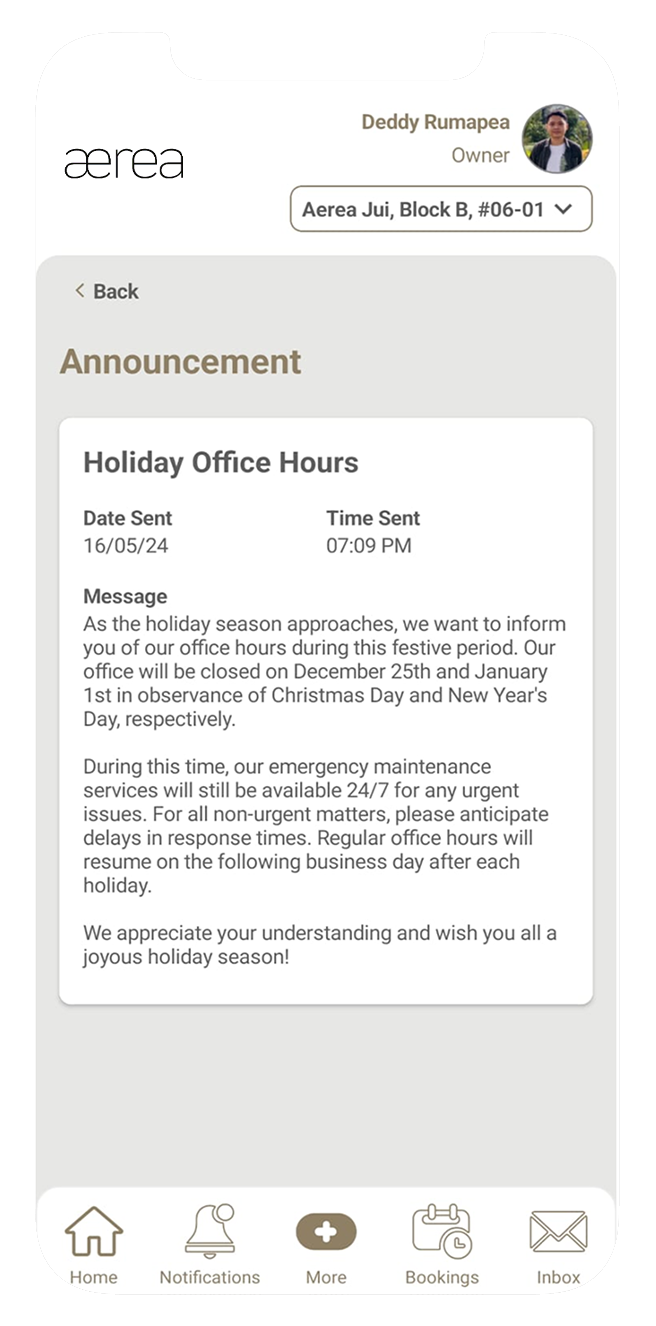
Step 1
Announcements from your property managers will appear in the announcements list.
Step 2
Tap on an item in the list to view its details.
8.1 Key Collection
How it works
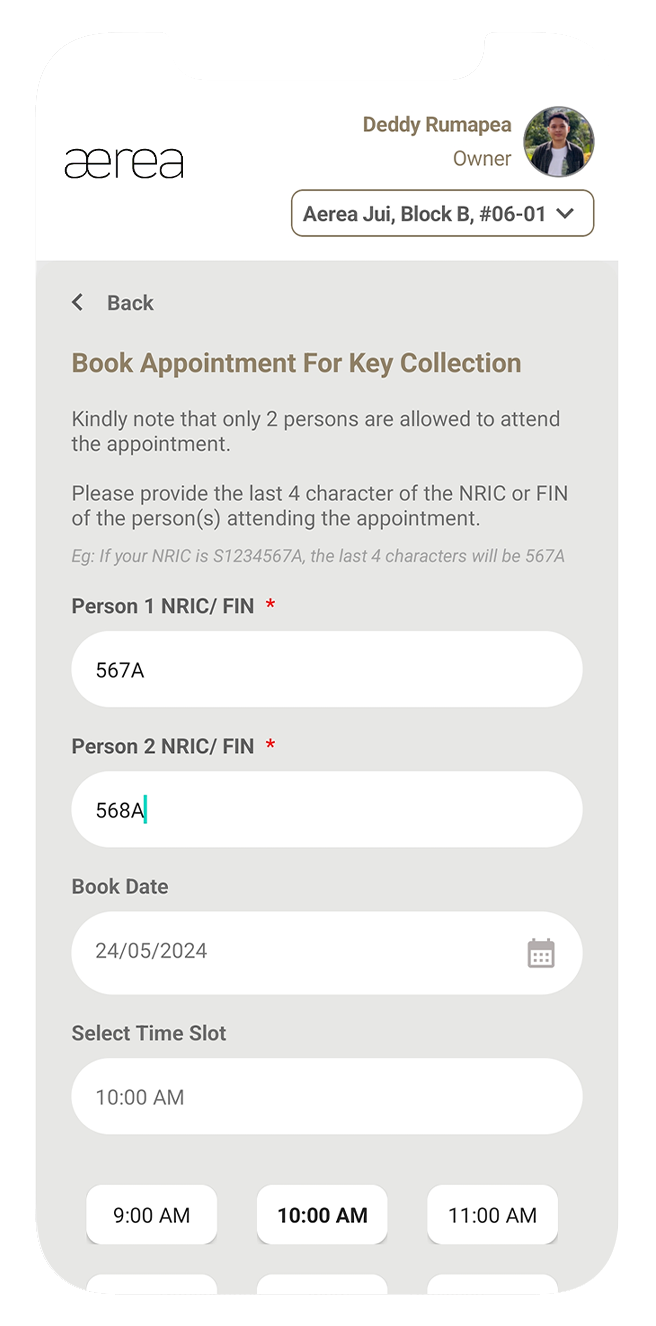
Step 1
Enter your NRIC(s)/FIN(s) and select your preferred booking date and time slot.
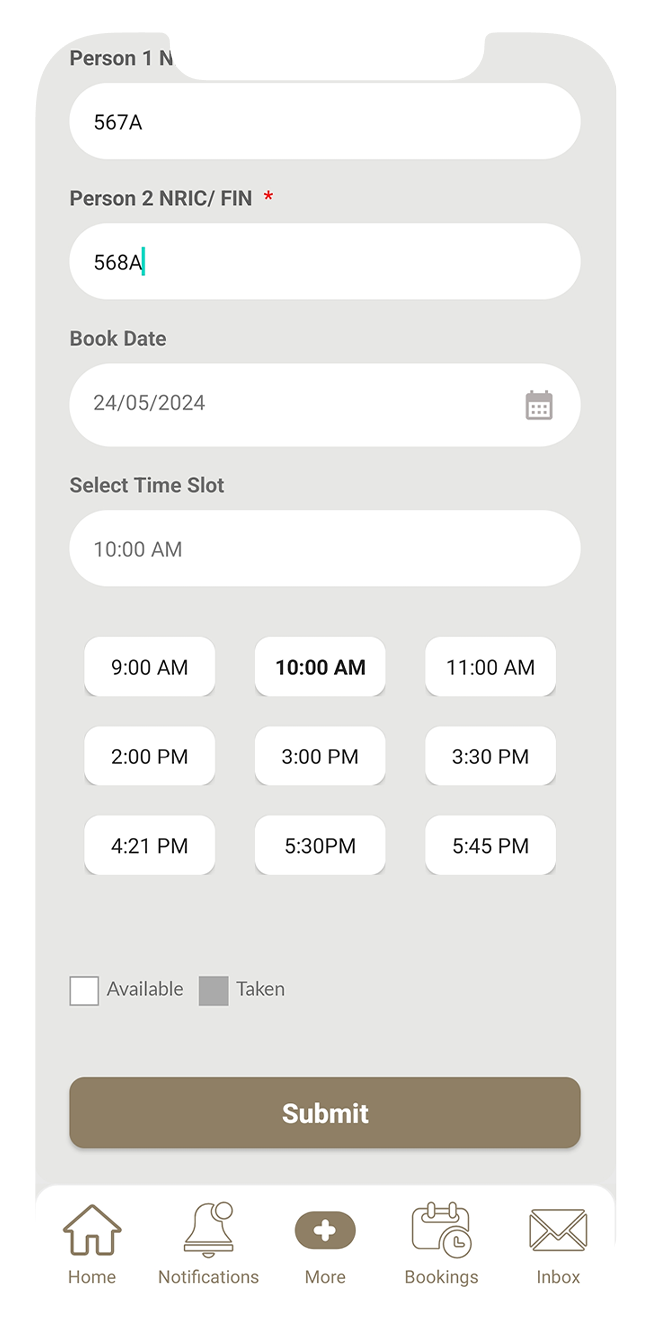
Step 2
Tap Submit to confirm your appointment.
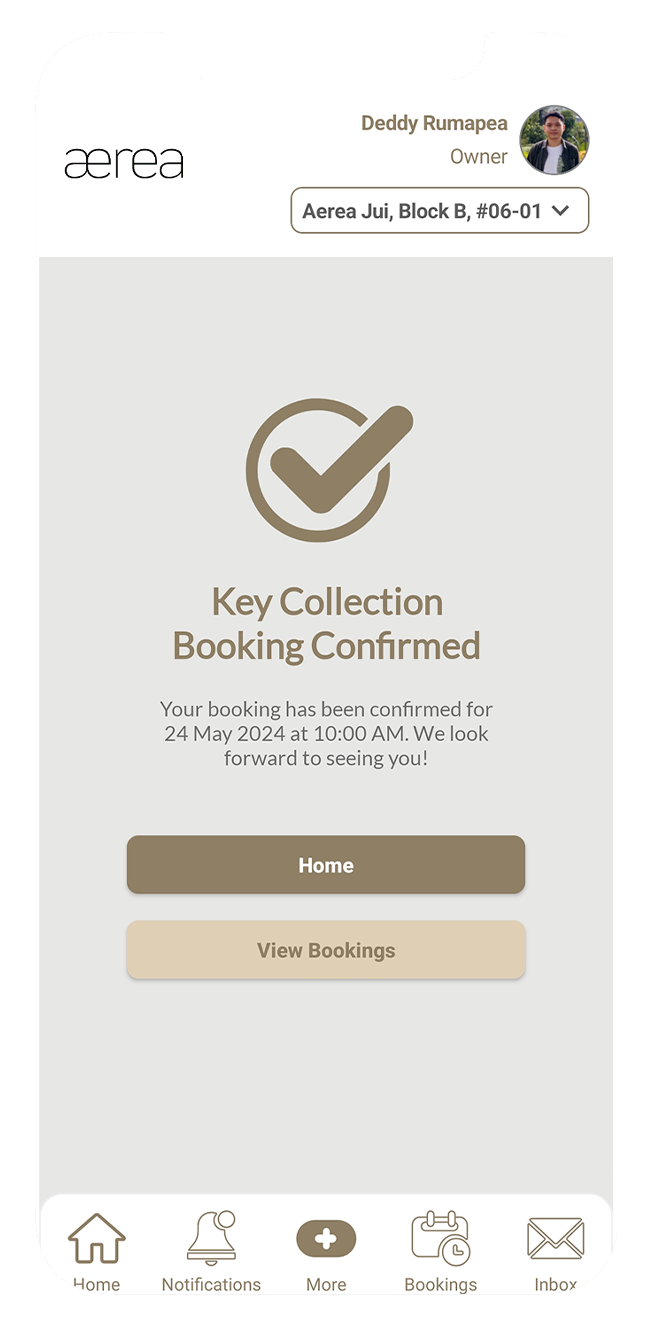
Step 3
A confirmation page will appear upon submission
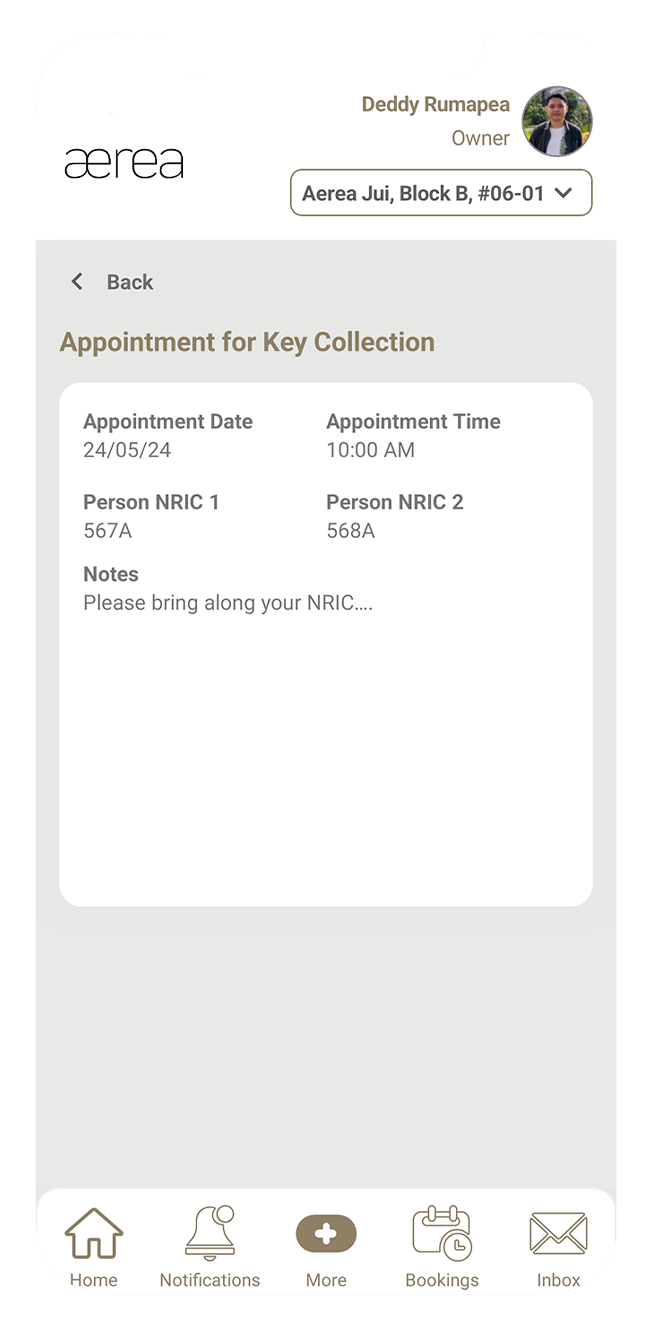
Step 4
Tap View Booking to see your appointment details.
9.1 Defects submission history
How it works
Step 1
Go to the Defects section to see your submission history.
Step 2
Tap on any item in the list to view its details.
9.2 Create a new defect submission
How it works

Step 1
Tap on the ‘+’ button above the defects submissions list.
Step 2
Select the location and defect type, enter remarks, and add a photo of the defect. Tap Add New if you want to include another defect, then tap Submit.
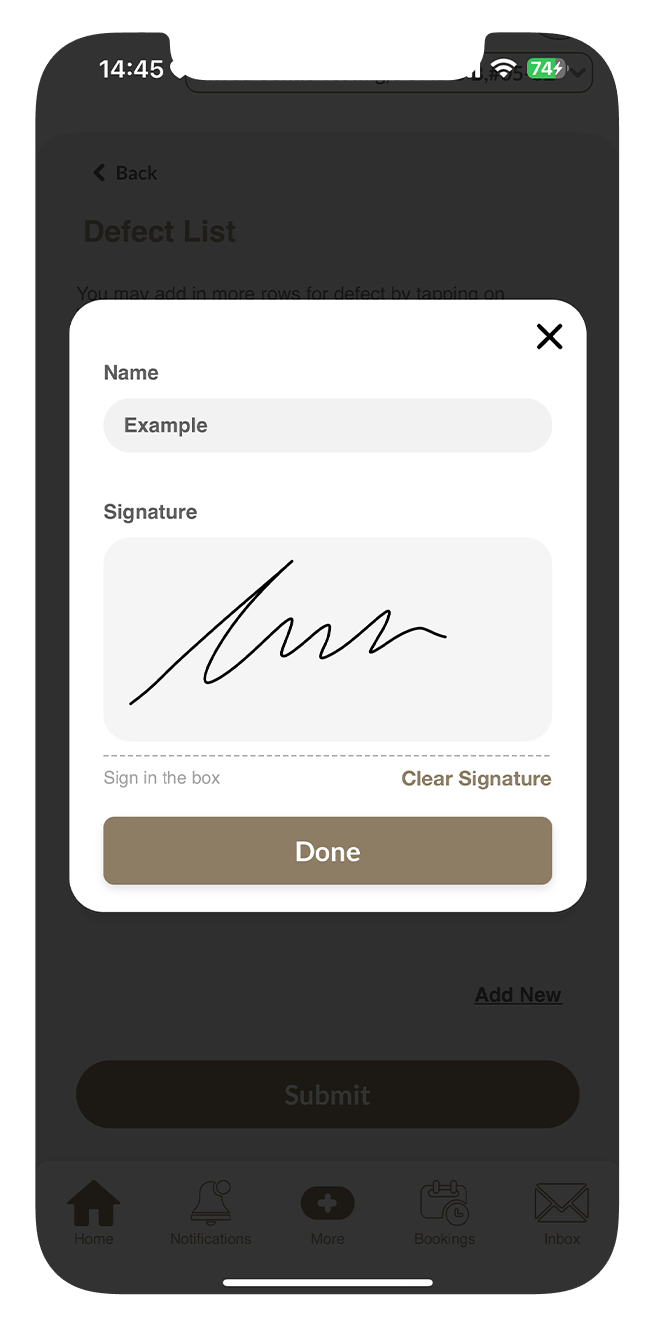
Step 3
A popup will appear. Enter your name and provide your signature in the given fields, then tap Done.
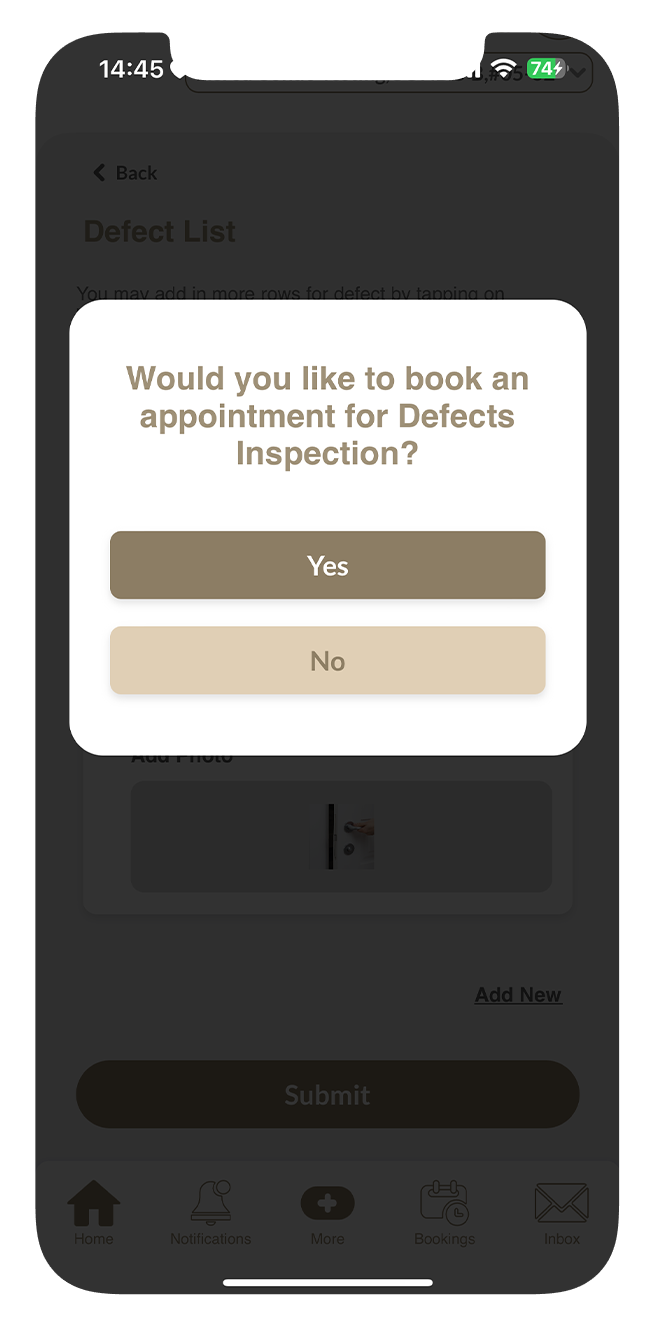
Step 4
Another popup will appear, allowing you to choose whether to book an inspection appointment as well. Make your selection.
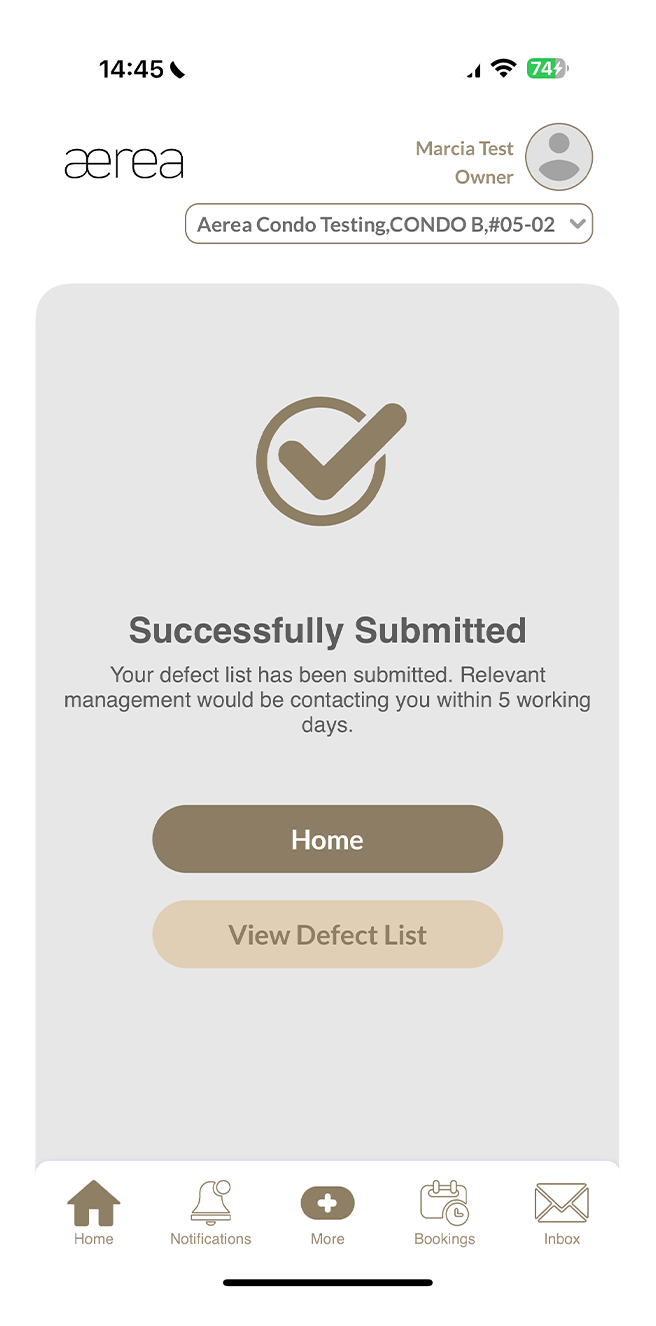
Step 5
A confirmation page will appear when your submission is successfully completed.
9.3 Booking a final inspection
How it works
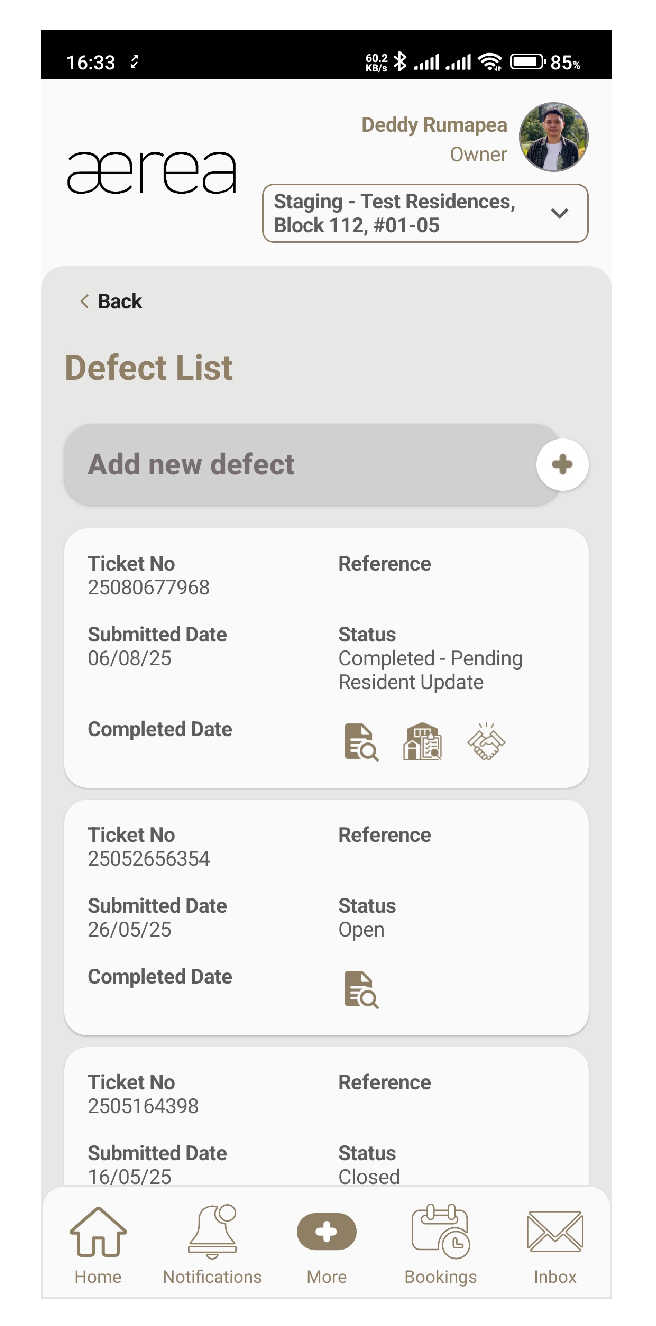


Step 1
Tap the handover icon (the handshake) on your defect ticket
Step 2
A pop-up will appear. Tap Yes to continue with the booking
Step 3
Fill in the last 4 characters of the NRIC or FIN for the person attending. You can add one more person if needed
Step 4
Pick your preferred date and time slot, then tap Submit to book
Step 5
You're all set! Your Final Inspection has been booked
10.1 Feedback submission history
How it works

Step 1
Go to the Feedback section to see your submission history.
Step 2
Tap on any item in the list to view its details.
10.2 Submitting a new feedback
How it works

Step 1
Tap on the ‘+’ button above the feedback submission history list.
Step 2
Select the feedback category, add photos (optional; maximum of 2), type the subject and description, then tap Submit.
Step 3
A confirmation page will appear once your submission has been successfully submitted.
11.1 Bookings history
How it works
Step 1
Go to the Facilities Booking section to see your booking history.
Step 2
Tap on any item in the list to view its details.
11.2 Submitting a new facility booking
How it works


Step 1
Tap on the '+' button located above the list of facility booking history.
Step 2
Choose the facility, select the booking date and time slot, and then tap on Submit.
Step 3
Once your booking is successfully submitted, you'll see a confirmation page.
12.1 E-forms
How it works
Step 1
Open the Marketplace in the AEREA Home app and go to the 'Sell' tab.
Step 2
Add photos, a title, the item's condition, price, and a description, then tap Submit.
Step 3
You'll receive a confirmation once your listing is successfully added to the Marketplace.
12.2 Moving in & out application
How it works
Step 1
As you begin filling out the Moving In & Out Application e-form, you'll encounter an agreement; be sure to read it carefully before proceeding by tapping on Next.
Step 2
Fill in the required information in each field of the form.
Step 3
Once finished, tap on the Submit button.
Step 4
A confirmation screen will appear to indicate successful submission of your e-form.
12.3 Renovation work application
How it works
Step 1
As you begin filling out the Renovation Work Application e-form, you'll encounter an agreement; be sure to read it carefully before proceeding by tapping on Next.
Step 2
Fill in the required information in each field of the form.
Step 3
Once finished, tap on the Submit button.
Step 4
A confirmation screen will appear to indicate successful submission of your e-form.
12.4 Resident access card & main door access
How it works
Step 1
Read the agreement carefully, then tap Next to proceed.
Step 2
Fill in the required information in each field of the form.
Step 3
Once finished, tap on the Submit button.
Step 4
A confirmation screen will appear to indicate successful submission.
12.5 Update of particulars
How it works

Step 1
As you begin filling out the Update of Particulars e-form, you'll encounter an agreement; be sure to read it carefully before proceeding by tapping on Next.
Step 2
Fill in the required information in each field of the form.
Step 3
Once finished, tap on the Submit button.
Step 4
A confirmation screen will appear to indicate successful submission of your e-form.
12.6 Registration of vehicle IU for residents
How it works
Step 1
As you begin filling out the Registration of Vehicle IU for Residents e-form, you'll encounter an agreement; be sure to read it carefully before proceeding by tapping on Next.
Step 2
Fill in the required information in each field of the form.
Step 3
Once finished, tap on the Submit button.
Step 4
A confirmation screen will appear to indicate successful submission of your e-form.
12.7 Change of mailing address
How it works
Step 1
As you begin filling out the Change of Mailing Address e-form, you'll encounter an agreement; be sure to read it carefully before proceeding by tapping on Next.
Step 2
Fill in the required information in each field of the form.
Step 3
Once finished, tap on the Submit button.
Step 4
A confirmation screen will appear to indicate successful submission of your e-form.
13.1 File Submissions
How it works

Step 1
When you go to Resident’s File Upload, you'll find your uploaded files history.
Step 2
Tap on any item in your uploaded files history list to view its details.
13.2 Uploading a new file
How it works

Step 1
Tap on the '+' button located above the list of uploaded file history.
Step 2
Choose the category, add your files, and write any necessary notes. Then, tap on the Submit button.
Step 3
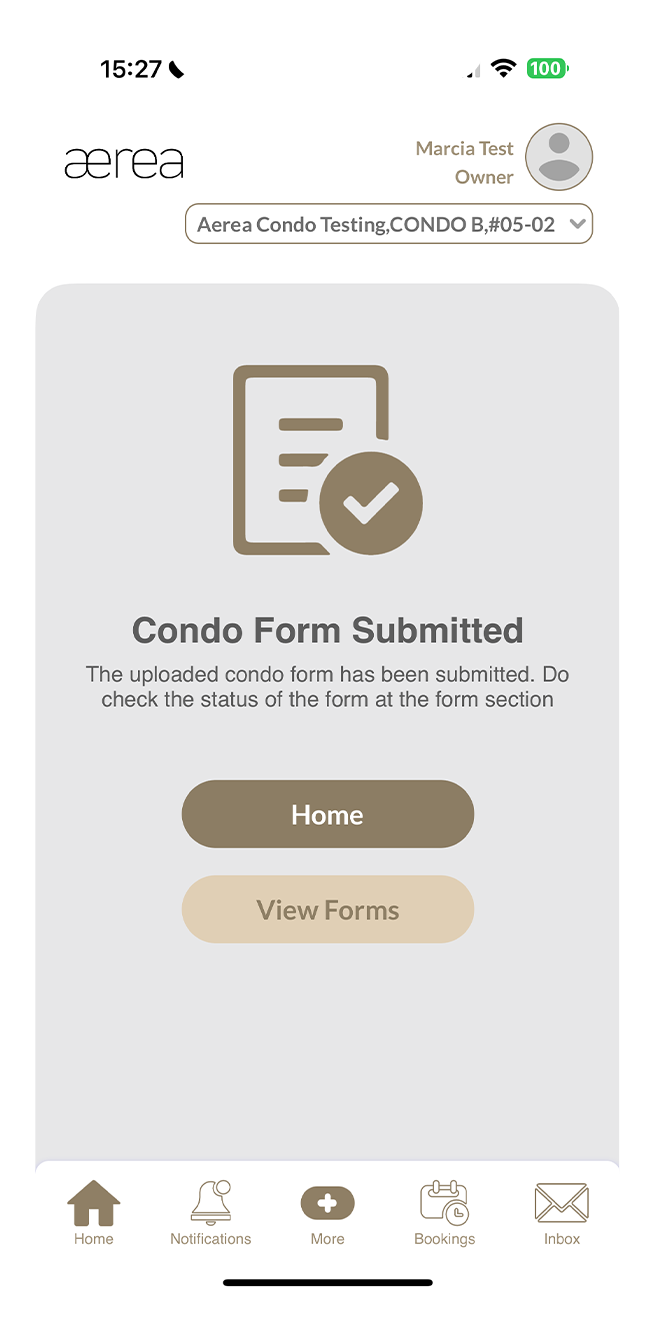
You'll see a confirmation page once your submission has been successfully uploaded.
14.1 Visitor bookings
How it works
Step 1
In Visitor Management, you can see your visitor booking history. To view details of any item, simply tap on it in your visitor bookings list.
Step 2
You can also tap the visitor QR code image to enlarge it.
Step 3
Access options to download or share the QR code
14.2 Creating a visitor invitation
How it works
Step 1
Tap on the '+' button located above the visitor bookings list.
Step 2
Pick the date of visit, visiting end date, purpose of visit, and visitor email address(es). You can add more email addresses by tapping on the 'Add Email' button. You can autofill email address from your contact book by clicking on the icon.
Step 3
Then, tap on the 'Submit' button.
Step 4
You'll see a confirmation page once your invitation has been successfully created. Invitation emails will be sent to the visitor email addresses.
14.3 Register visitors on their behalf
How it works
Step 1
Tap on the '+' button located above the visitor bookings list.
Step 2
Tap on the “Click here if you are registering on their behalf” button.
Step 3
Pick the date of visit, visiting end date, purpose of visit, and visitor details. You can add more visitors by tapping on the “Add Visitor” button. You can autofill visitor details from your contact book by clicking on the icon.
Step 4
Then, tap on the 'Submit' button.
Step 5
You'll see a confirmation page once your invitation has been successfully created. Invitation emails will be sent to the visitor email addresses.
14.4 Creating a new contact in contact book
How it works

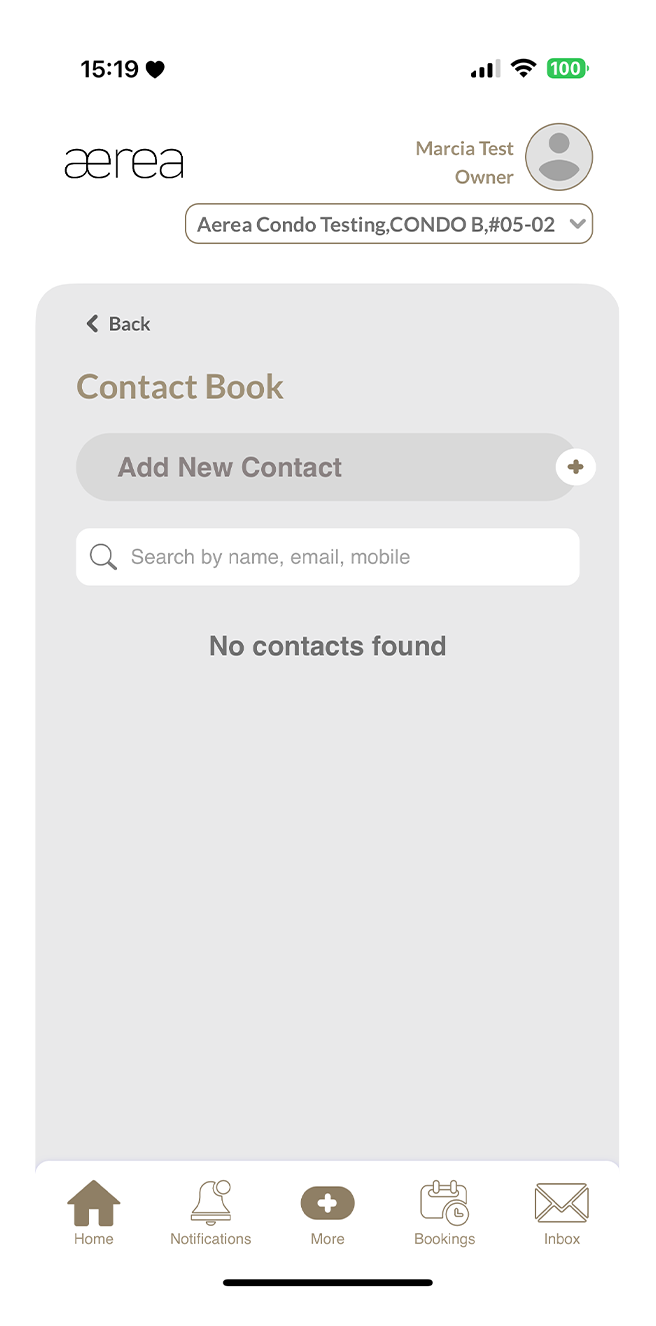
Step 1
Tap on the contact book icon above the visitor booking list.
Step 2
Tap on the '+' above the contact list
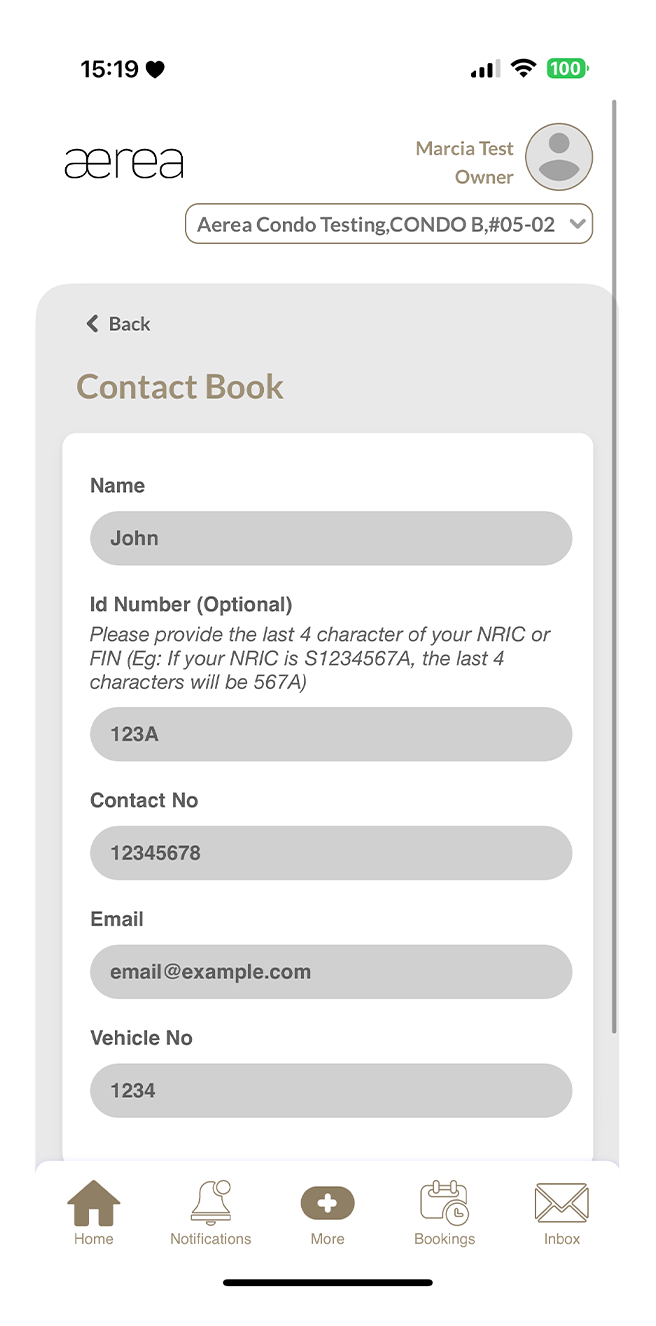
Step 3
Enter the contact name, ID number, contact number, email, and vehicle number in the provided fields.
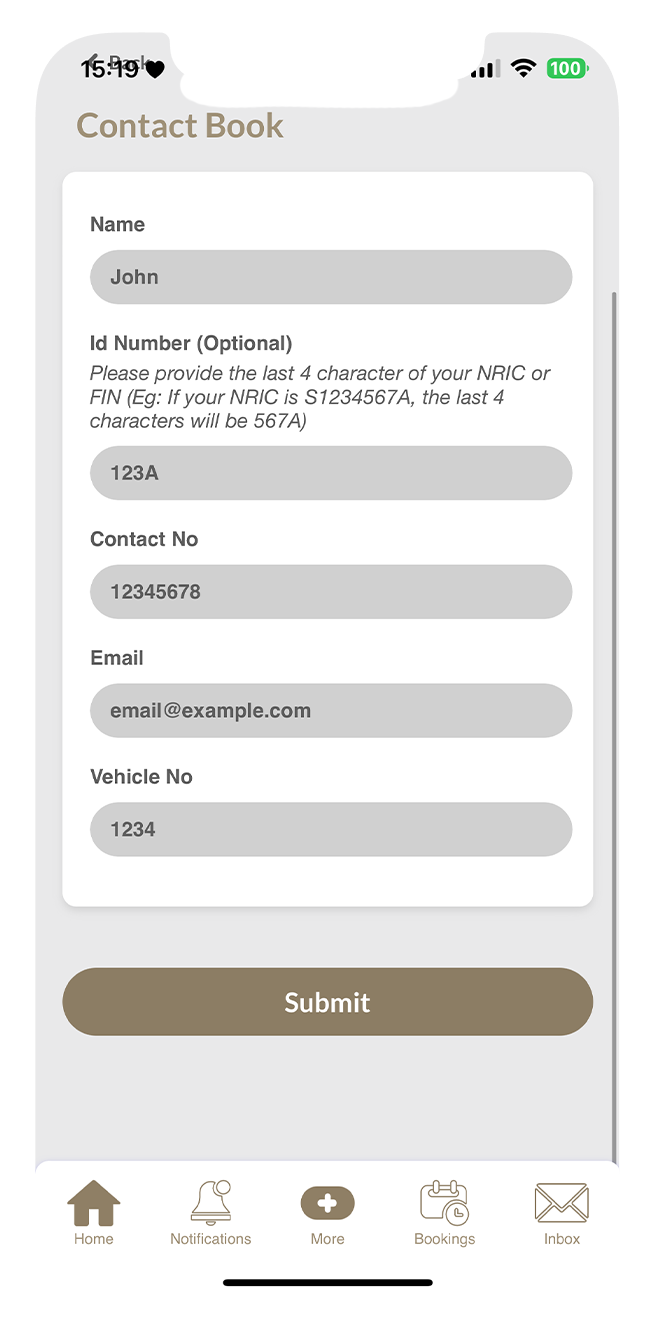
Step 4
Then tap on the Submit button.
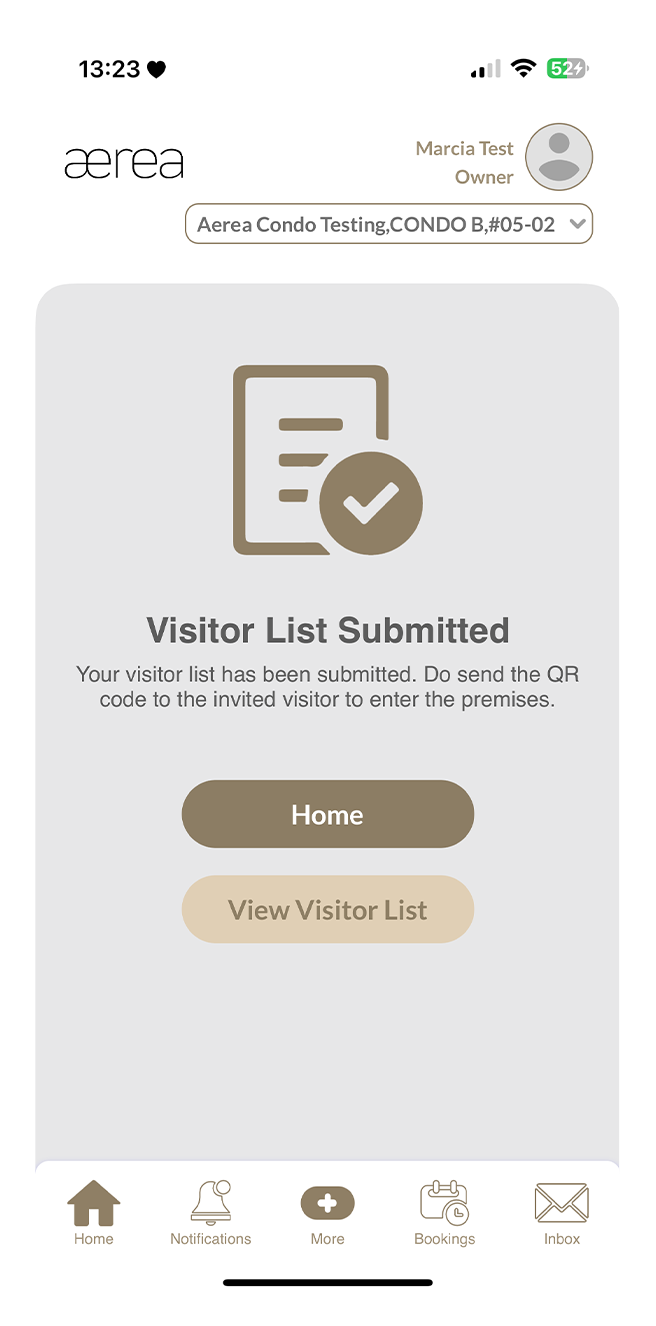
Step 5
A confirmation screen will appear when the contact has been saved successfully.
14.5 Updating a contact in contact book
How it works

Step 1
Tap on the contact book icon above the visitor booking list.
Step 2
Tap on the 'Edit' icon of any item in the contact list.
Step 3
Update the contact name, ID number, contact number, email, and/or vehicle number in the provided fields.
Step 4
Then tap on the Save button.
Step 5
A confirmation screen will appear when the contact has been updated successfully.
14.6 Deleting a Contact in Contact Book
How it works

Step 1
Tap on the contact book icon above the visitor booking list.
Step 2
Tap on the 'Edit' icon of any item in the contact list.
Step 3
Tap on the “Delete Contact” button
Step 4
Then tap “Yes” in the confirmation popup.
Step 5
A confirmation screen will appear when the contact has been deleted successfully.
15.1 Creating a listing
How it works
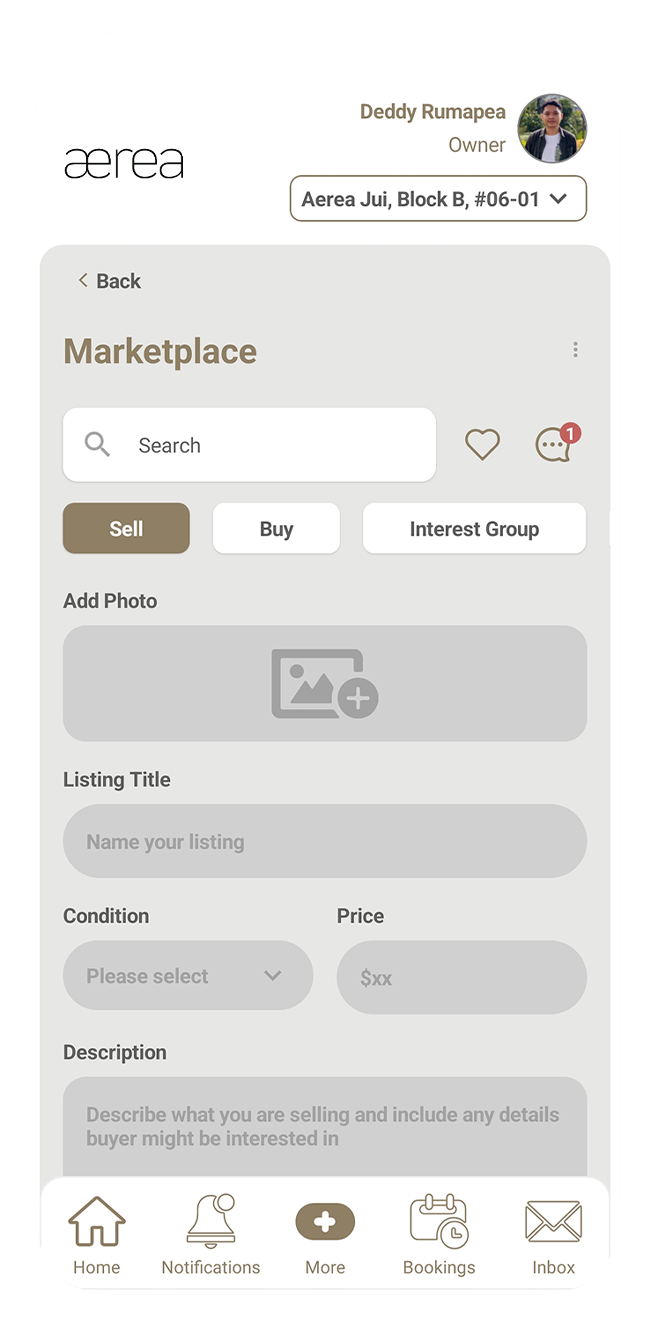
Step 1
Open the Marketplace in the AEREA Home app and go to the 'Sell' tab.
Step 2
Add photos, a title, the item's condition, price, and a description, then tap Submit.
Step 3
You'll receive a confirmation once your listing is successfully added to the Marketplace.
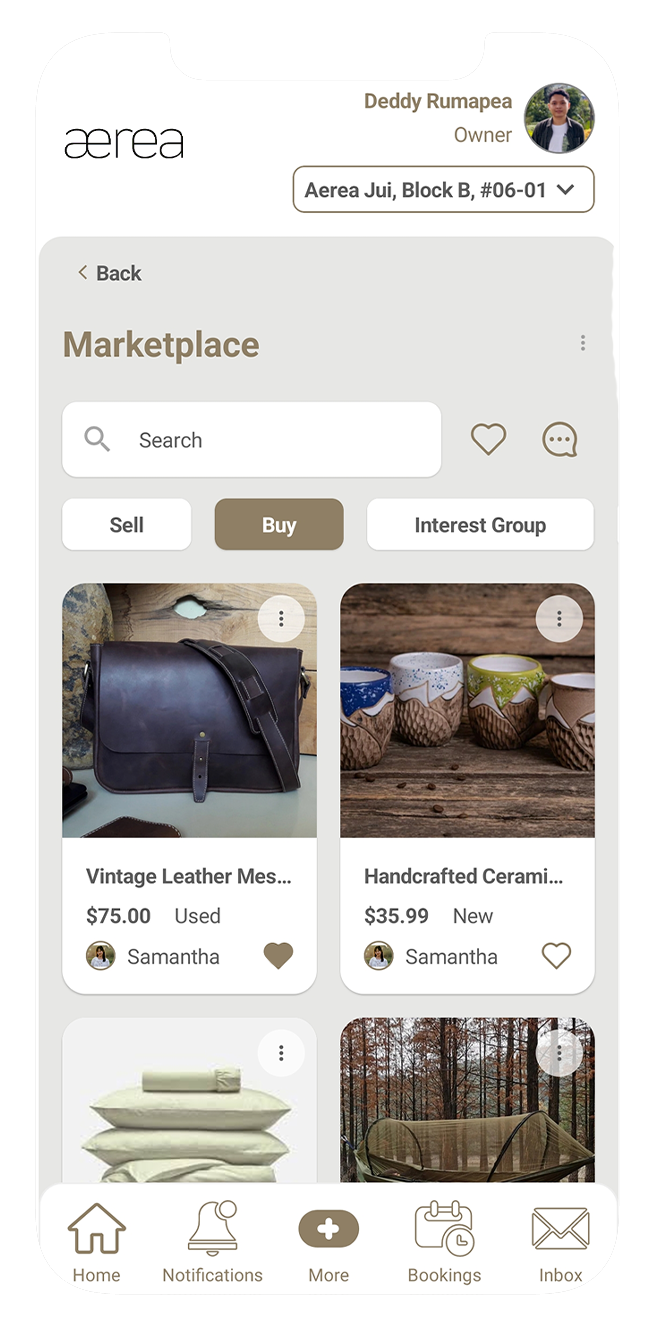
15.2 Browsing available listings
How it works


Step 1
Navigate to the “Buy” tab to see all items for sale. Tap on any item to view its details.
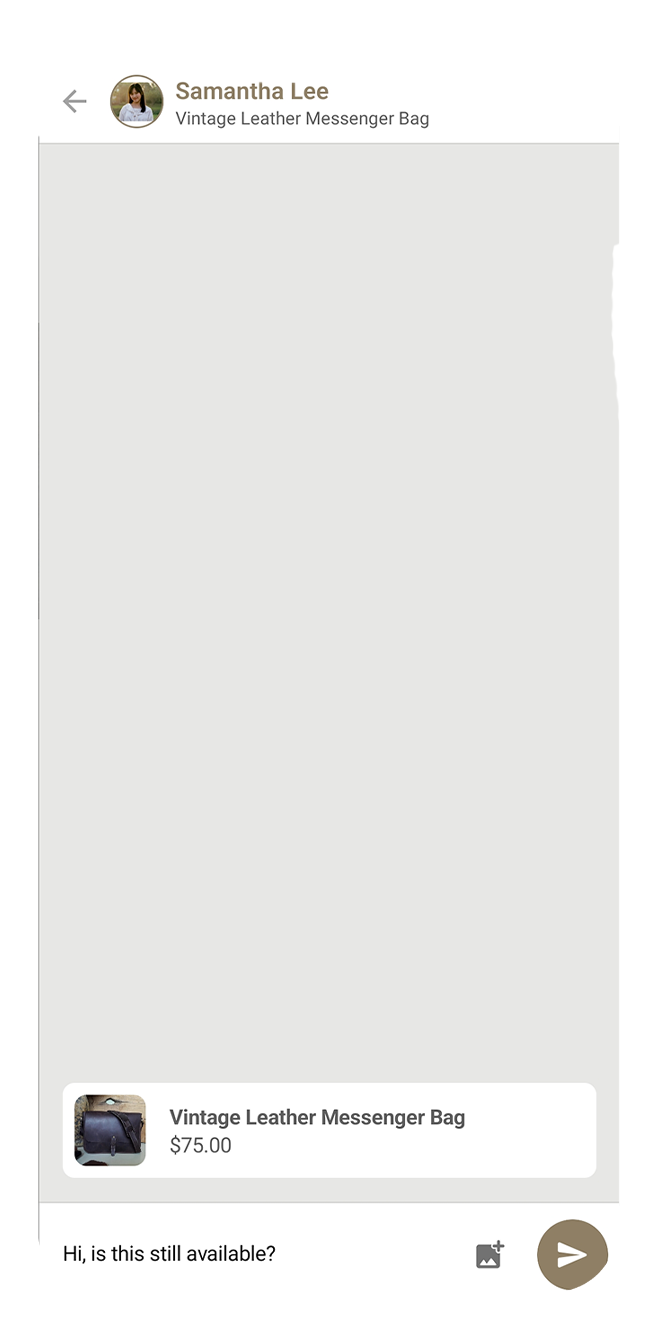
Step 2
To contact the seller, tap the "Chat Now" button.
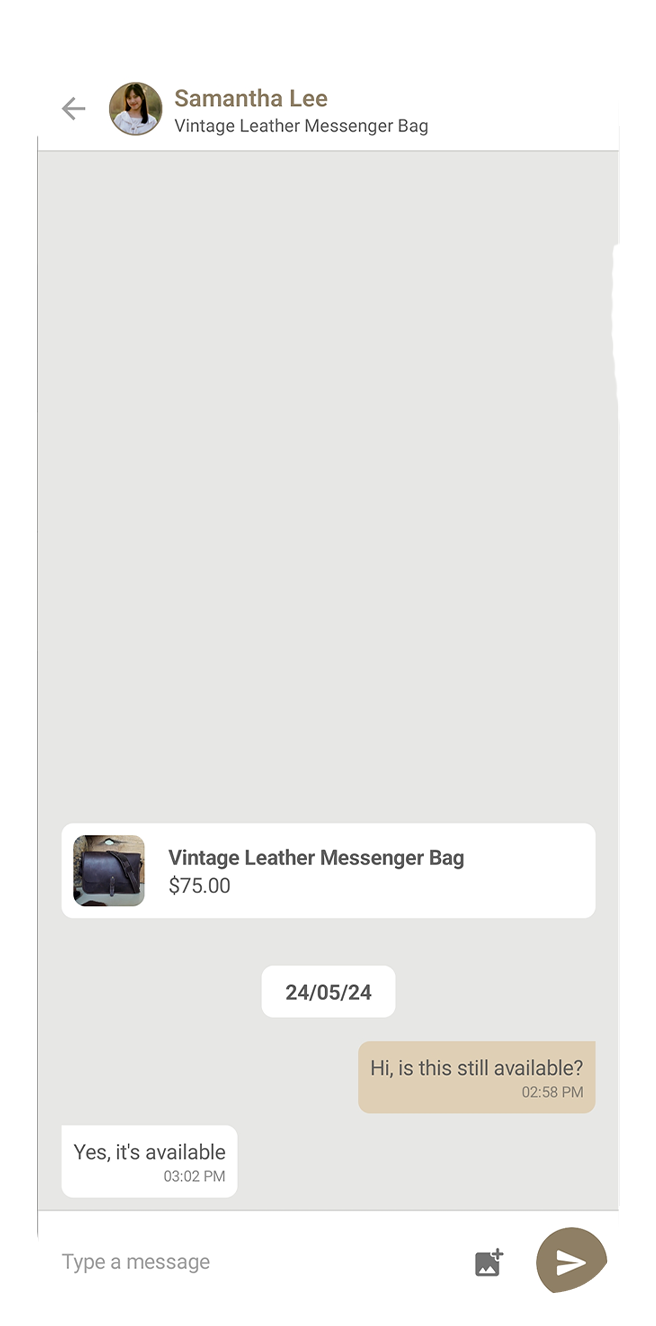
Step 3
Type your message in the chat room and hit send to communicate with the seller.
15.3 Marketplace chats
How it works
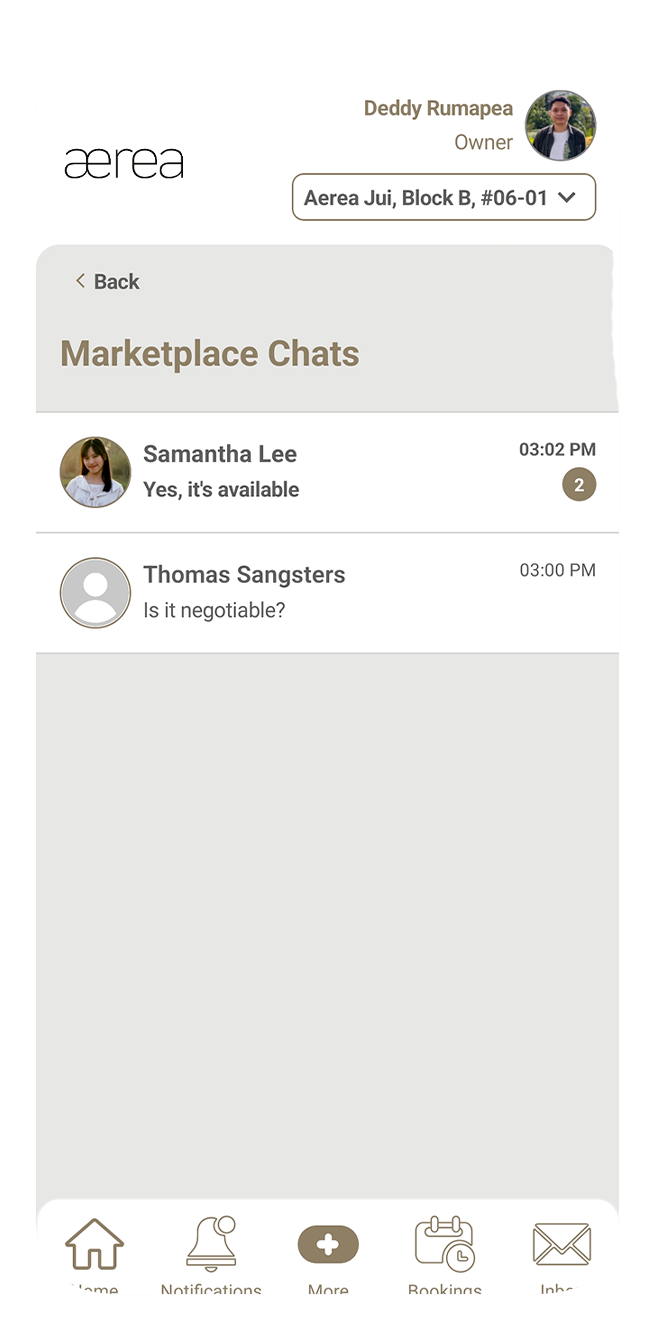
Step 1
Tap on the chat icon.
Step 2
You'll see a list of all your chats.
Step 3
Tap on any chat to view the messages.
15.4 Browsing available interest groups
How it works
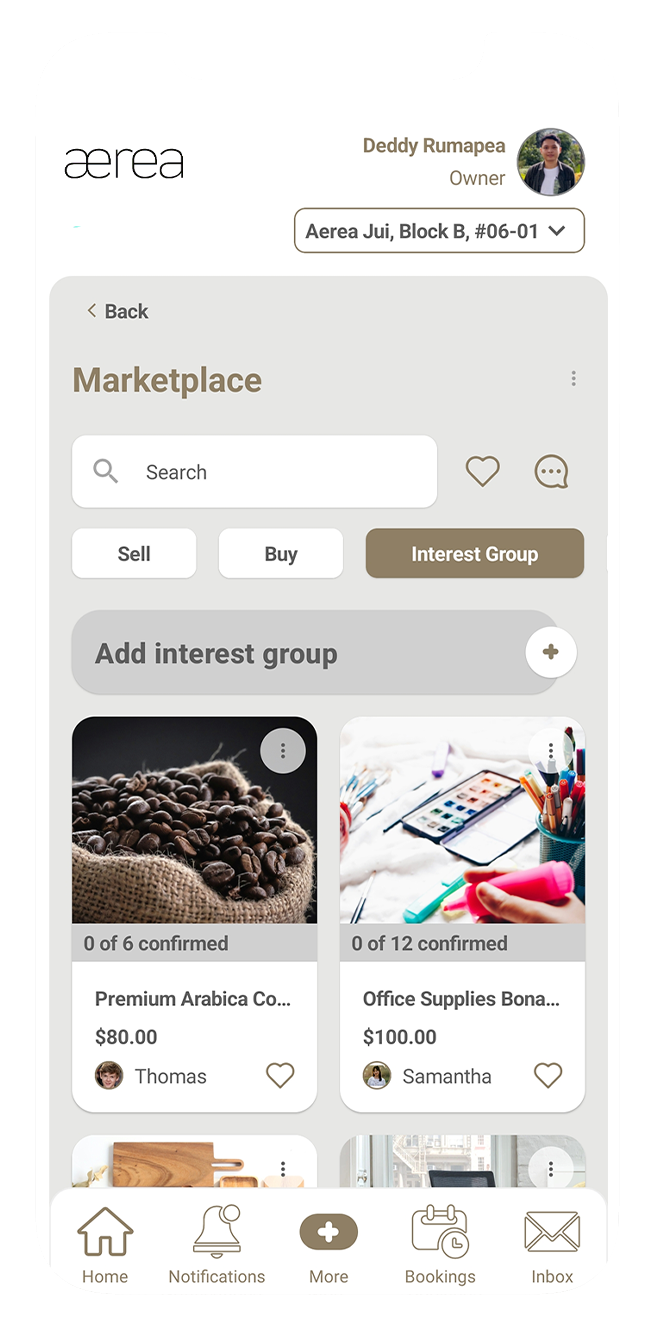
Step 1
Go to the Interest Group tab to see a list of available groups.
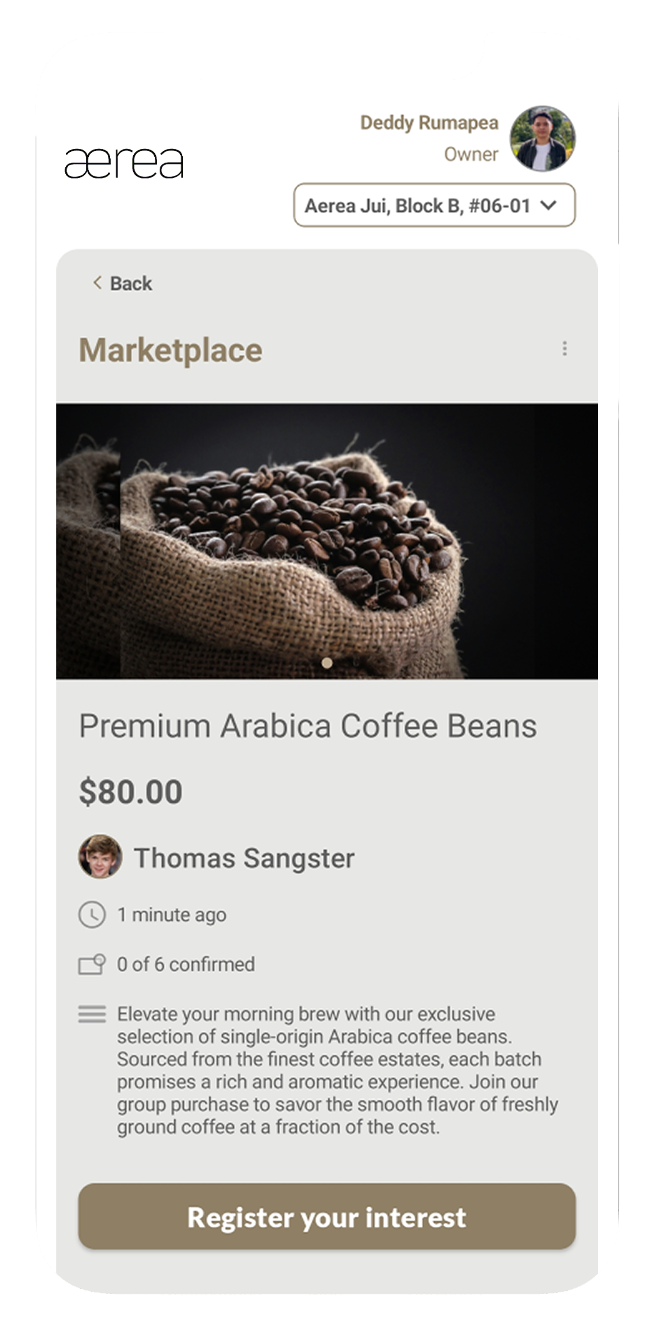
Step 2
Tap on a group to view its details.If interested, tap Register Your Interest to join.
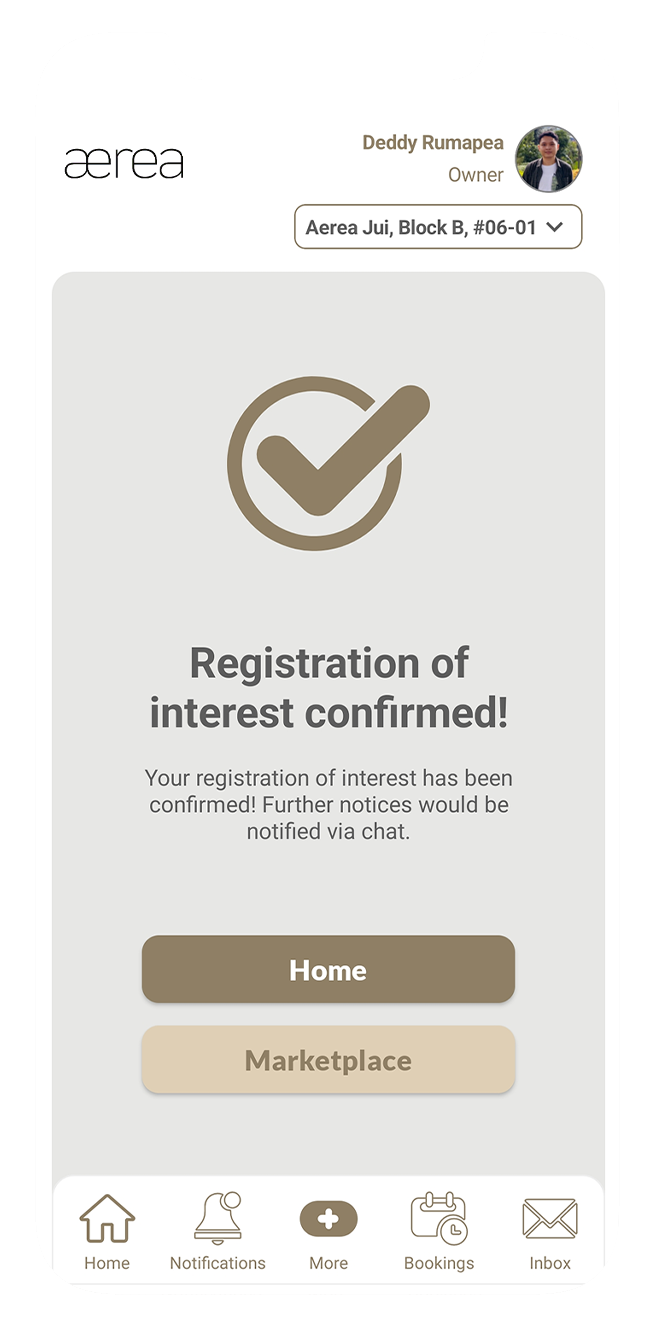
Step 3
A confirmation will appear once you're successfully registered.
15.5 Creating an interest group
How it works
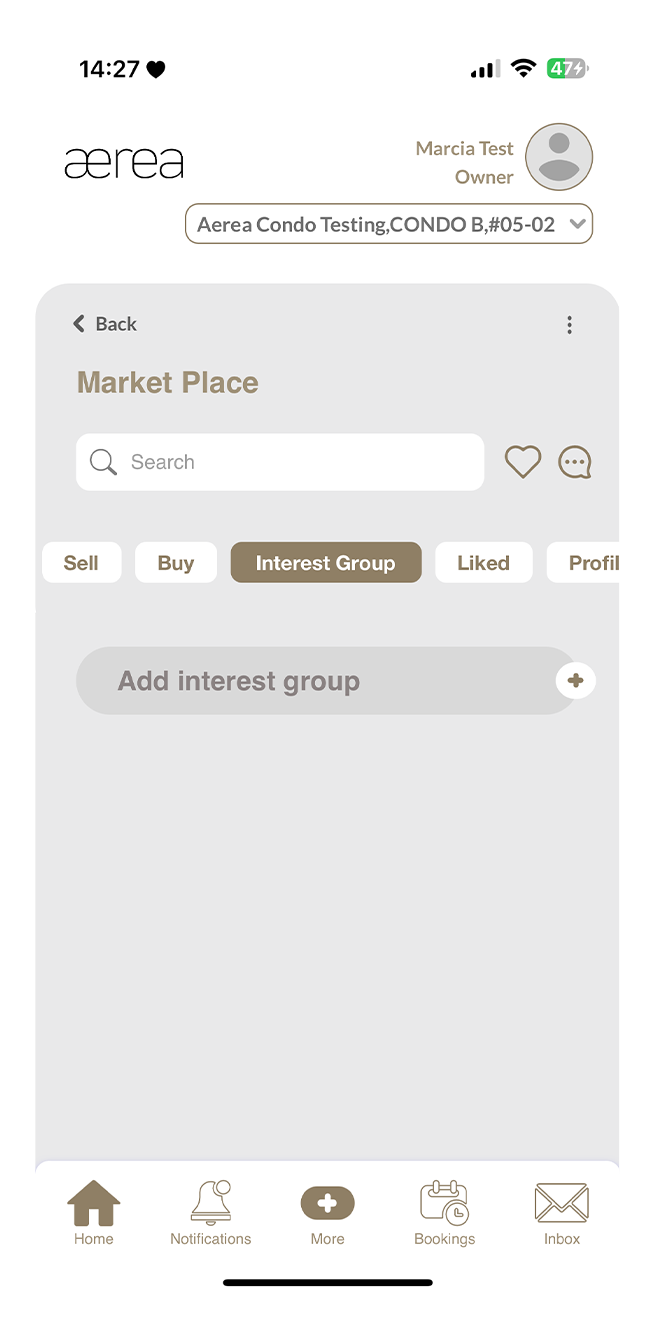
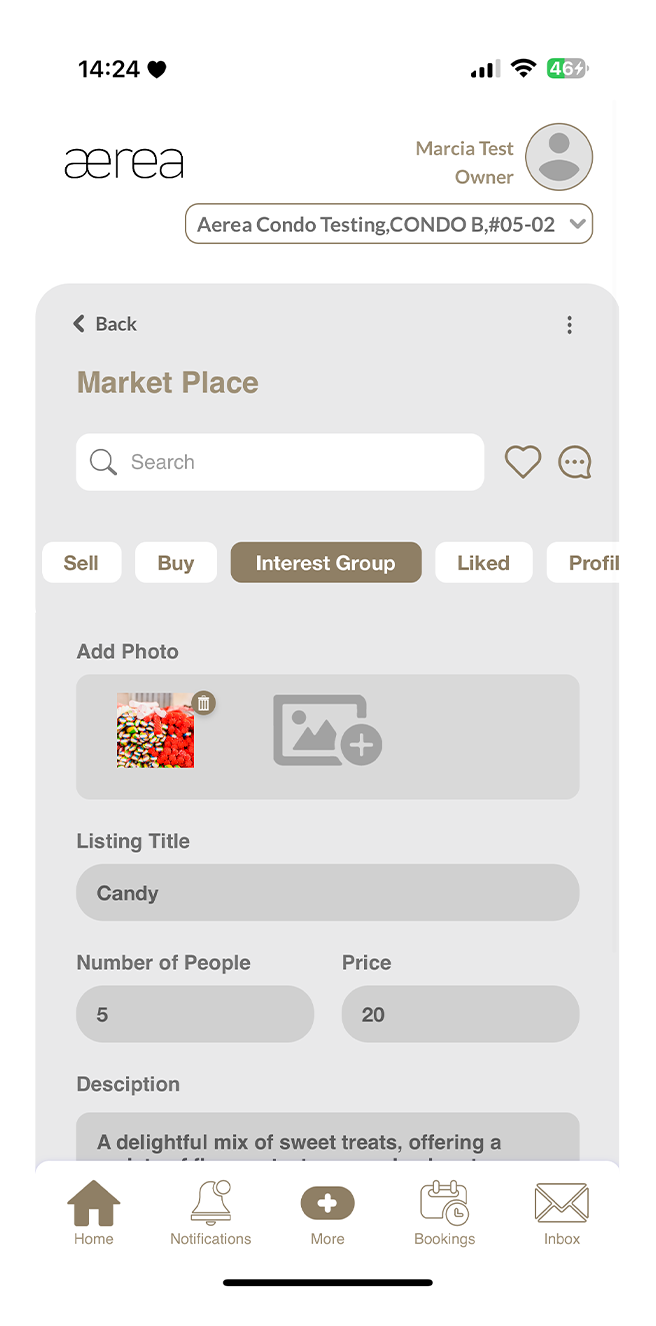
Step 1
Go to the 'Interest Group' tab in Marketplace and tap on the '+' icon.
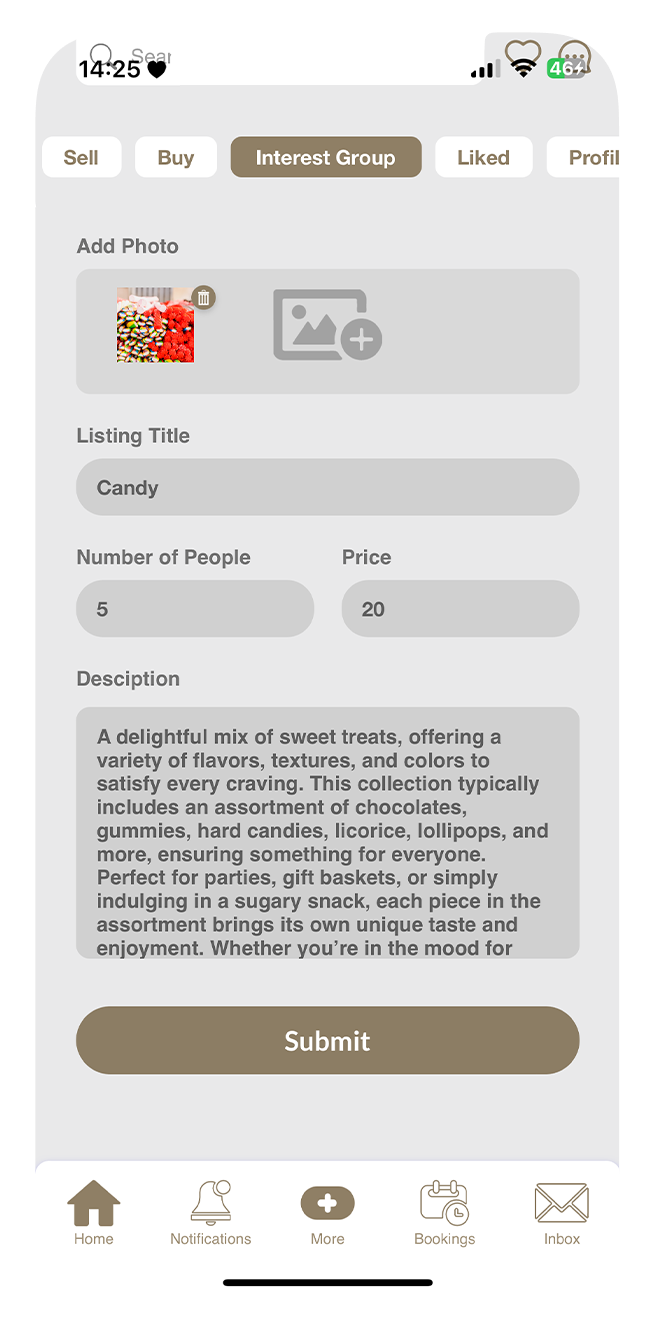
Step 2
Fill in the details: upload photos, provide a title, specify the number of members, set a price, and write a brief description.
Step 3
Tap the Submit button.
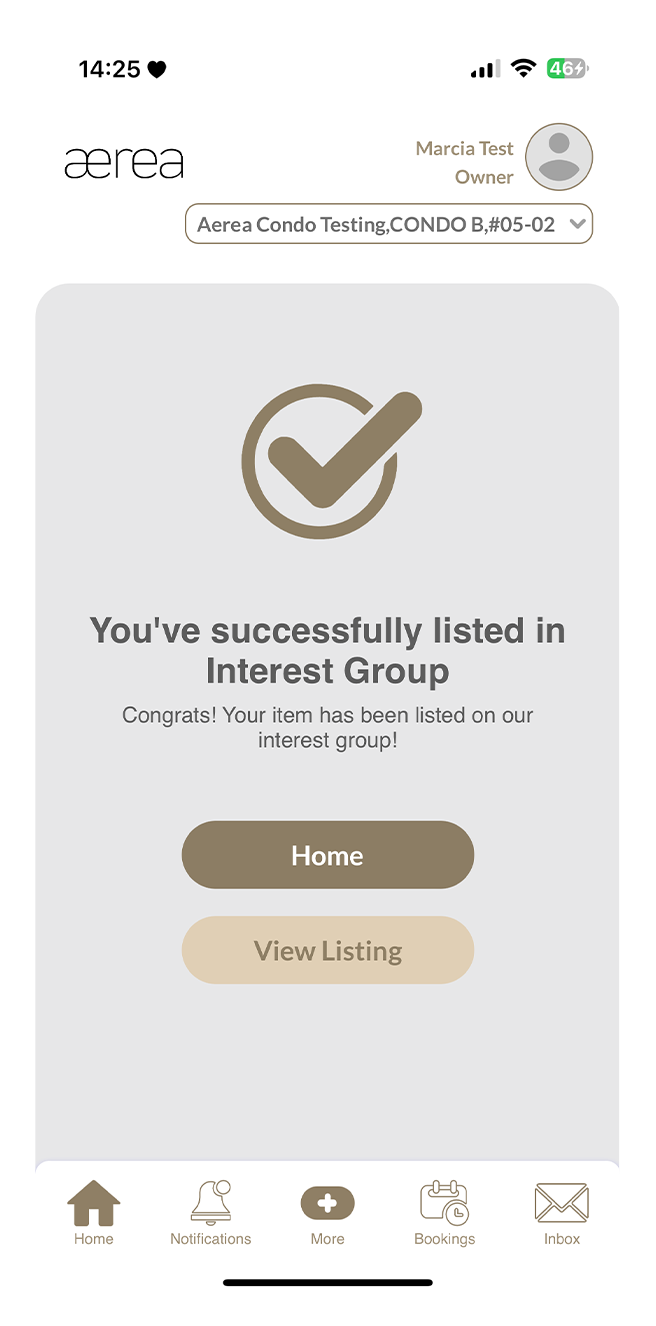
Step 4
A confirmation screen will appear once your interest group is successfully listed in the Marketplace.
15.6 Liking / Unliking a listing item or interest group
How it works

Step 1
Tap the heart icon at the bottom right of a listing or interest group.
Step 2
This will toggle between liking or unliking the item.
15.7 Reporting a listing item or interest group
How it works

Step 1
Tap the 3 dots in the top right corner of the listing item or interest group.
Step 2
Select the "Report" option.
Step 3
In the confirmation popup, enter your report remarks and tap "Yes."
Step 4
If the report is successful, a confirmation popup will appear.
15.8 Blocking a listing item or interest group creator
How it works

Step 1
Tap the 3 dots at the top right of the listing item or interest group.
Step 2
Select "Block" from the options.
Step 3
Confirm by tapping "Yes" on the popup.
Step 4
A confirmation popup will appear, indicating that the user has been successfully blocked.
15.9 Unblocking a user
How it works

Step 1
Tap the 3 dots in the top right corner of the Marketplace screen.
Step 2
From the menu that appears, select "Blocked List."
Step 3
Find the user you want to unblock and tap the "Unblock" button next to their name.
Step 4
Confirm your choice by tapping "Yes" on the popup.
Step 5
A confirmation popup will appear once the user has been successfully unblocked.
15.10 Updating a listing item or interest group
How it works


Step 1
Go to the Profile tab and select the listing item or interest group you want to update.
Step 2
Tap the "Edit Listing" button.
Step 3
Make your desired changes and tap Submit.
Step 4
A confirmation popup will appear once your changes are successfully saved.
15.11 Deleting a listing item or interest group
How it works

Step 1
Tap the 3 dots button at the top right of your listing item or interest group.
Step 2
Select "Delete" from the options that appear.
Step 3
Confirm the deletion by tapping "Yes" on the confirmation popup.
Step 4
A confirmation popup will appear once the listing item or interest group has been successfully deleted.
15.12 Marking / Unmarking a listing item or interest group as sold
How it works
Step 1
Navigate to the Profile tab and select the item or group you wish to mark as sold.
Step 2
On the detail page, tap the 3 dots button at the top-right corner.
Step 3
Tap "Mark as Sold."
Step 4
Confirm the action by tapping "Yes" on the confirmation popup.
Step 5
A confirmation popup will appear once your item or group is successfully marked as sold.
16.1 Viewing Submission Details
How it works
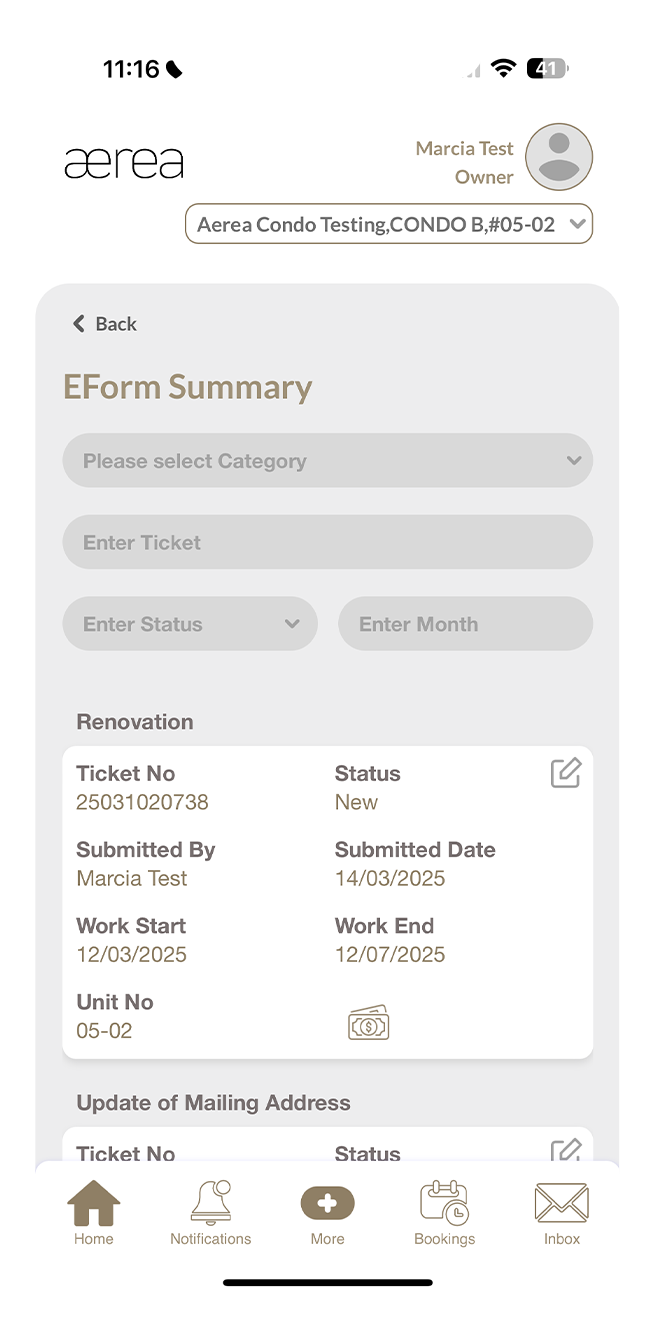
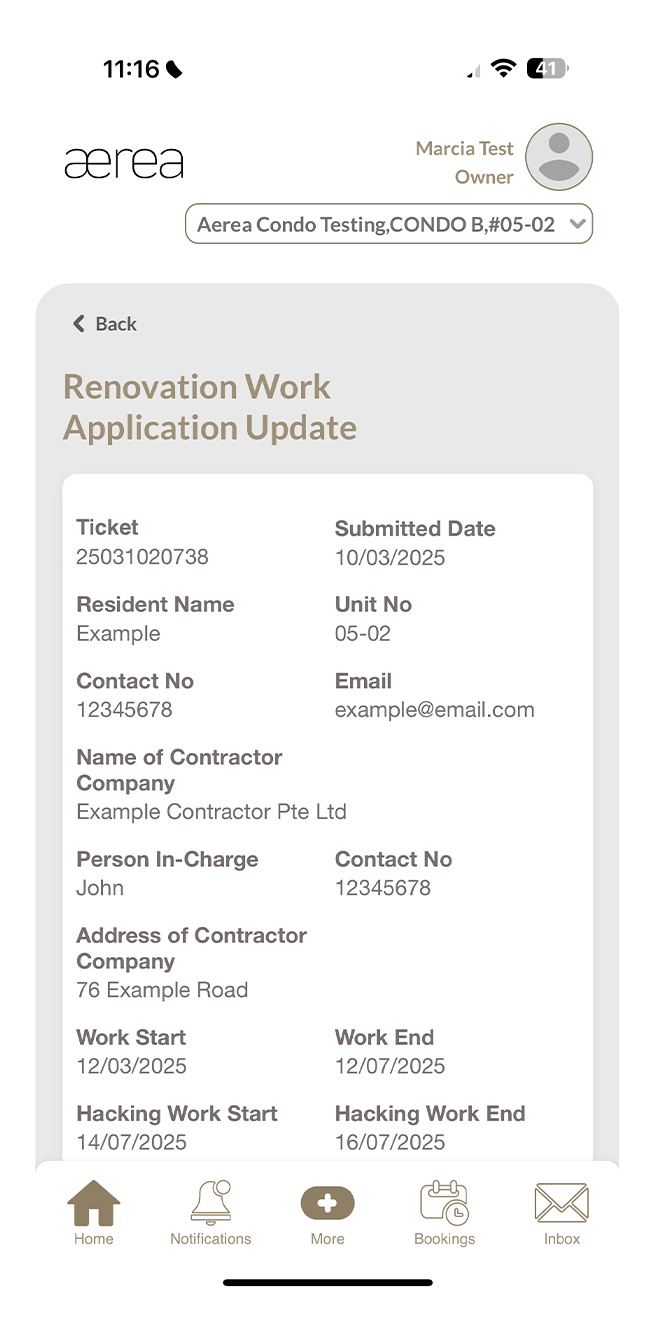
Step 1
To see more details, tap on your choice of submission
Step 2
View the full details of the submitted form
16.2 Viewing Submission Payment Information
How it works
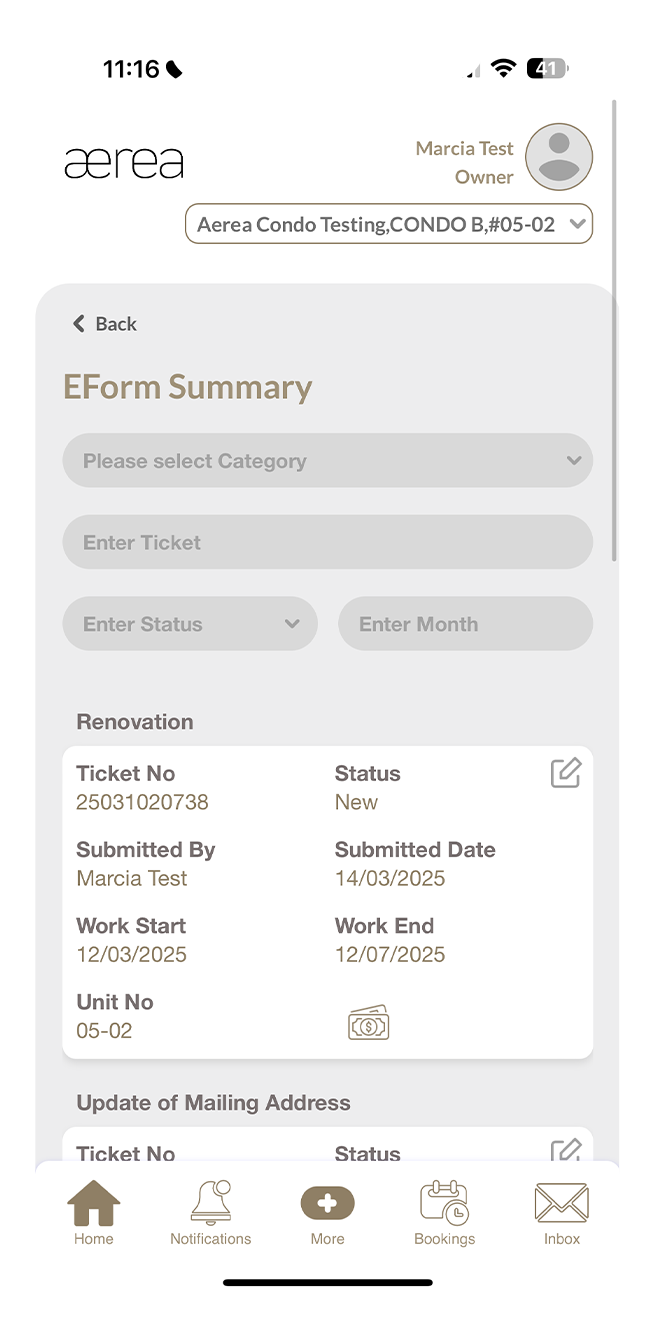
Step 1
To see payment details, tap on the payment icon
Step 2
View the full payment details.
17.1 Opening a door with bluetooth
How it works

Step 1
Turn on Bluetooth on your smartphone, ensure you are near the door device and tap on Bluetooth opening.
Step 2
A list of doors you can open will appear. Select the door you want to open (e.g., Sliding Gate) and wait a moment for it to unlock.
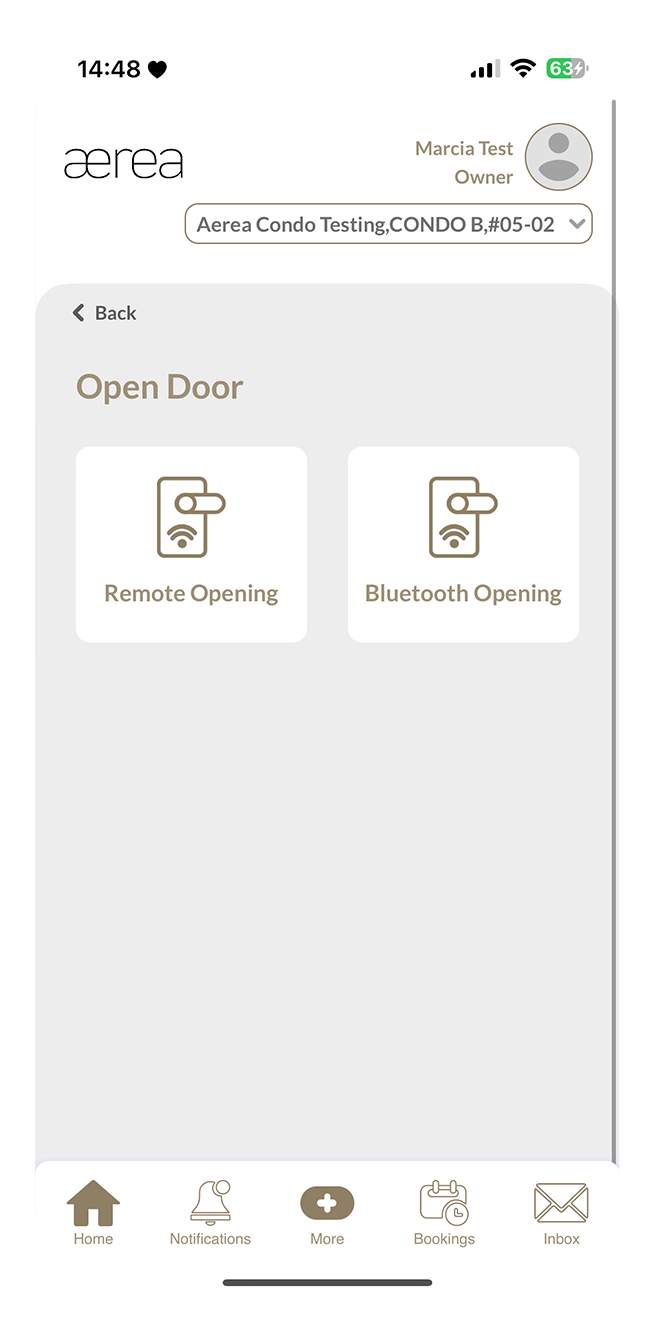
17.2 Opening a door remotely
How it works
Step 1
Tap "Remote Opening" in the Open Door menu.
Step 2
Choose the door (e.g., Side Gate) you want to open from the list and wait a moment for it to unlock.
18.1 Paying due invoice
How it works

Step 1
Select the invoice that is due.
Step 2
Review the invoice details, then tap the "Pay Now" button.
Step 3
Save the PayNow QR code to your gallery. Open your banking app, select "Scan & Pay," and upload the saved QR code. Enter the payment amount and your Block/Unit No (e.g., Block 1 #01-02) as a reference. Take a screenshot of the payment confirmation, then return to the Aerea Home app.
Step 4
Tap the "Upload Screenshot" button, select your payment confirmation screenshot, and then tap "Submit."
Step 5
A confirmation page will appear once your payment has been successfully submitted.
18.2 Reviewing invoice history
How it works
Step 1
Scroll down to view your invoice history in Resident Management.
Step 2
Tap on any item to see its details.
19.1 Registering a new face ID
How it works


Step 1
Tap the "Add a Face" button above the list of registered Face IDs.
Step 2
Read through the face image requirements, then tap "Next."
Step 3
A popup will appear, allowing you to choose an image from either the camera or gallery. Make your selection.
Step 4
After selecting an image, crop it as needed and tap the "Crop" button.
Step 5
Choose the appropriate photo category and tap "Upload."
Step 2
A confirmation screen will appear once the Face ID has been successfully submitted.
19.2 Deleting a registered face ID
How it works
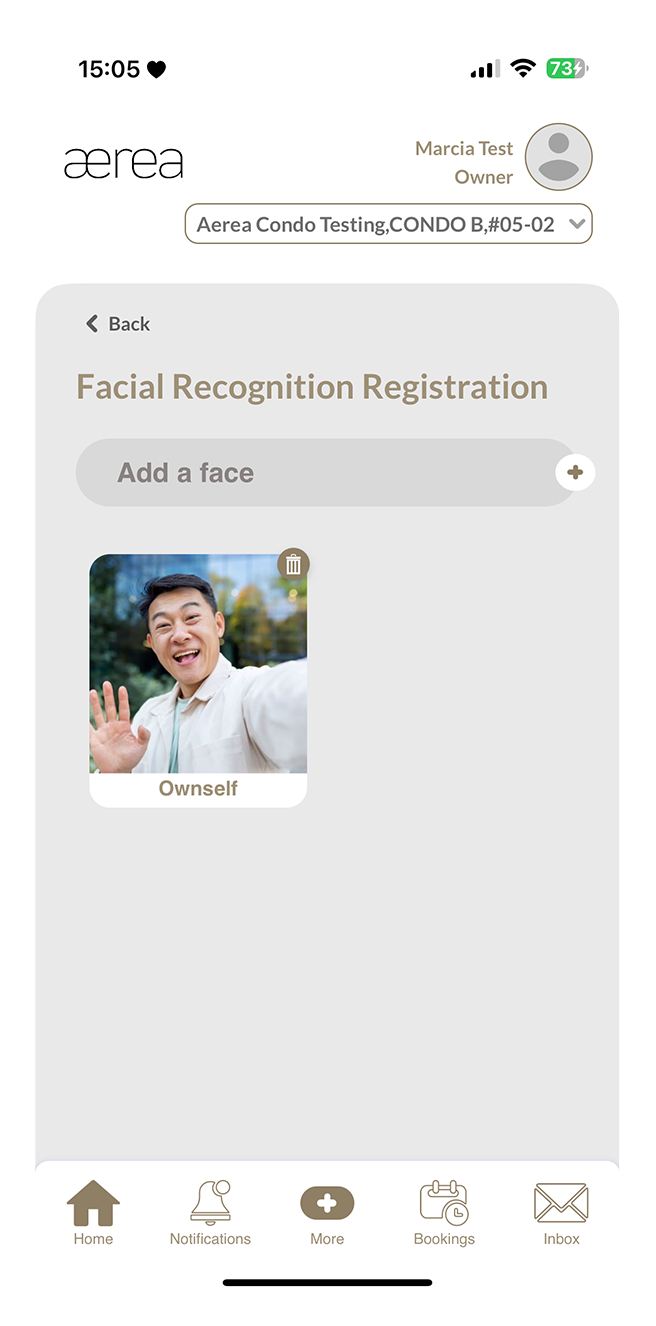
Step 1
Tap the delete button next to the Face ID in the list.
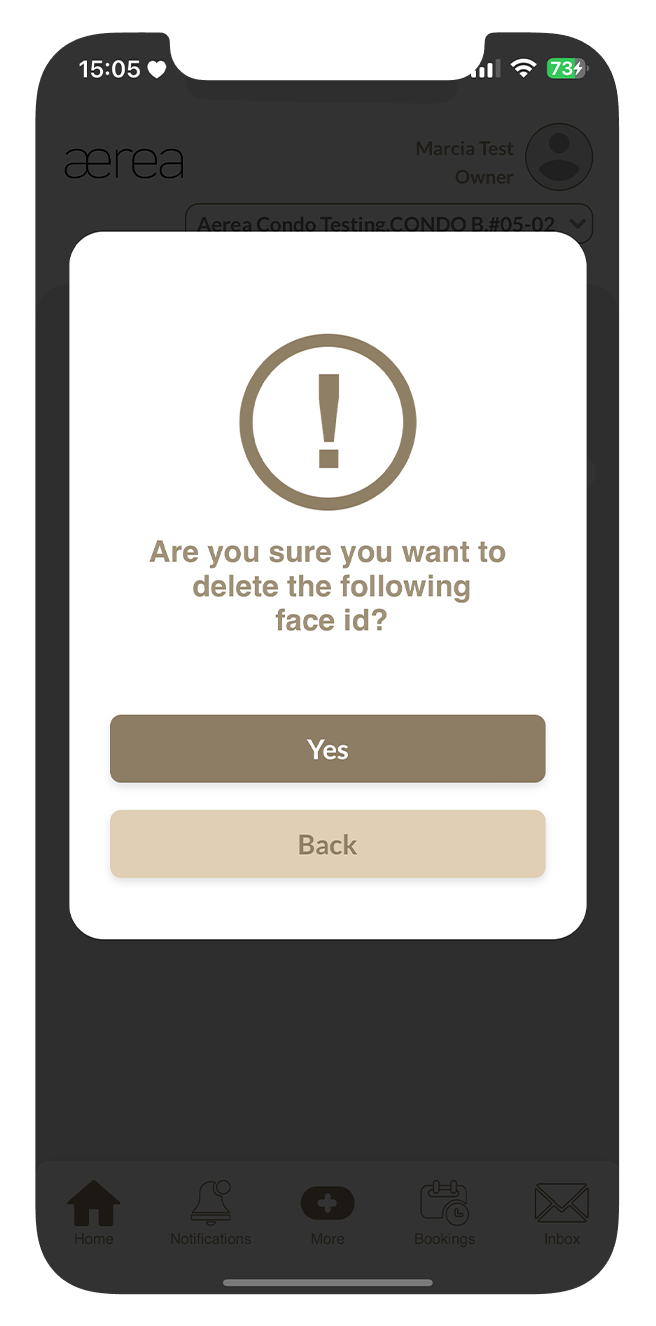
Step 2
Confirm the deletion by tapping "Yes" in the popup.
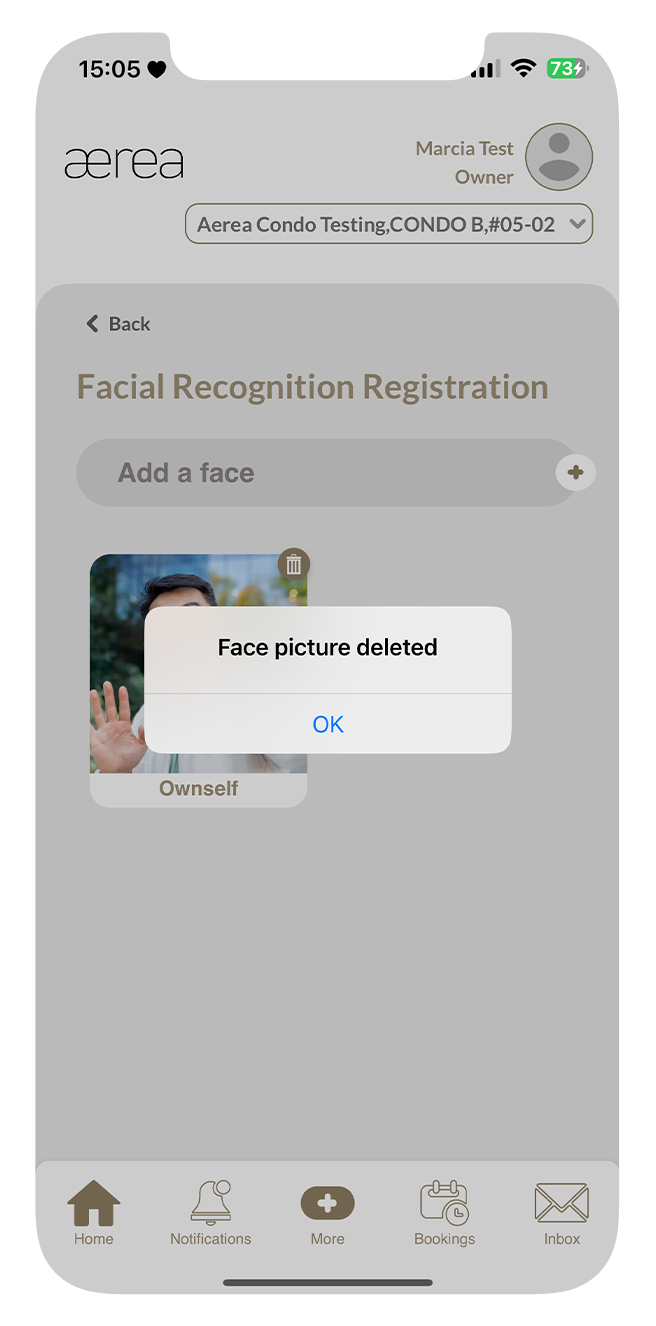
Step 3
A confirmation screen will appear once the Face ID has been successfully deleted.
20.1 Browsing Posts Feed
How it works

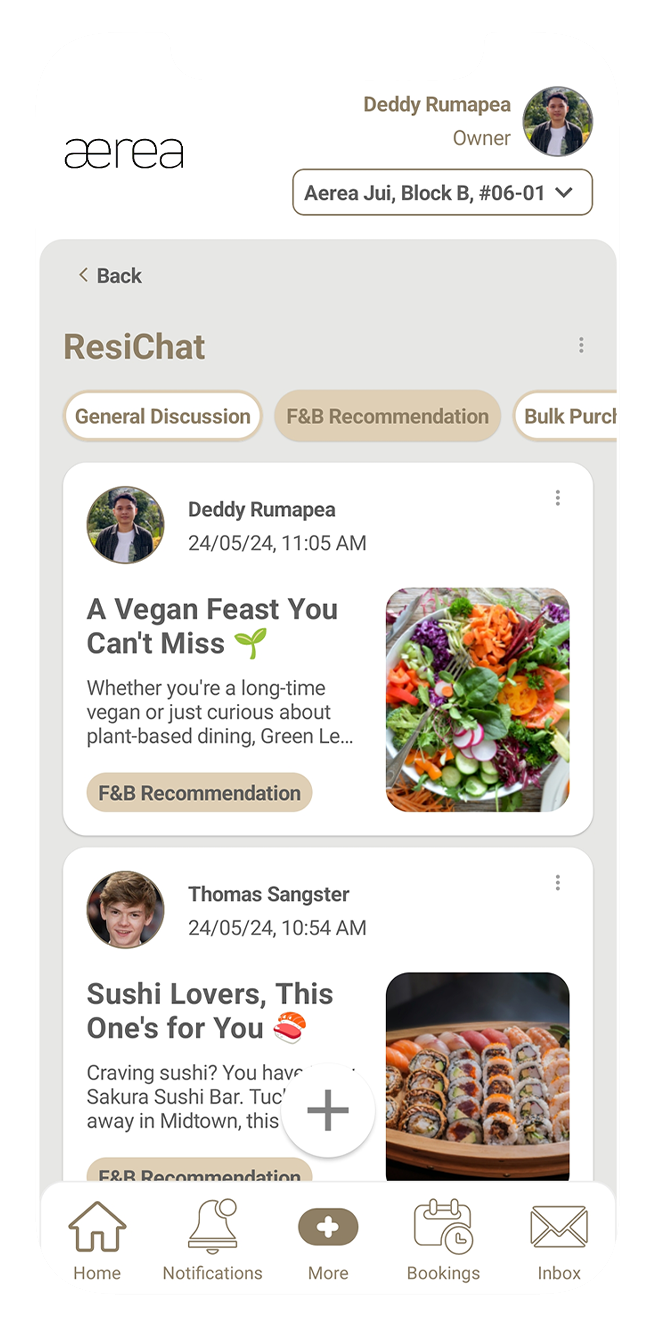
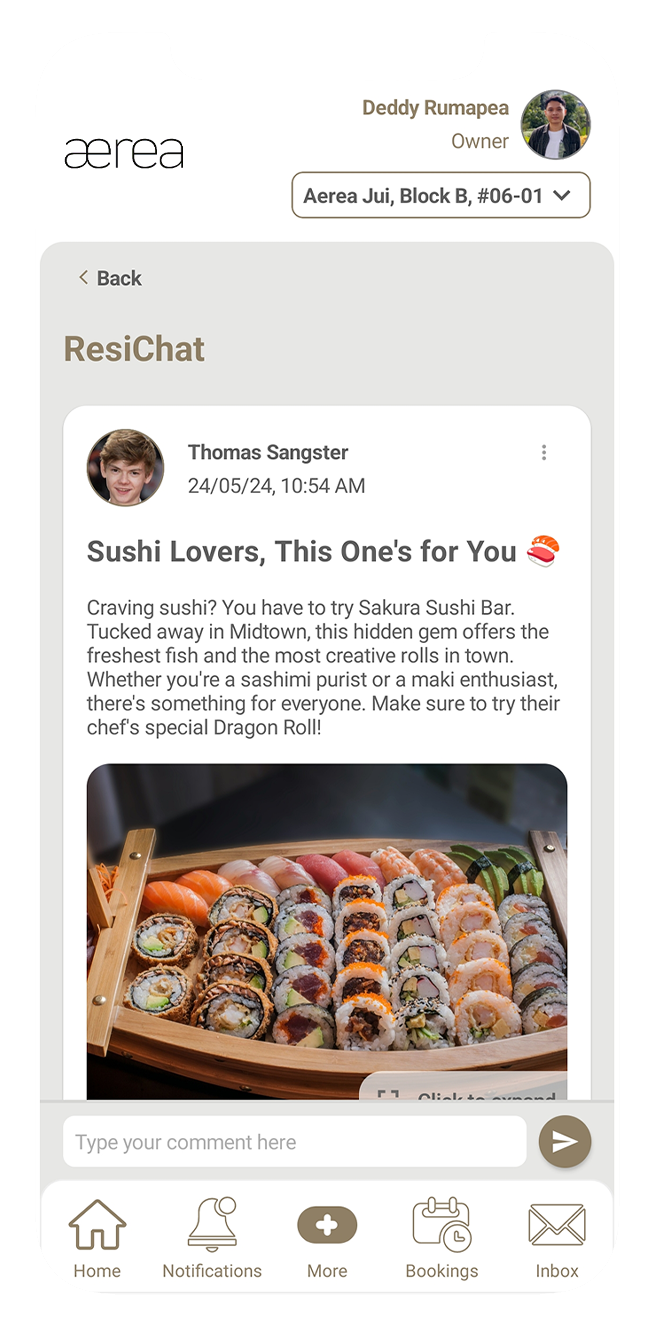
Step 1
Open ResiChat, and you'll see a feed of posts. Scroll through to find posts of interest.
Step 2
Use the topic filter at the top to narrow posts by category (e.g., "F&B Recommendation").
Step 3
Tap on any post to view its details.
20.2 Creating a New Post
How it works

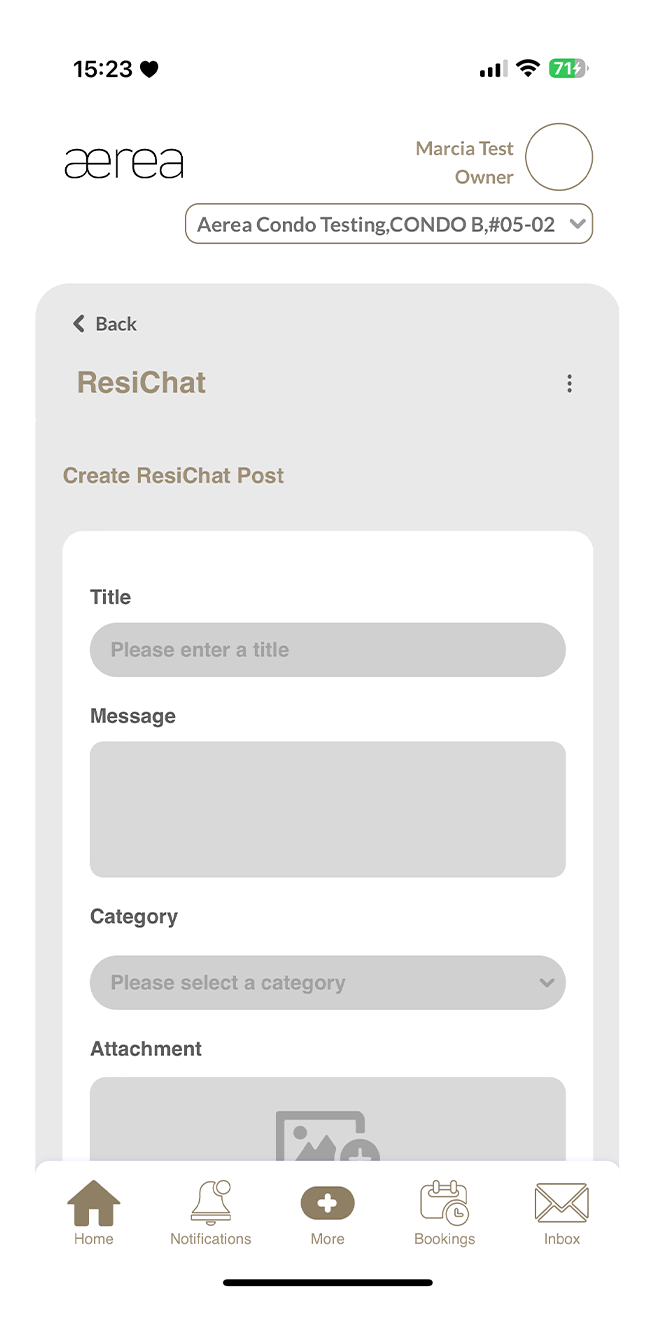
Step 1
Tap the + button on the feed to start a new post.
Step 2
Fill in the post title, message, and category.
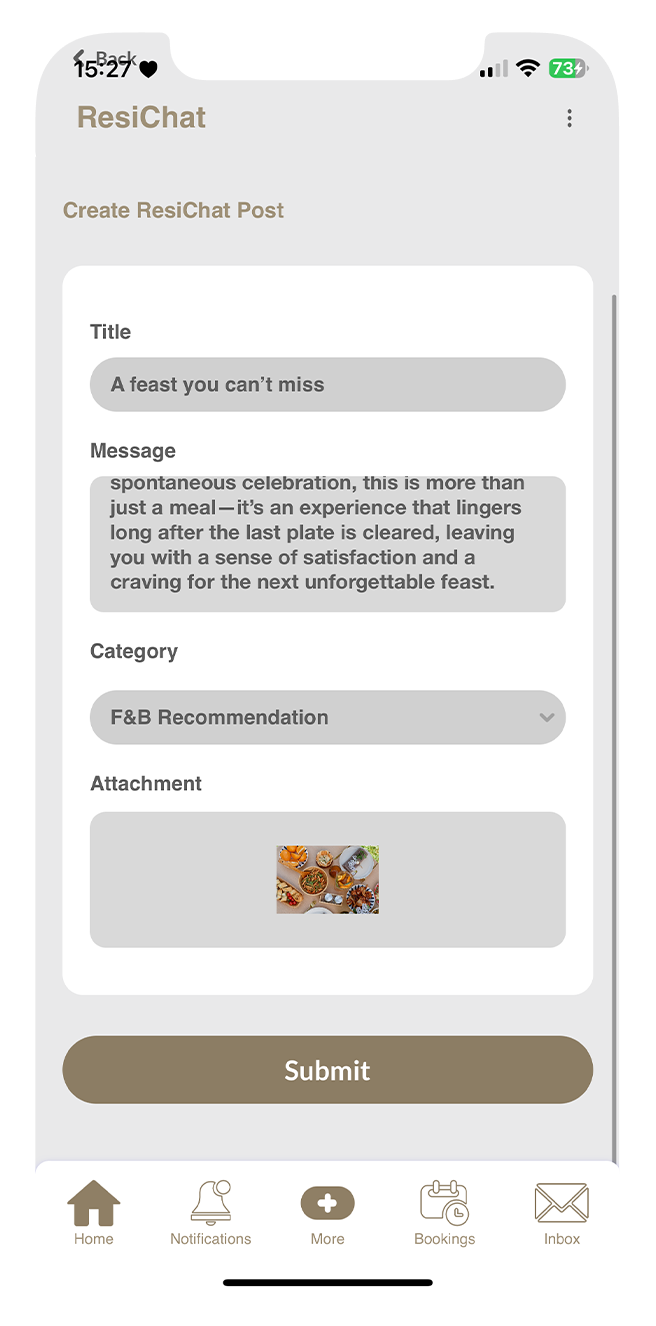
Step 3
Optionally, attach an image if you want and tap on the ‘Submit’ button once all fields are filled.
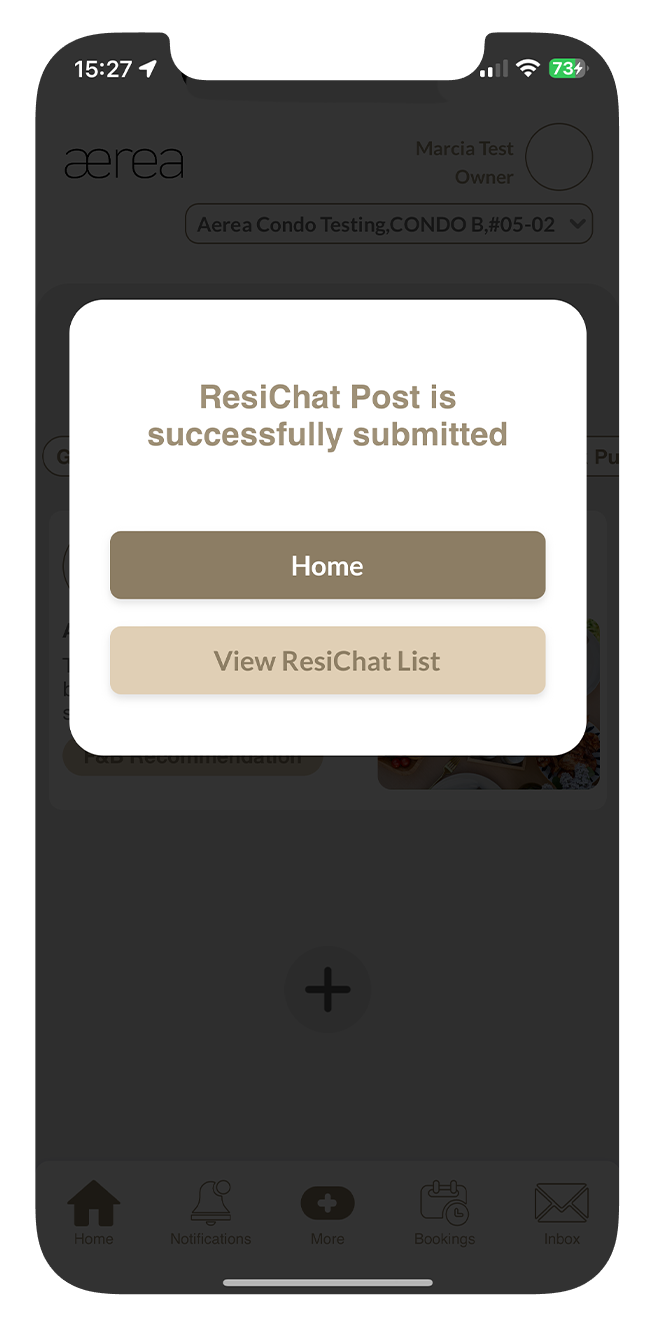
Step 3
A confirmation message will appear once your post has been successfully submitted.
20.3 Deleting a Post
How it works
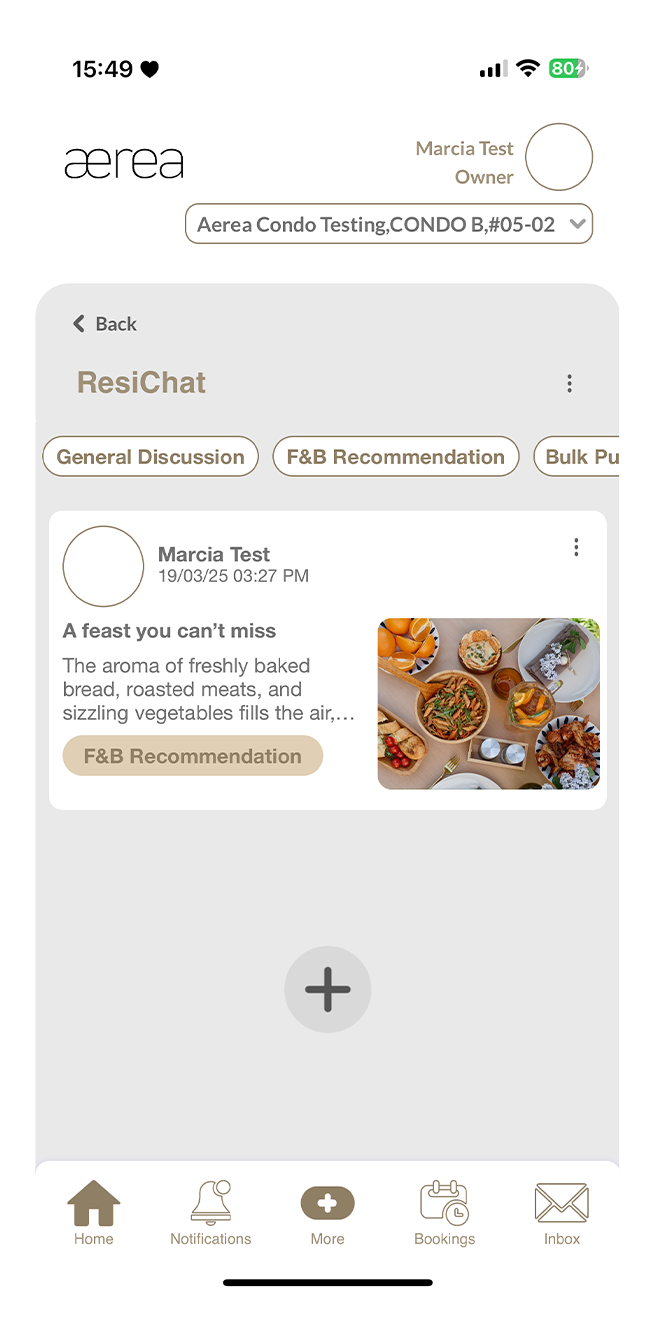
Step 1
Tap the 3 dots at the top right of your post.
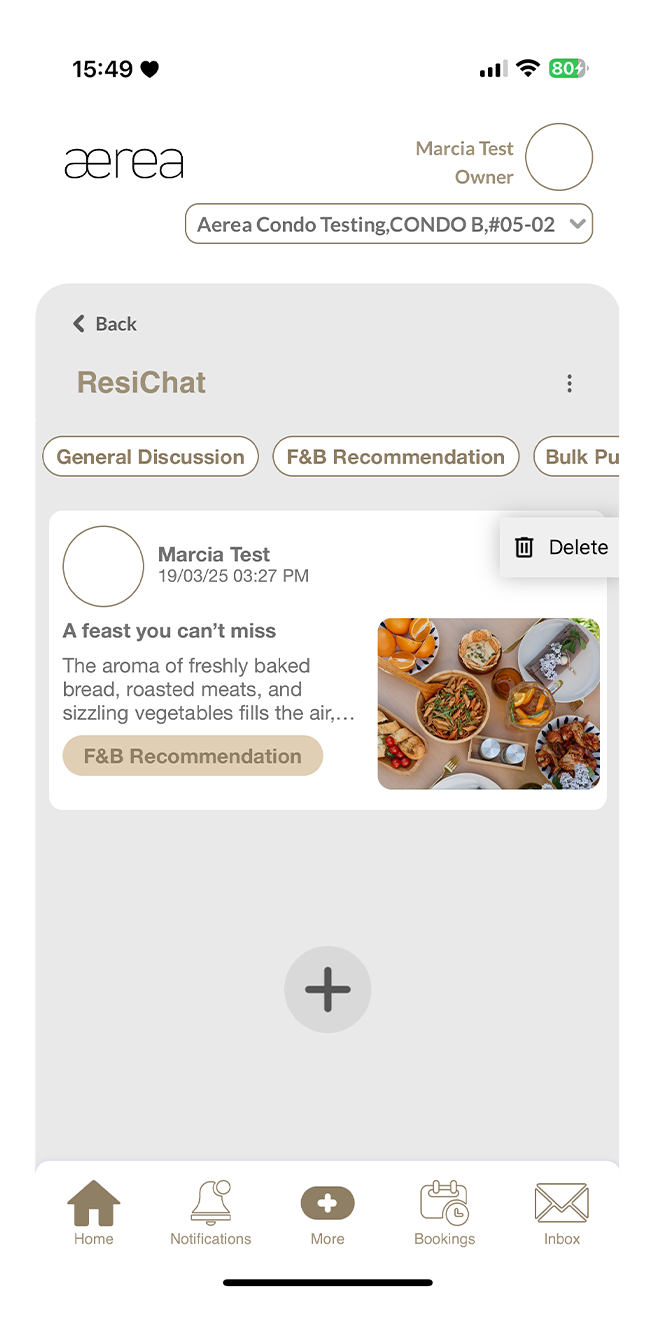
Step 2
Select “Delete” from the options that appear.
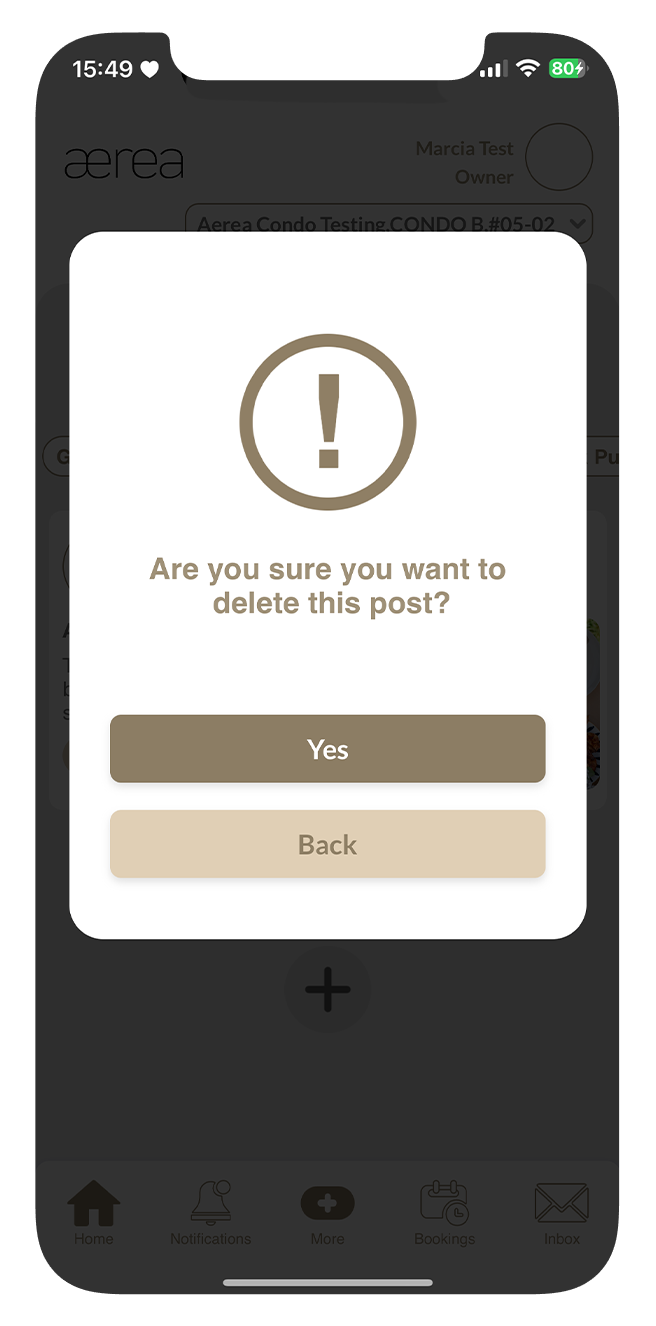
Step 3
Confirm the deletion by tapping “Yes” on the confirmation popup.
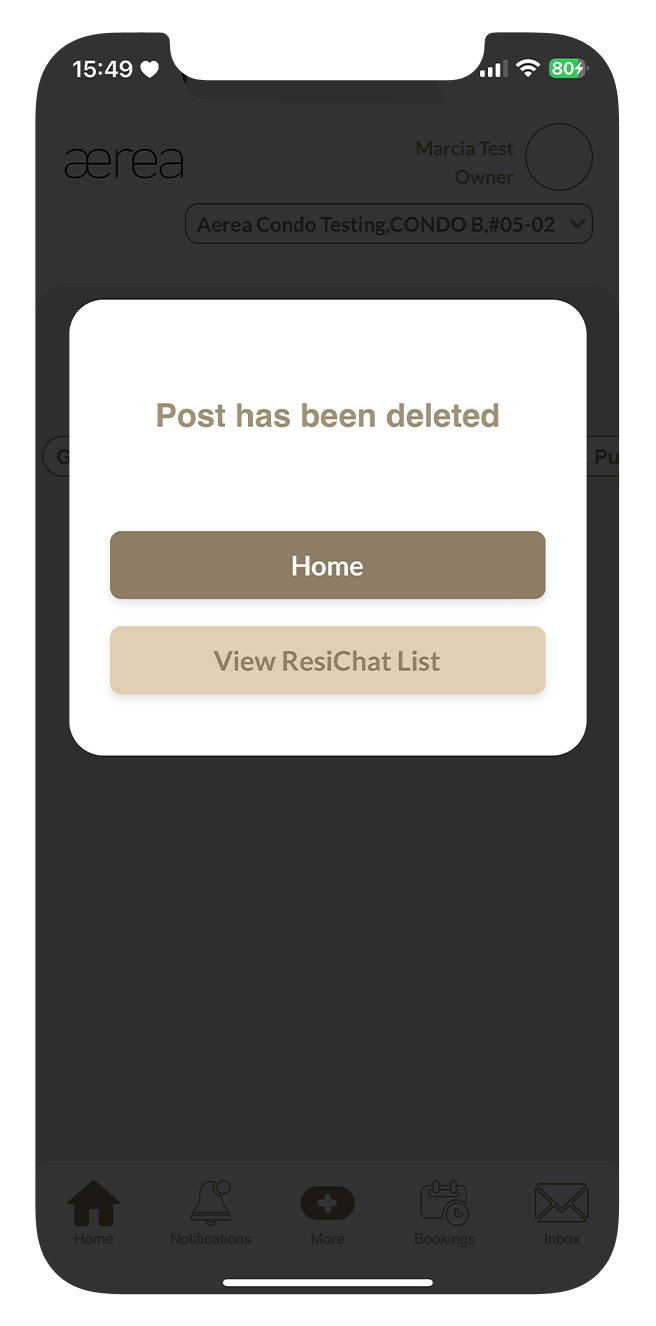
Step 4
You will see another confirmation popup once the post has been successfully deleted- You will see another confirmation popup once the post has been successfully deleted
20.4 Reporting a Post
How it works
Step 1
Tap the 3 dots in the top right corner of the post.
Step 2
Select the “Report” option that appears.
Step 3
Enter your report remarks in the confirmation popup and tap “Yes.”
Step 4
If the post is reported successfully, you will see a confirmation popup.
20.5 Blocking a Post Creator
How it works

Step 1
Tap the 3 dots in the top right corner of the post.
Step 2
Select the "Block" option that appears.
Step 3
Confirm by tapping "Yes" on the popup.
Step 4
You'll receive another popup confirming if the user has been successfully blocked.
20.6 Posting a New Comment
How it works
Step 1
You'll receive another popup confirming if the user has been successfully blocked.
Step 2
Type your comment in the designated comment field and tap “Send”.
Step 3
A confirmation popup will appear once your comment has been successfully posted.
20.7 Deleting a Comment
How it works
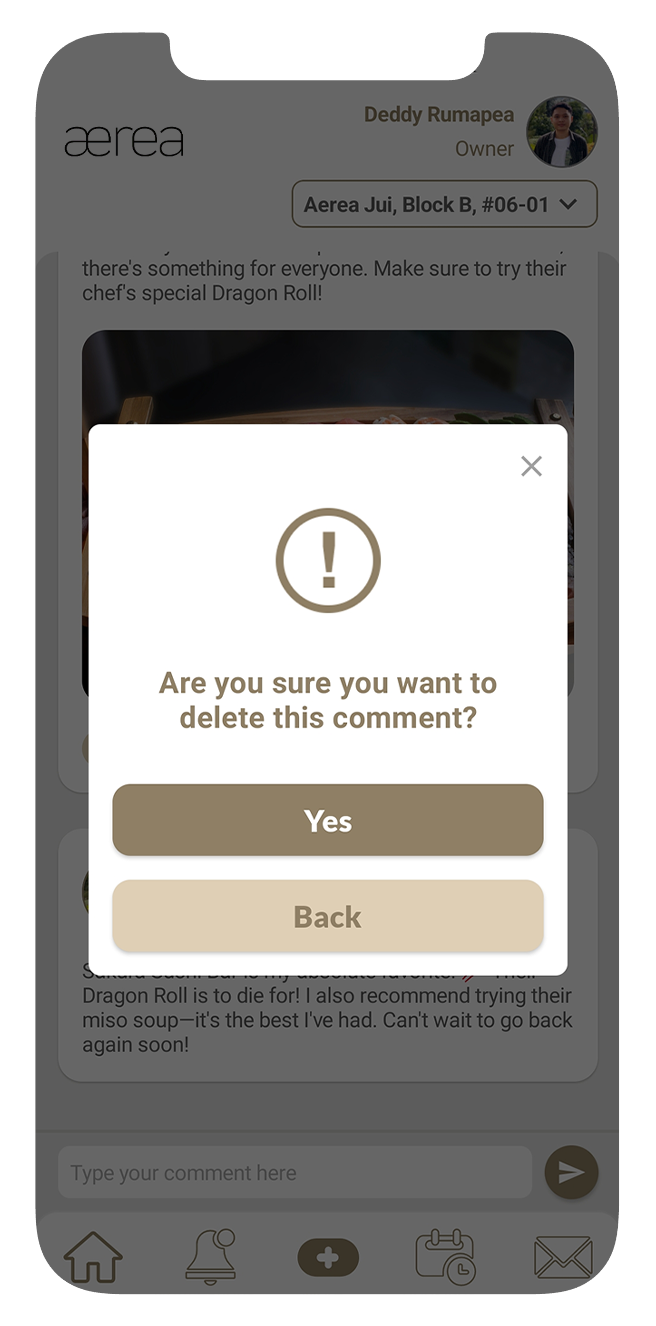
Step 1
Tap the 3 dots located at the top right corner of your comment.
Step 2
From the options that appear, select "Delete."
Step 3
Confirm the deletion by tapping "Yes" on the popup that appears.
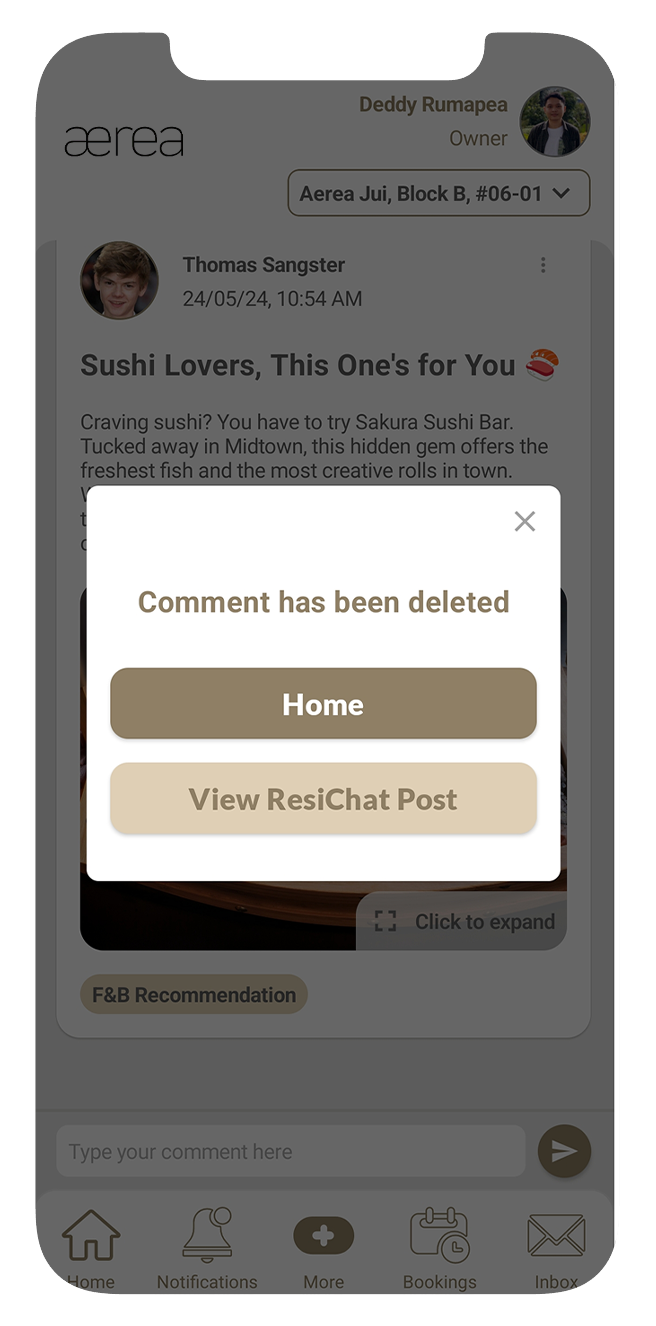
Step 4
Once your comment has been successfully deleted, you'll see another confirmation popup.
20.8 Reporting a Comment
How it works

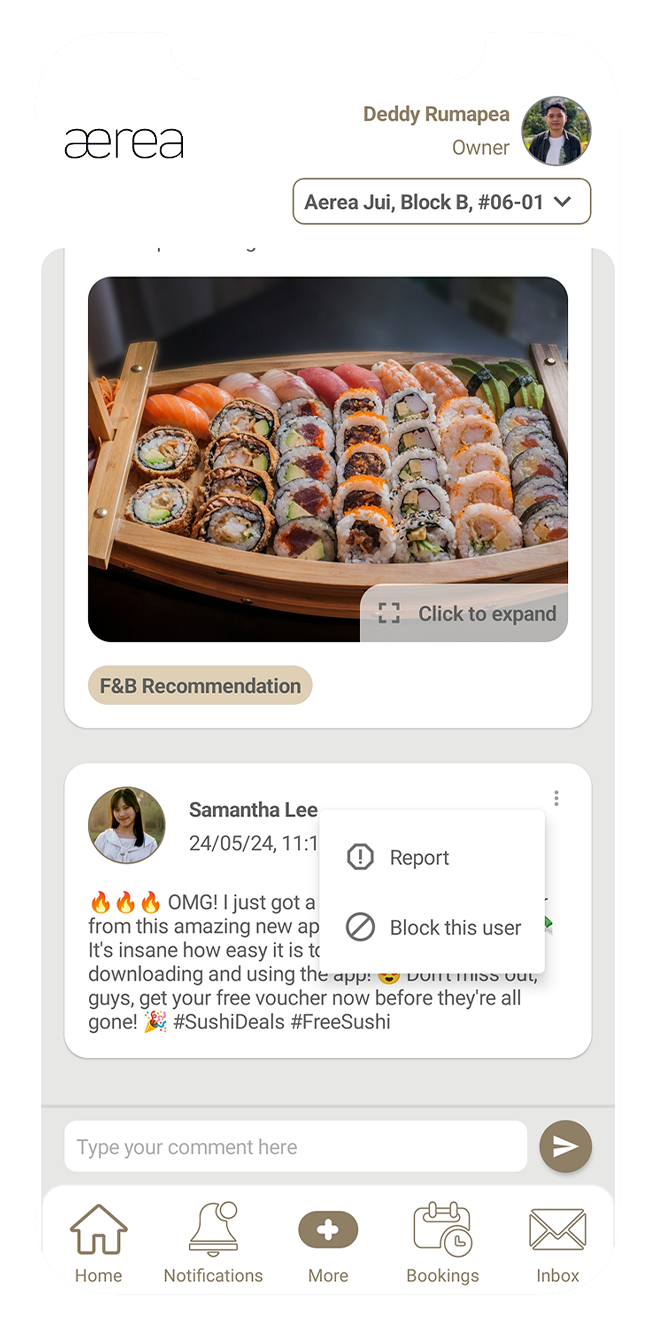
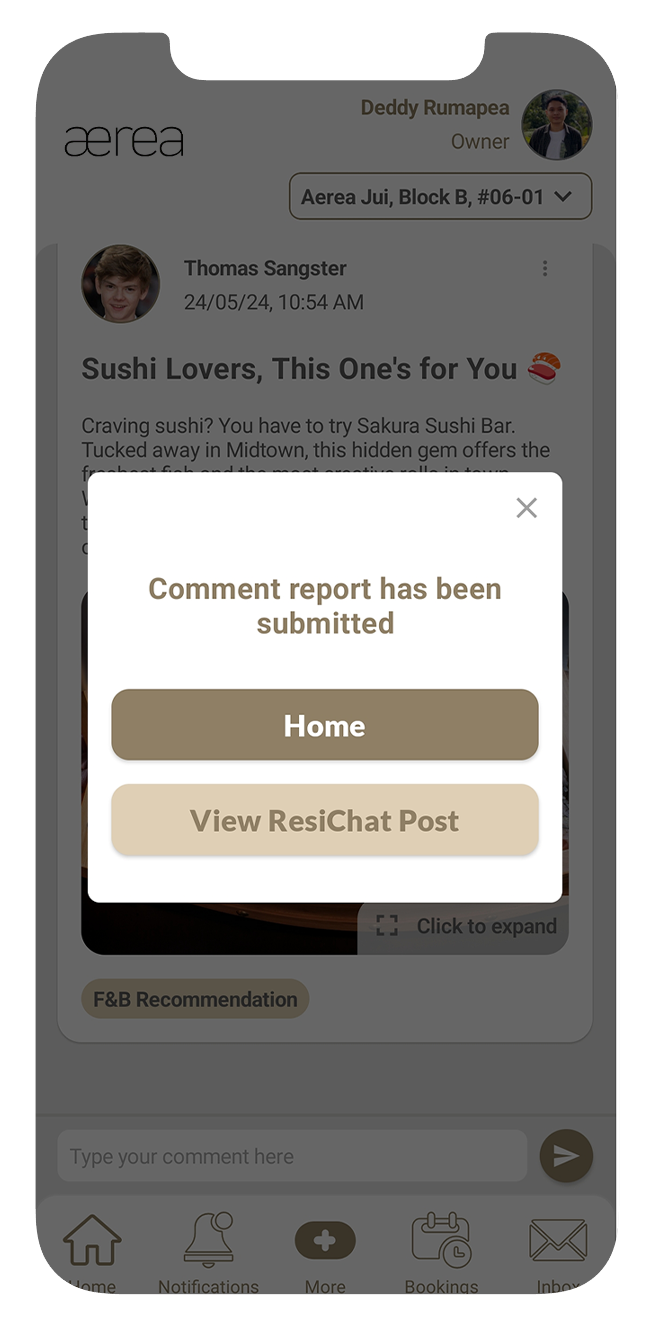
Step 1
Tap the 3 dots located in the top right corner of the comment.
Step 2
Choose the “Report” option from the menu that appears.
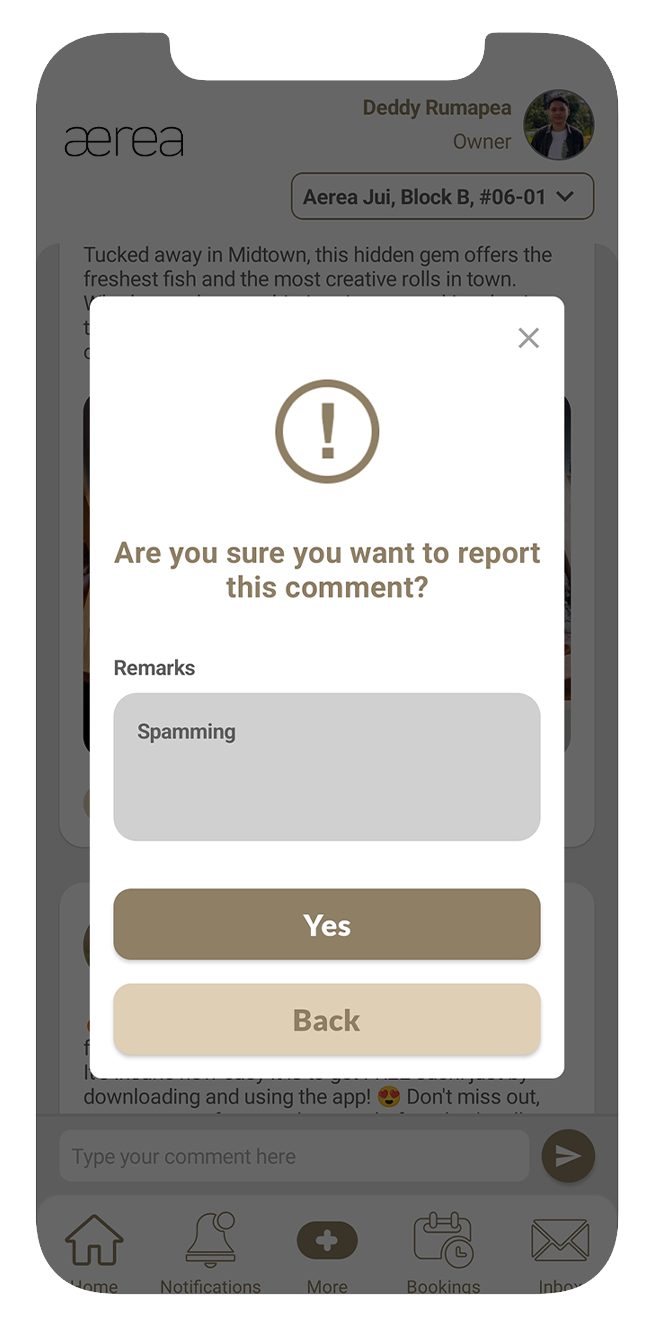
Step 3
Enter your report remarks in the confirmation popup and tap “Yes.”
Step 4
If the comment is successfully reported, you’ll see a confirmation popup.
20.9 Blocking a Comment Creator
How it works


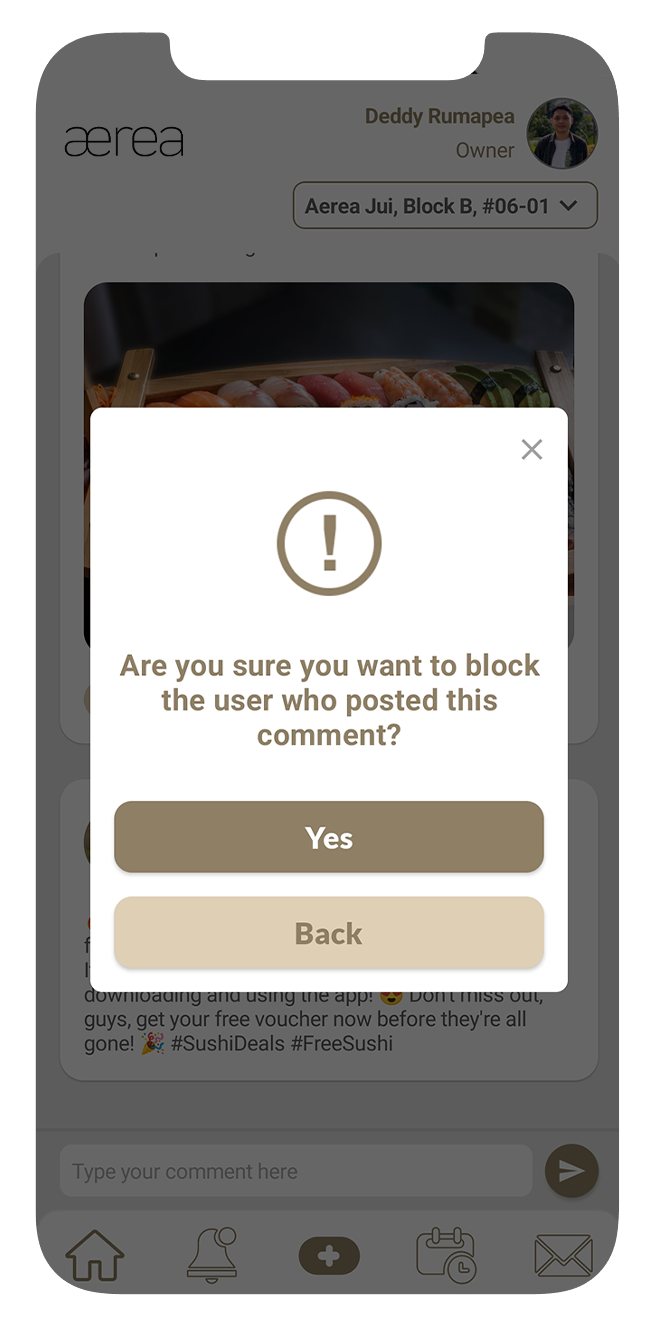
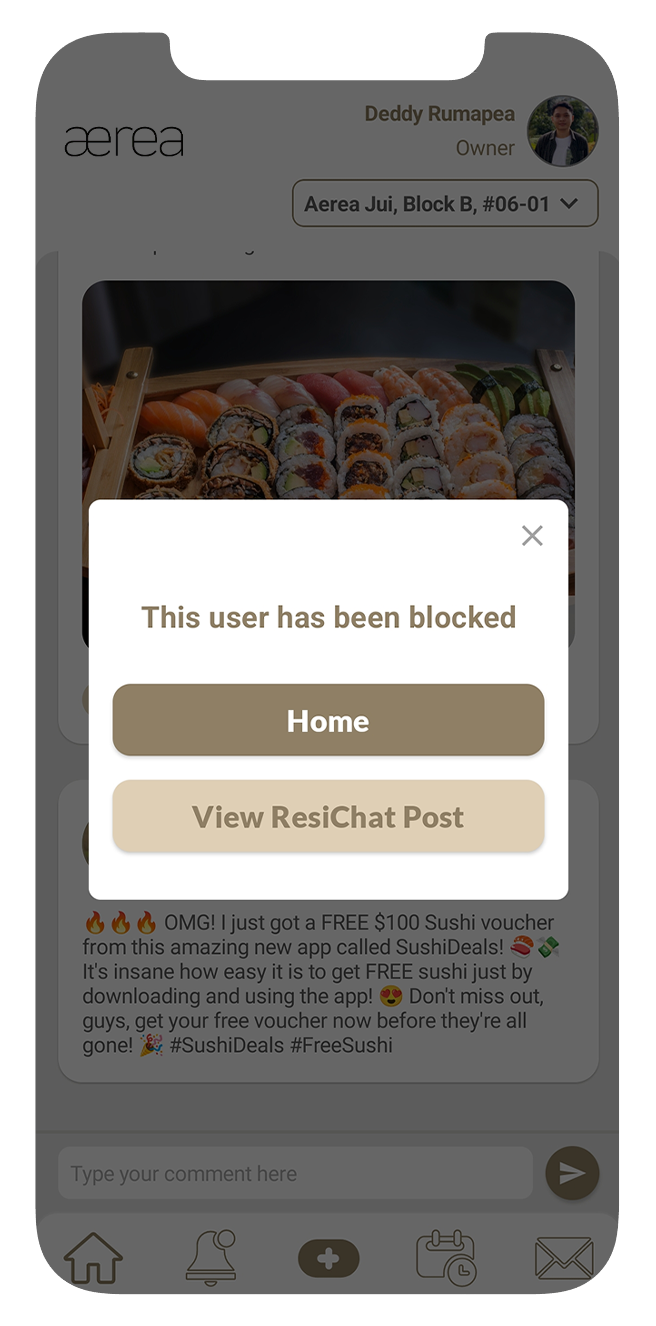
Step 1
Tap the 3 dots located at the top right of the comment.
Step 2
Choose the "Block" option from the menu that appears.
Step 3
Confirm your choice by tapping "Yes" on the popup that appears.
Step 4
You'll then see another popup confirming if the user has been successfully blocked.
20.10 Unblocking a User
How it works

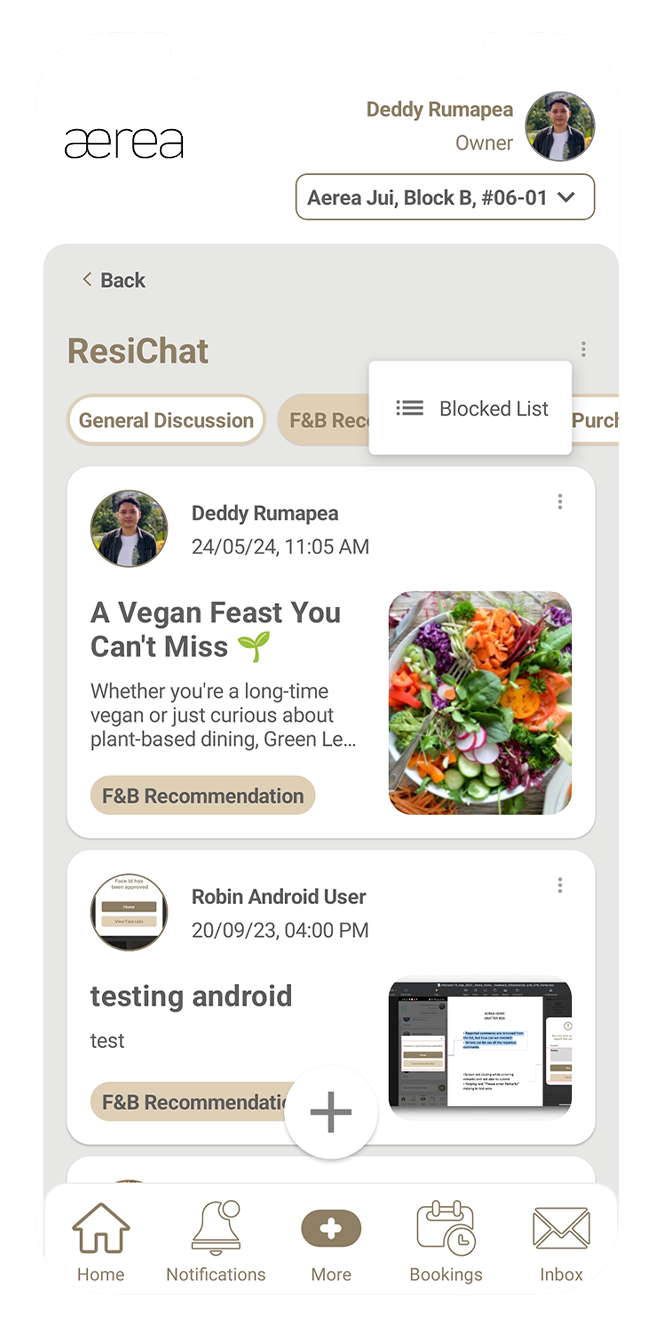
Step 1
Tap the 3 dots located at the top right corner of the ResiChat feed screen.
Step 2
Select "Blocked List" from the menu that appears.
Step 3
You'll see a list of blocked users. For each user, there's an "Unblock" button. Tap the "Unblock" button next to the user you want to unblock.
Step 4
Confirm your choice by tapping "Yes" on the popup that appears.
Step 5
You'll then receive another popup confirming if the user has been successfully unblocked.
21.1 Frequently Asked Questions
How it works
Step 1
Tap on the category dropdown
Step 2
Select the relevant category (e.g., Profile).
Step 3
The questions and answers for the selected category will appear.
22.1 Settings menu
How it works
Step 1
Tap on the desired option to access its settings.
22.2 Changing profile picture
How it works

Step 1
Tap the Edit icon at the bottom left of your current profile picture and choose a new picture from your camera or gallery.
Step 2
Tap Submit to save your changes.
Step 3
A confirmation message will appear once your new profile picture is saved.
22.3 Customizing notifications
How it works
Step 1
Tap the switch to enable or disable notifications for each menu option.
22.4 Changing password
How it works

Step 1
Enter your current password, then your new password and confirm it in the designated fields.
Step 2
Tap Submit to save the changes, and a confirmation message will appear once your password is updated.
22.5 Terms and conditions
How it works
Step 1
Read through the terms to understand your rights, responsibilities, and how your data is handled.
22.6 Enabling_disabling biometric login
How it works
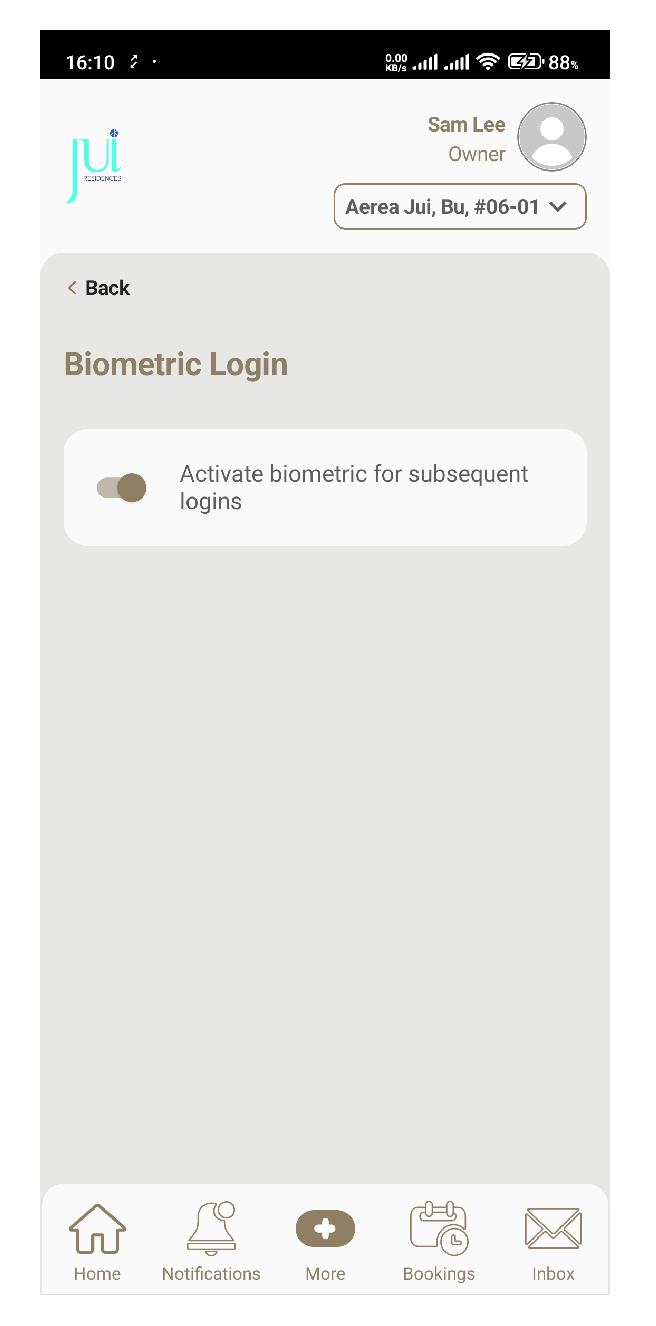
Step 1
Read through the terms to understand your rights, responsibilities, and how your data is handled.
1.1 Login as a new user
How it works
Step 1
Select the country your condo is located in
Step 2
Enter the email address associated with your registered account in the provided field. If you want to use biometric for subsequent logins, check the given checkbox. Then, tap Sign In
Step 3
Check your email inbox for a one-time password (OTP), enter it in the designated field, and tap Submit
Step 3
Choose a password, enter it in the password field, confirm it by typing it again in the provided field, and tap Submit
1.2 Login as a regular user
How it works
Step 1
Enter the email address associated with your registered account in the provided field. If you want to use biometric for subsequent logins, check the given checkbox. Then, tap Sign In
Step 2
If your email address is registered, you'll see a password field. Enter your password there, and then tap on Submit.
Step 3
Check your email inbox for a one-time password (OTP). Enter the OTP in the designated field, and then tap on Submit
1.3 Log in with biometric
How it works
Step 1
If biometric login is enabled, just tap the Sign In button and you will be prompted to use biometric sensors available on your device
1.4 Reset password
How it works
Step 1
Enter your email address in the provided field and tap the Submit button
Step 2
If your email is registered, a password field and a Forgot Password button will appear. Tap Forgot Password
Step 3
Enter your email address again in the provided field and tap the Reset Password button
Step 4
Check your email inbox for a one-time password (OTP). Enter the OTP in the designated field and tap Submit
Step 5
Choose a new password, enter it in the new password field, confirm it by typing it again, and tap Submit
2.1 More Menu
How it works
Step 1
Tap More on the bottom bar to see the full menu.
Step 2
Select the item you want to explore (e.g., Announcement) to navigate to that menu.
3.1 Favorite Menu
How it works
Step 1
Simply tap on the '+' icon to add menu items to your favorites.
Step 2
Choose the menu item you want to add to your favorites (e.g., Announcement)
Step 3
Once selected, the item will appear in your favorites. To access a specific menu, just tap on its corresponding item in your favorites. You can add up to six items to the favorites.
4.1 Notifications
How it works
Step 1
Tap on a notification to go directly to the notifications list screen or select Notifications from the bottom bar menu to access your notification history。 Tap on any item in the list to see more details.
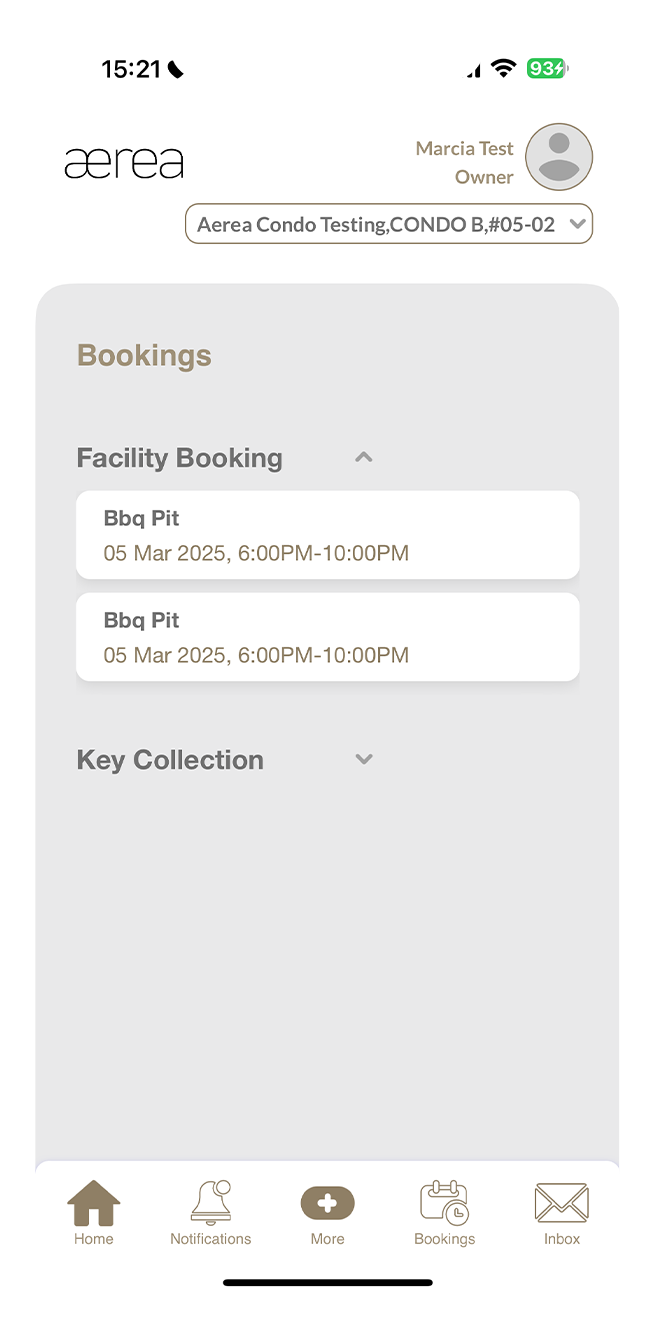
5.1 Bookings
How it works
Step 1
On the bookings screen, you'll find lists of facility bookings, defect inspection appointments, and joint inspection appointments.
Step 2
To see the facility bookings list, tap on “Facility Booking.”
Step 3
Tap on any item in the list to view its details.
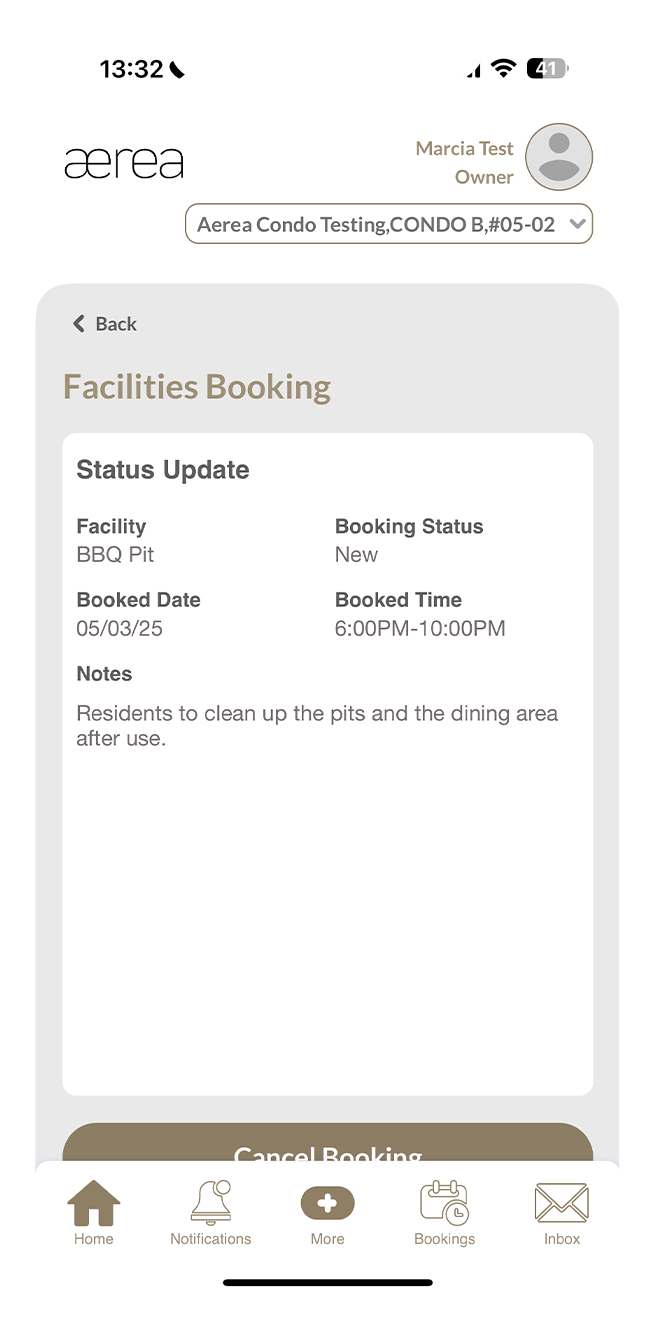
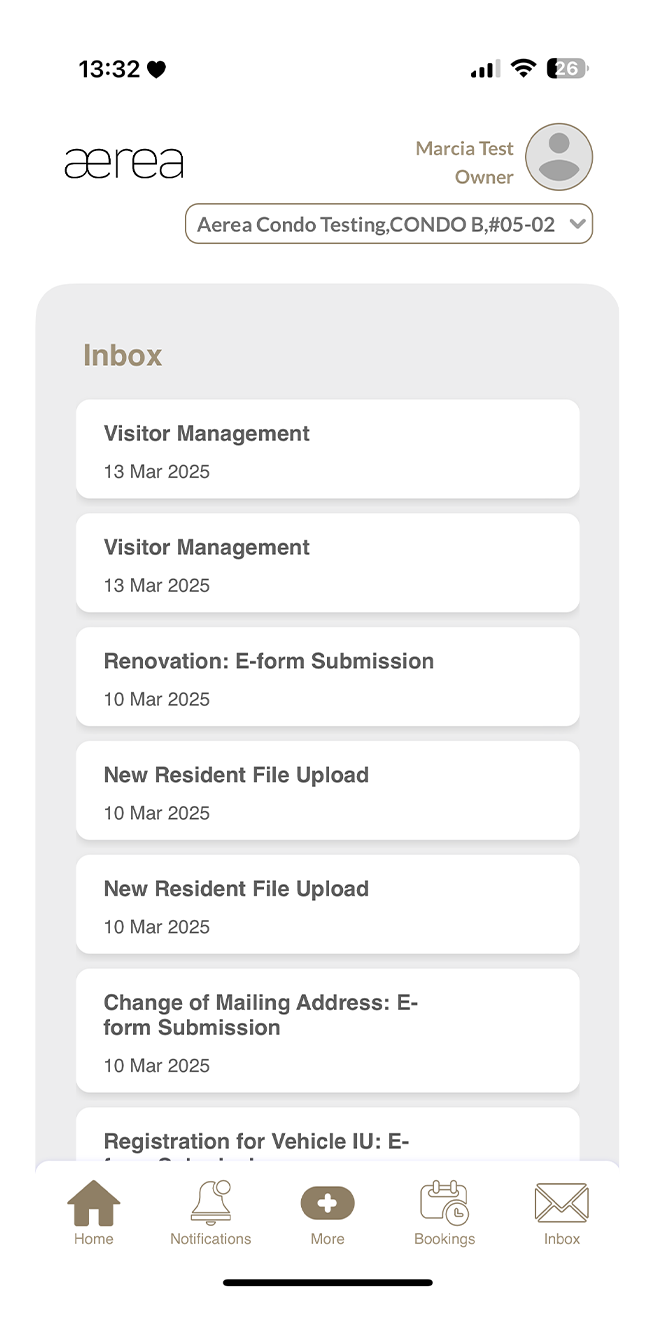
6.1 Inbox
How it works
Step 1
Open the Inbox screen to see a list of updates from your submissions.
Step 2
Tap on an item in the list to view its details.
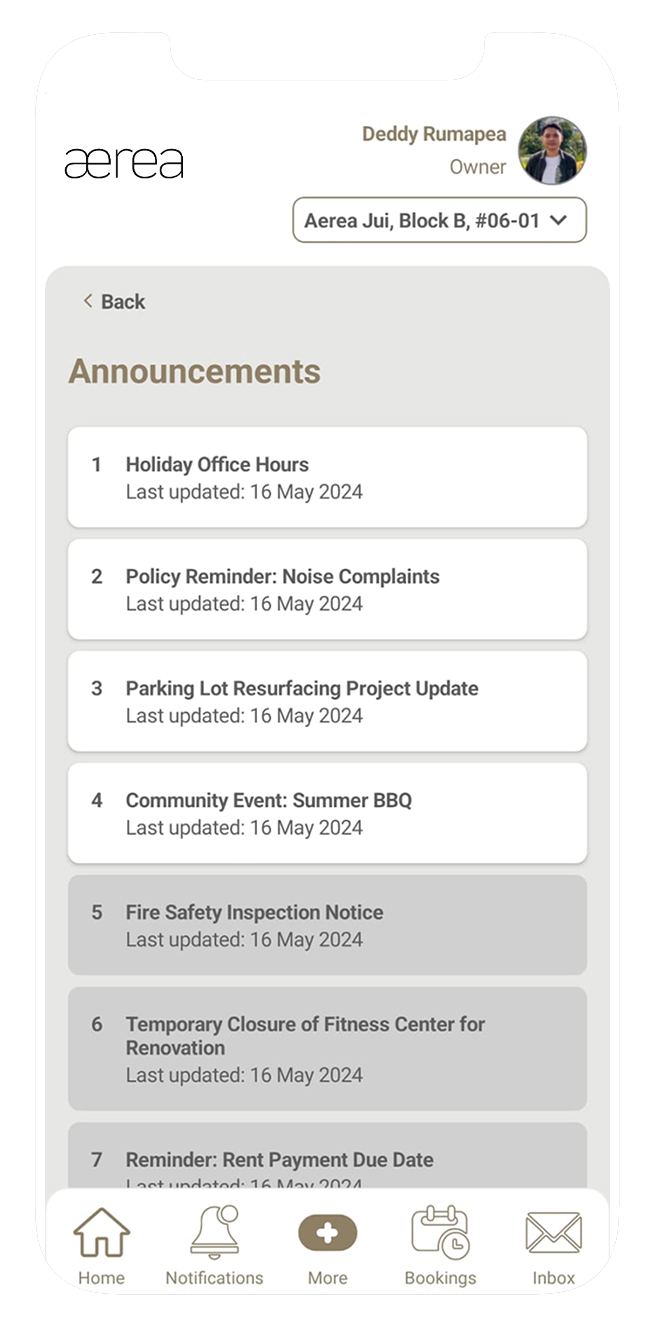
7.1 Announcements
7.1 Announcements
Step 1
Announcements from your property managers will appear in the announcements list.
Step 2
Tap on an item in the list to view its details.
8.1 Key Collection
How it works
Step 1
Enter your NRIC(s)/FIN(s) and select your preferred booking date and time slot.
Step 2
Tap Submit to confirm your appointment.
Step 3
A confirmation page will appear upon submission
Step 4
Tap View Booking to see your appointment details.
9.1 Defects submission history
How it works
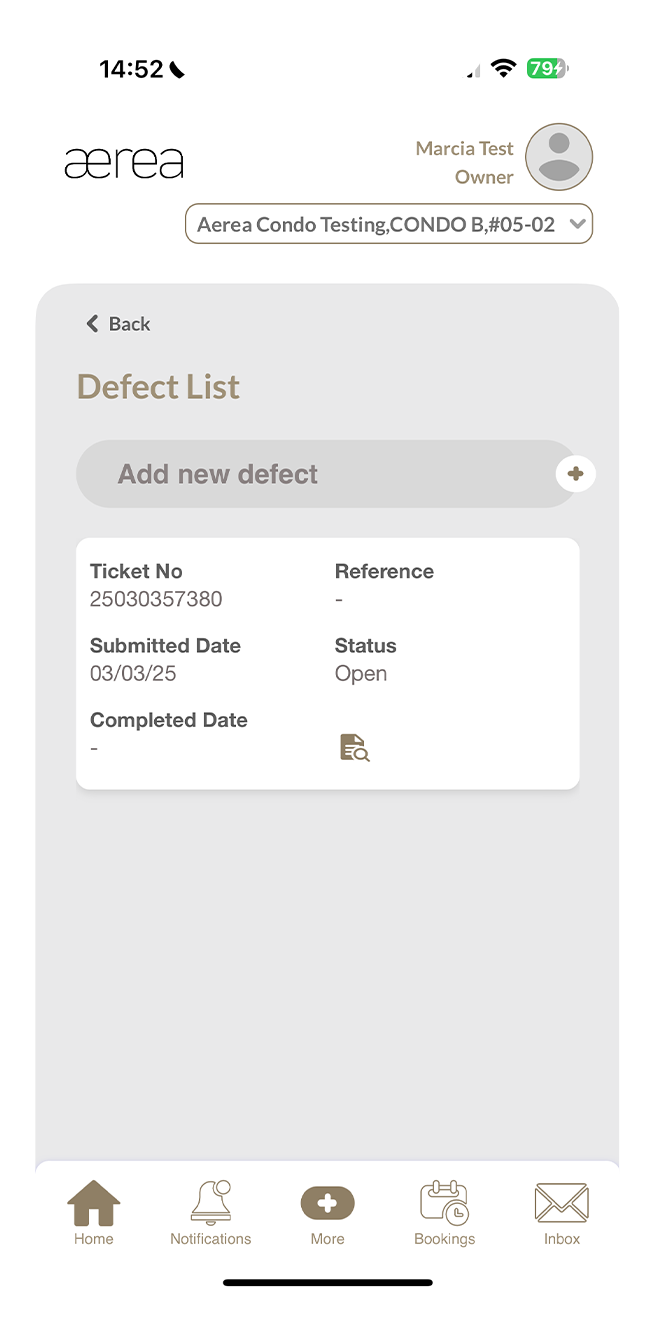
Step 1
Go to the Defects section to see your submission history.
Step 2
Tap on any item in the list to view its details.
9.2 Create a new defect submission
How it works
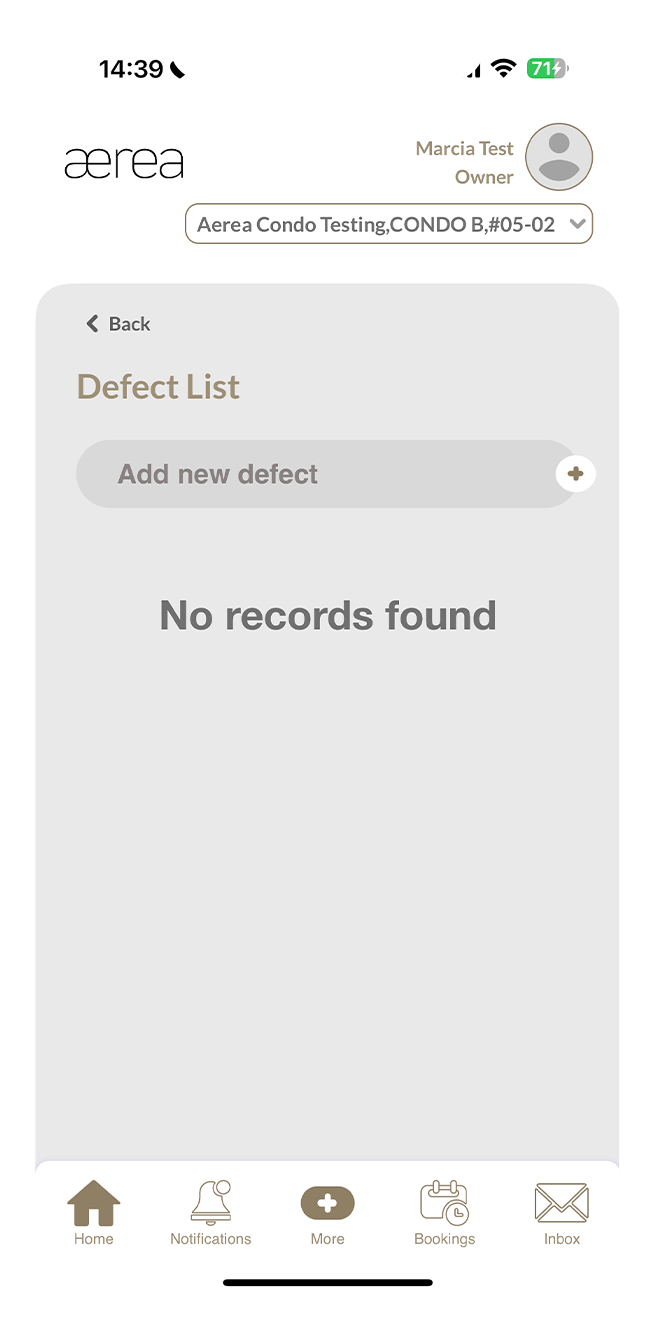
Step 1
Tap on the ‘+’ button above the defects submissions list.
Step 2
Select the location and defect type, enter remarks, and add a photo of the defect. Tap Add New if you want to include another defect, then tap Submit.
Step 3
A popup will appear. Enter your name and provide your signature in the given fields, then tap Done.
Step 4
Another popup will appear, allowing you to choose whether to book an inspection appointment as well. Make your selection.
Step 5
A confirmation page will appear when your submission is successfully completed.
9.3 Booking a final inspection
How it works
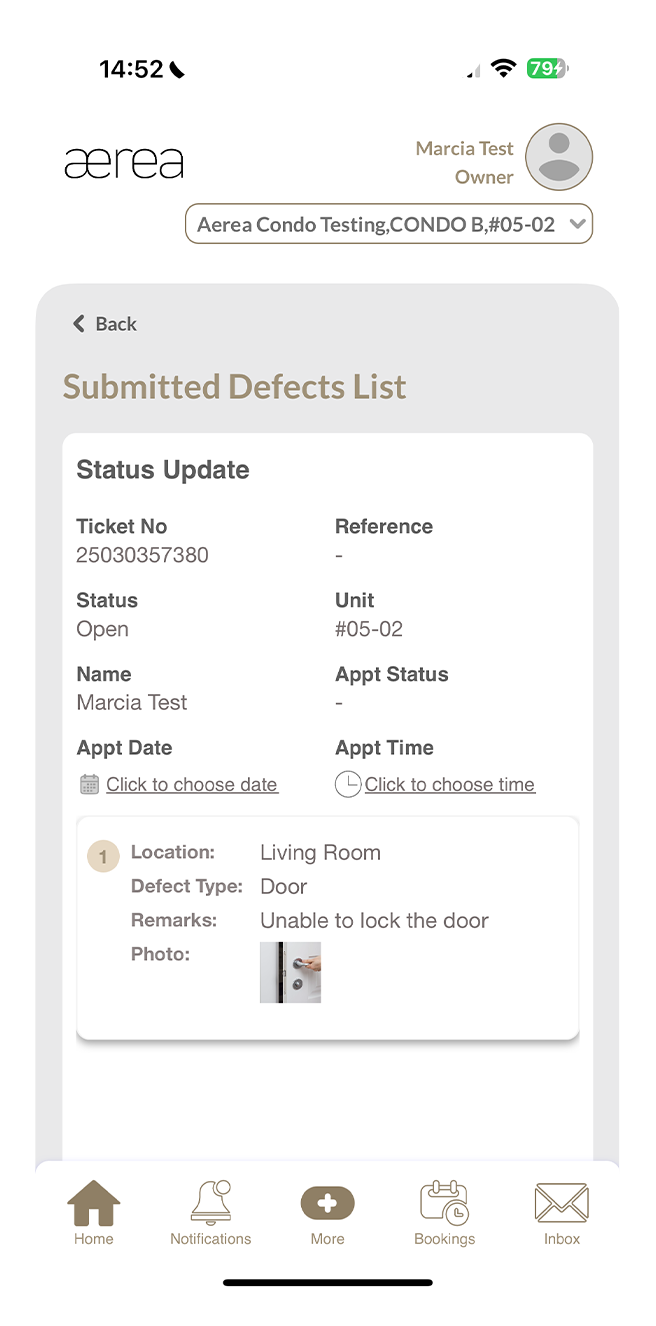
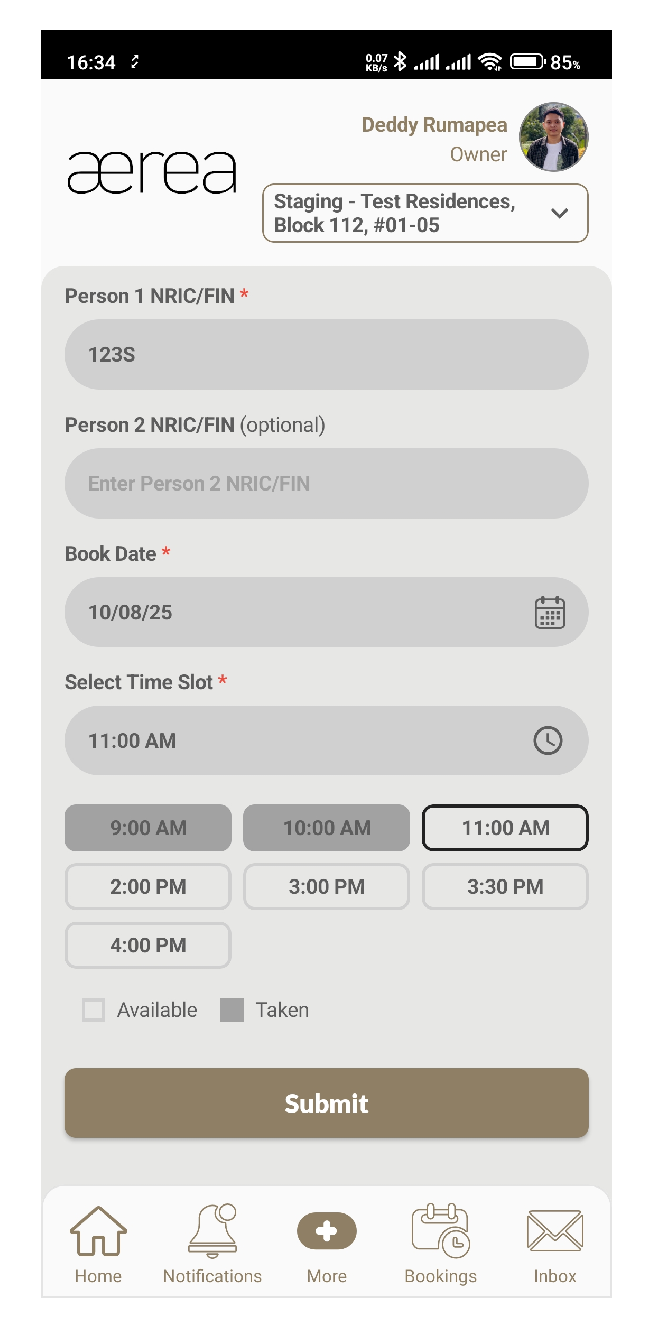
Step 1
Tap the handover icon (the handshake) on your defect ticket
Step 2
A pop-up will appear. Tap Yes to continue with the booking
Step 3
Fill in the last 4 characters of the NRIC or FIN for the person attending. You can add one more person if needed
Step 4
Pick your preferred date and time slot, then tap Submit to book
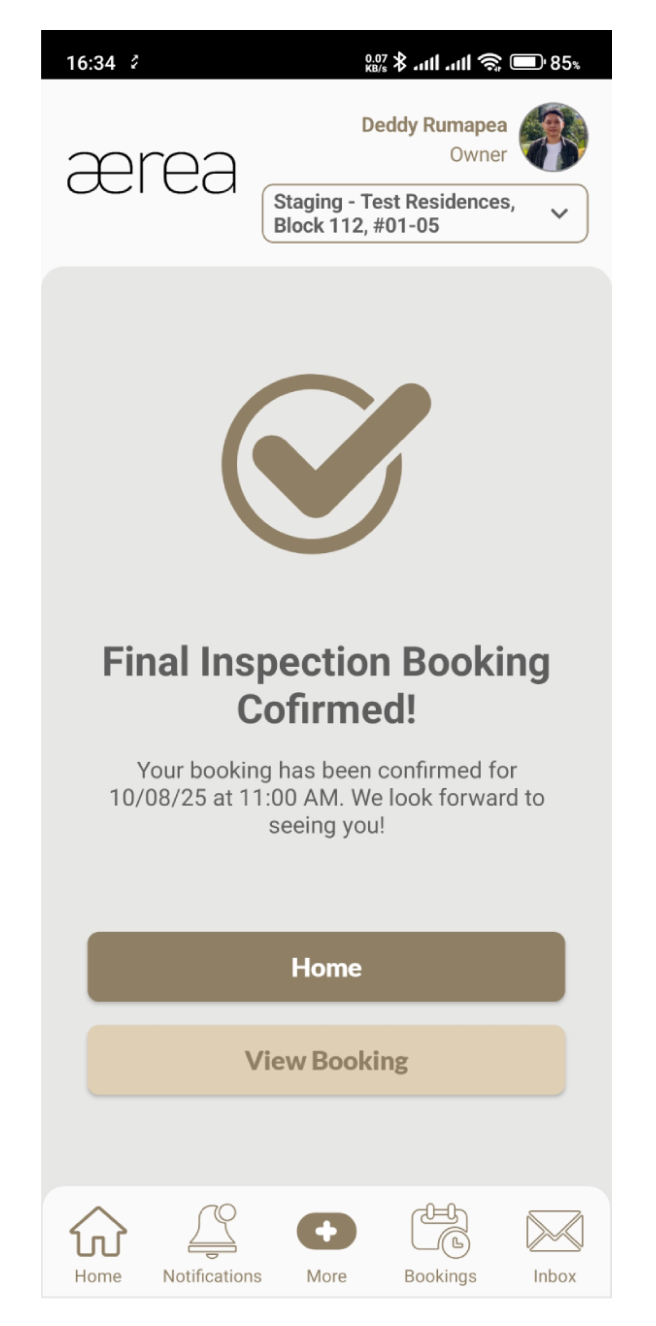
Step 5
You're all set! Your Final Inspection has been booked
10.1 Feedback submission history
How it works
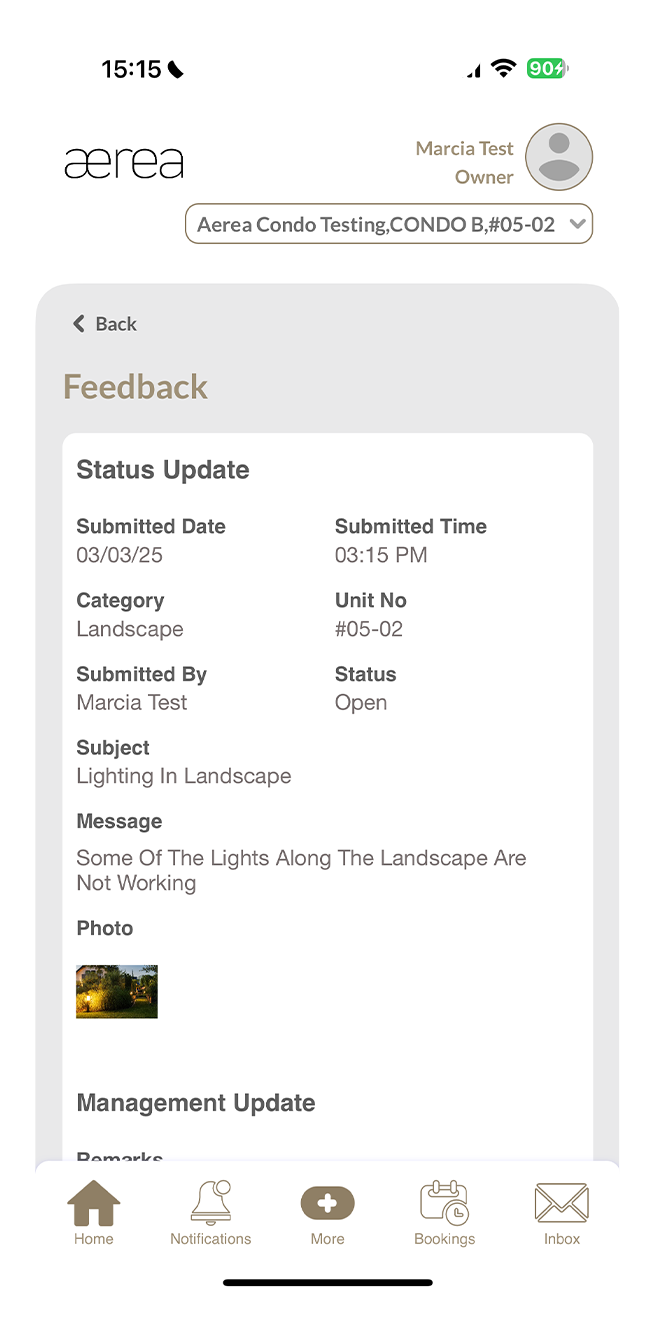
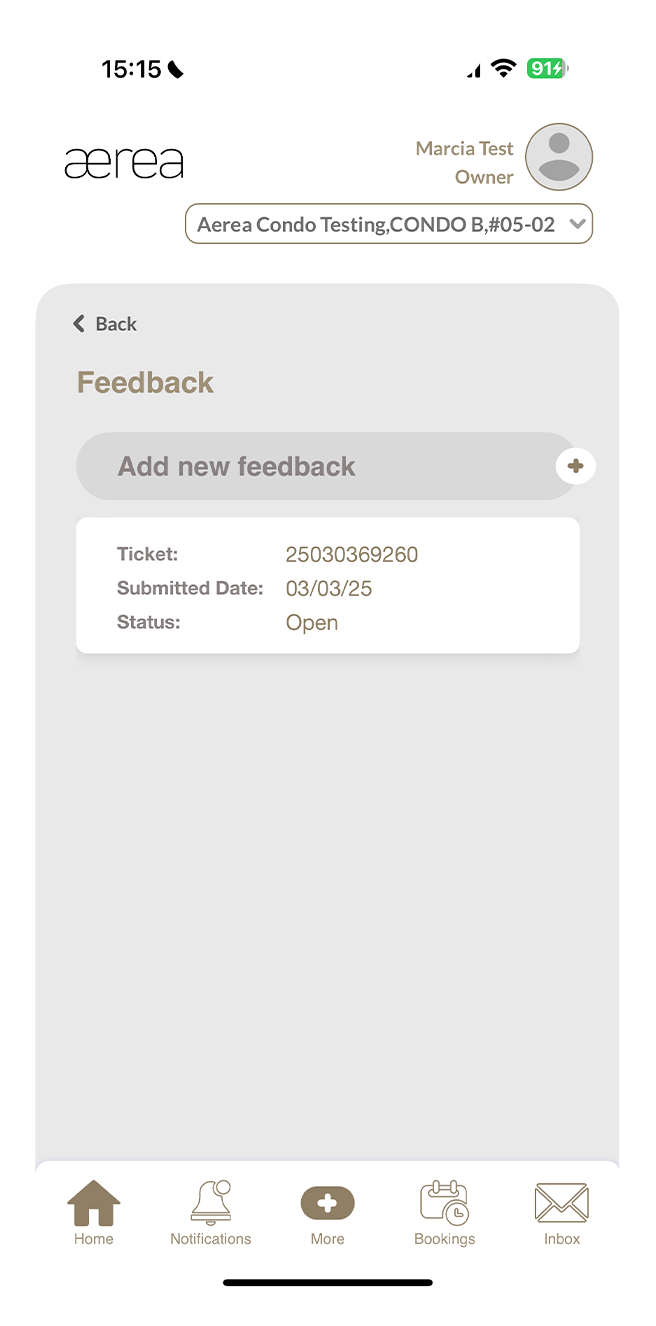
Step 1
Go to the Feedback section to see your submission history.
Step 2
Tap on any item in the list to view its details.
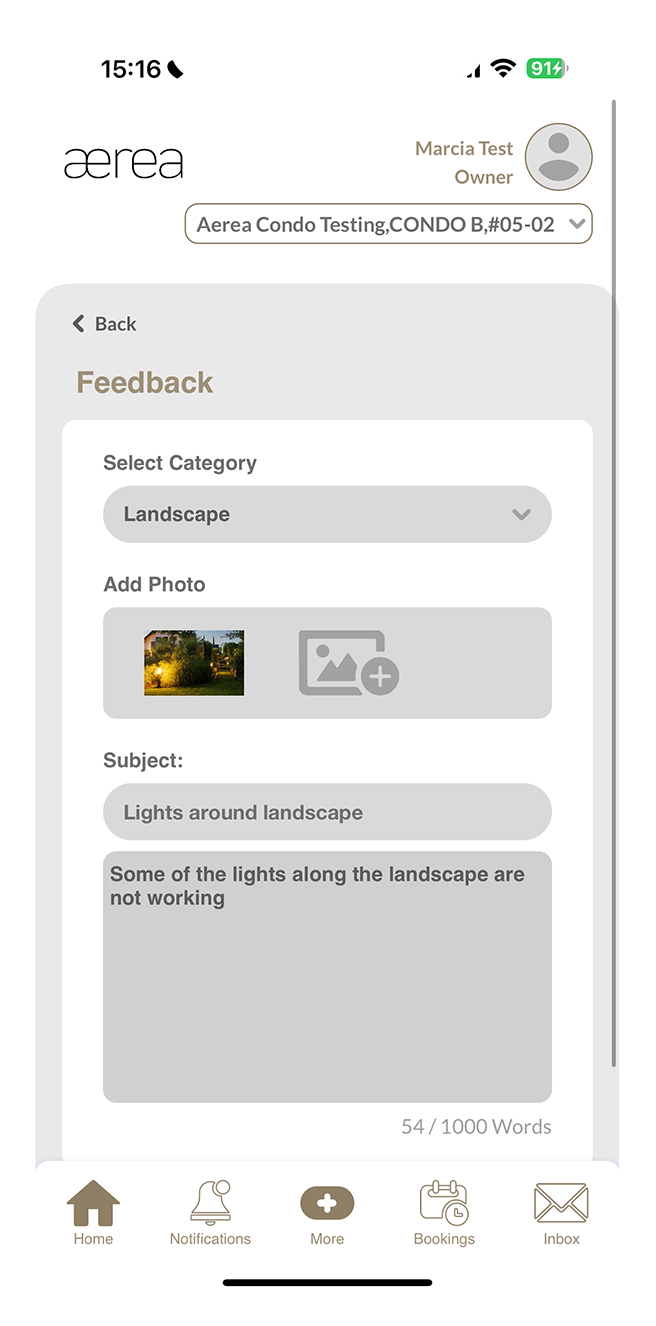
10.2 Submitting a new feedback
How it works
Step 1
Tap on the ‘+’ button above the feedback submission history list.
Step 2
Select the feedback category, add photos (optional; maximum of 2), type the subject and description, then tap Submit.
Step 3
A confirmation page will appear once your submission has been successfully submitted.
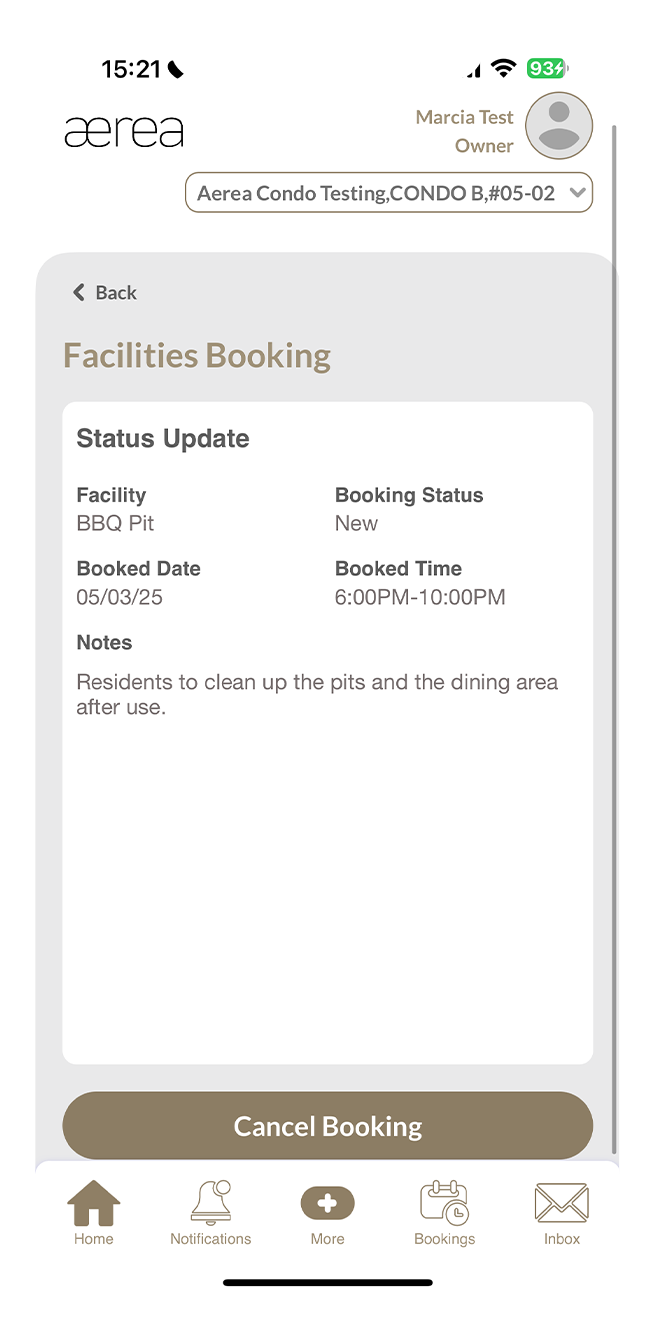
11.1 Bookings history
How it works
Step 1
Go to the Facilities Booking section to see your booking history.
Step 2
Tap on any item in the list to view its details.
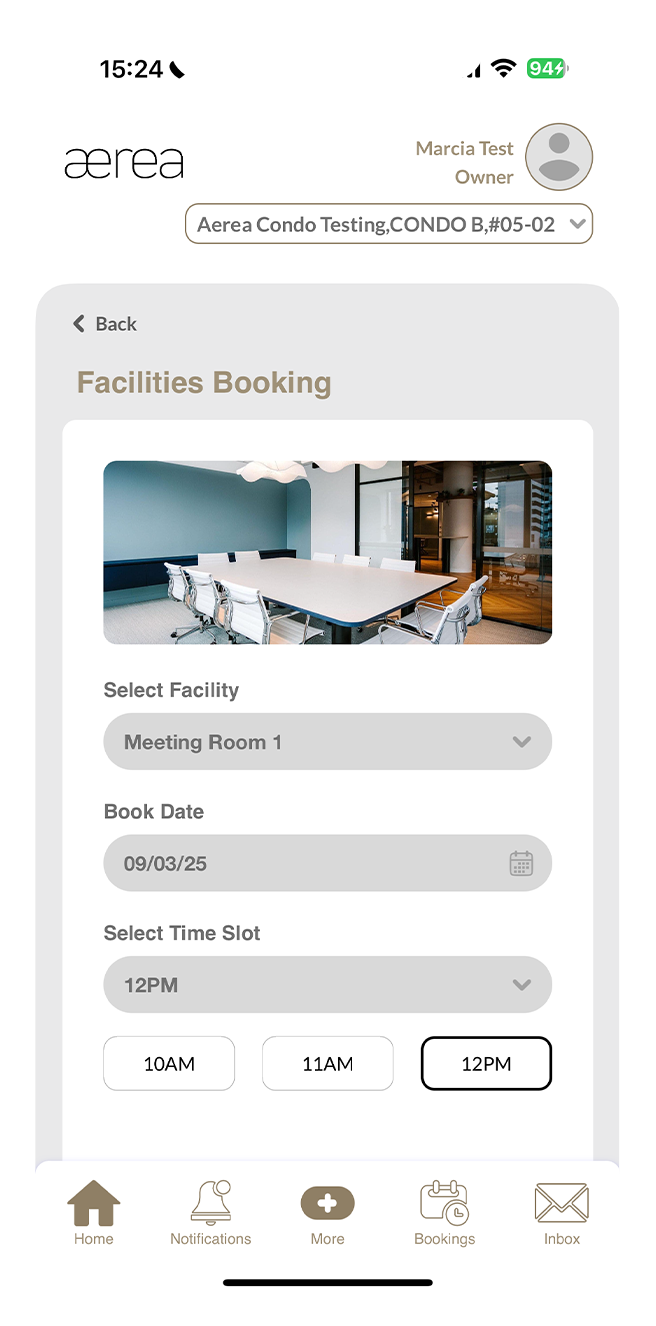
11.2 Submitting a new facility booking
How it works
Step 1
Tap on the '+' button located above the list of facility booking history.
Step 2
Choose the facility, select the booking date and time slot, and then tap on Submit.
Step 3
Once your booking is successfully submitted, you'll see a confirmation page.
12.1 E-forms
How it works
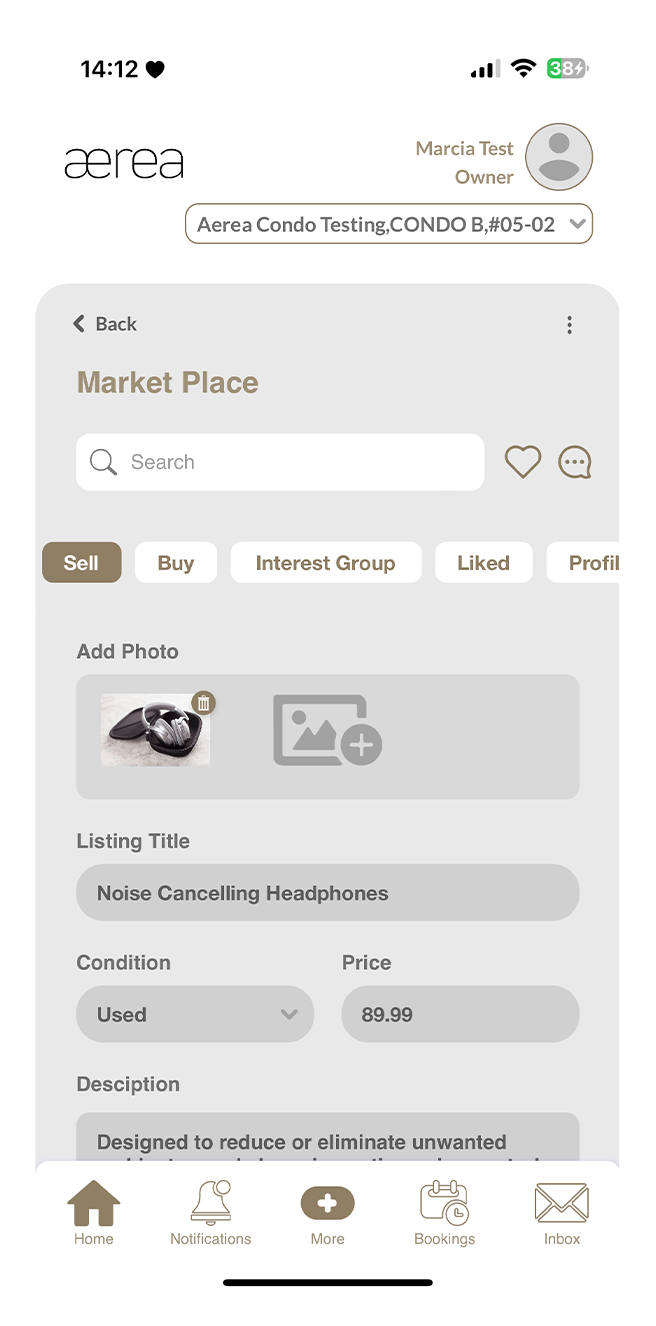
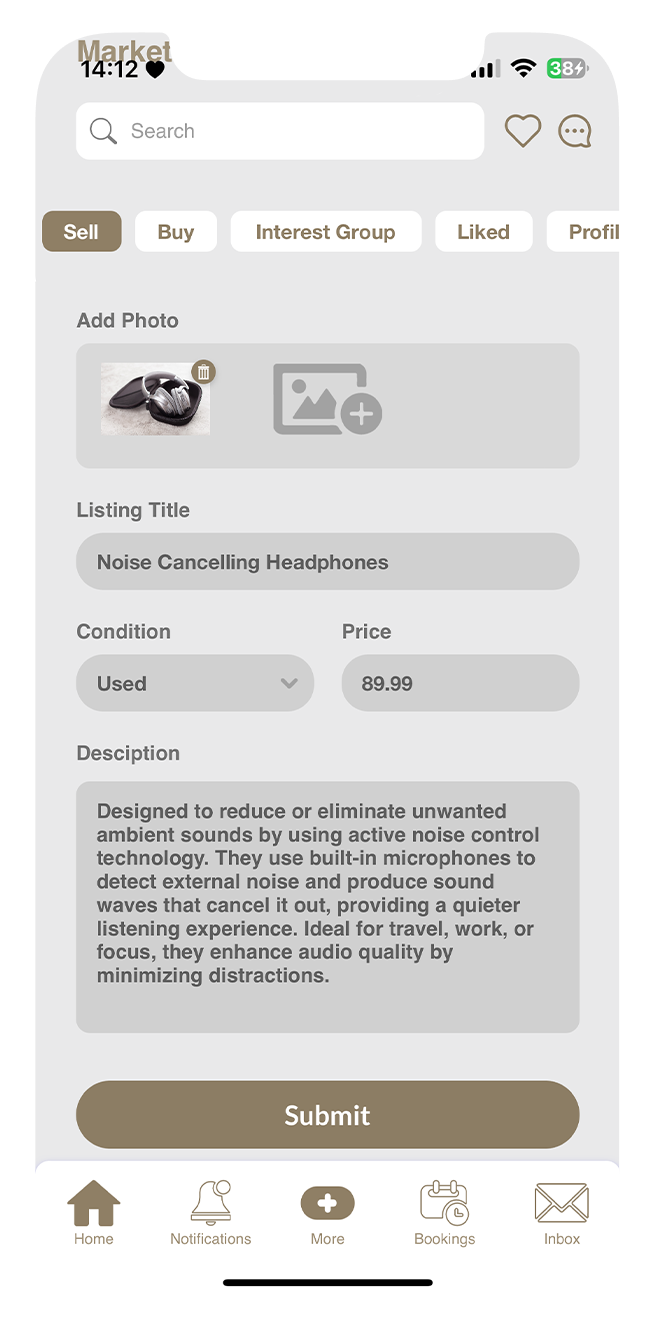
Step 1
Open the Marketplace in the AEREA Home app and go to the 'Sell' tab.
Step 2
Add photos, a title, the item's condition, price, and a description, then tap Submit.
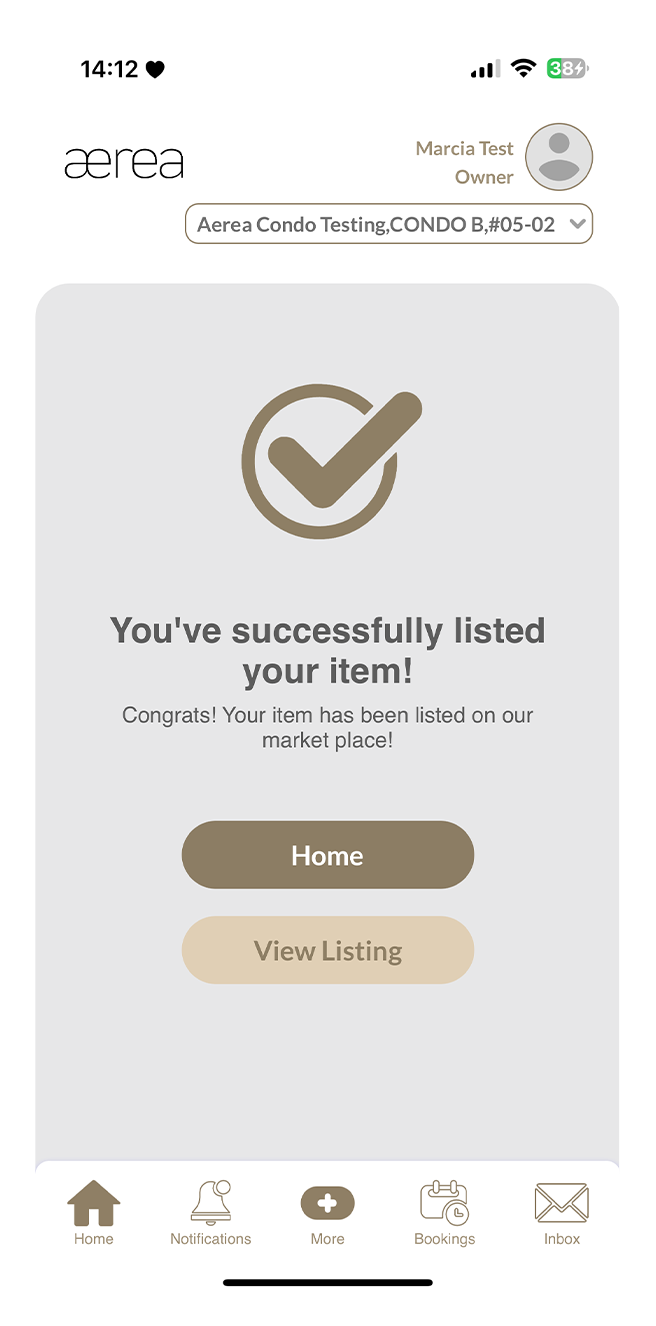
Step 3
You'll receive a confirmation once your listing is successfully added to the Marketplace.
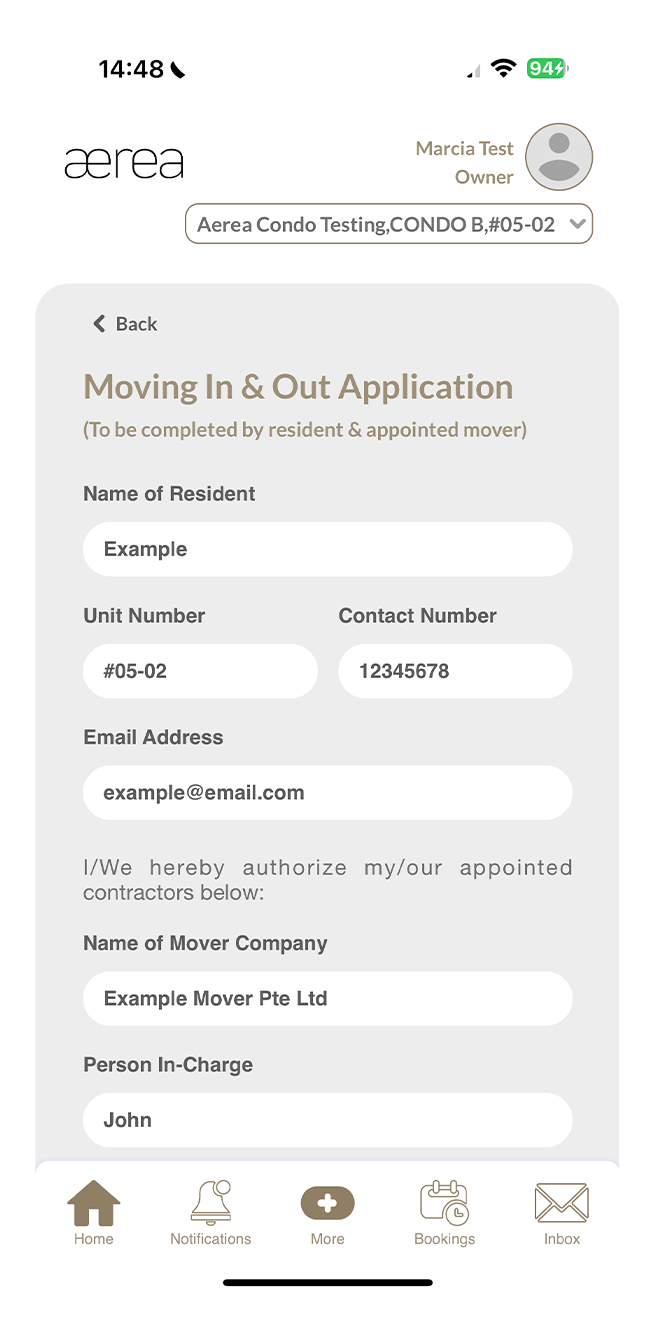
12.2 Moving in & out application
How it works
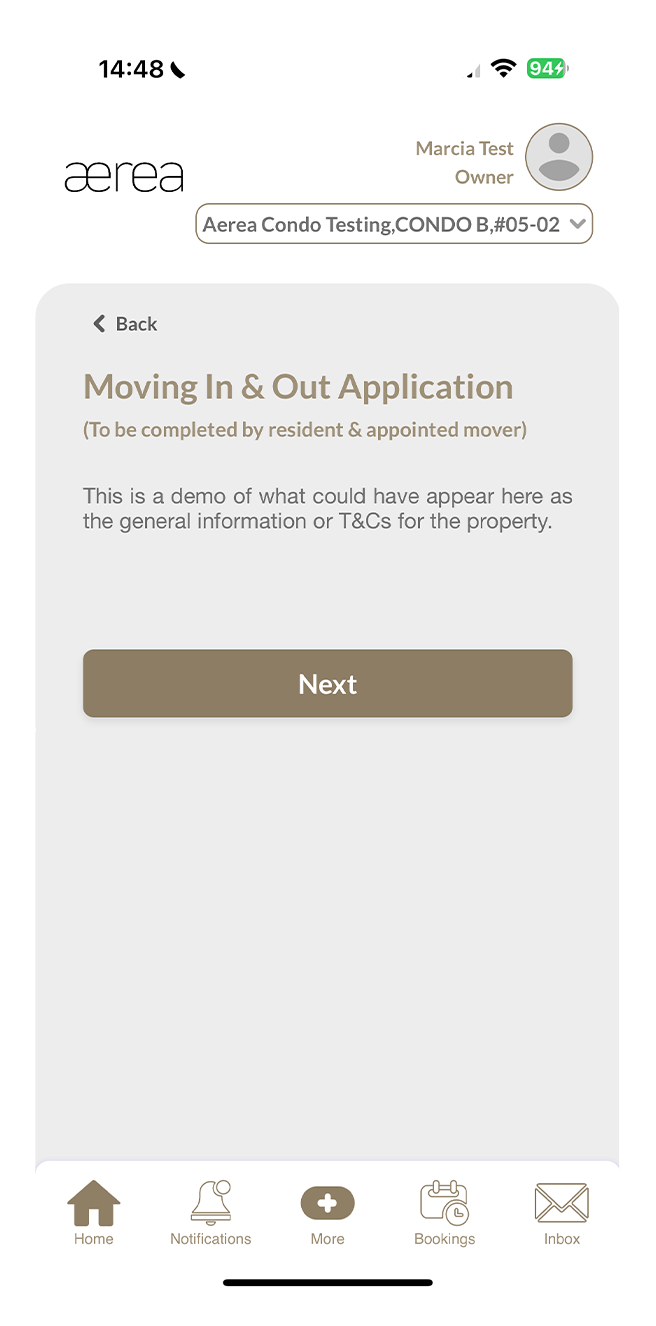
Step 1
As you begin filling out the Moving In & Out Application e-form, you'll encounter an agreement; be sure to read it carefully before proceeding by tapping on Next.
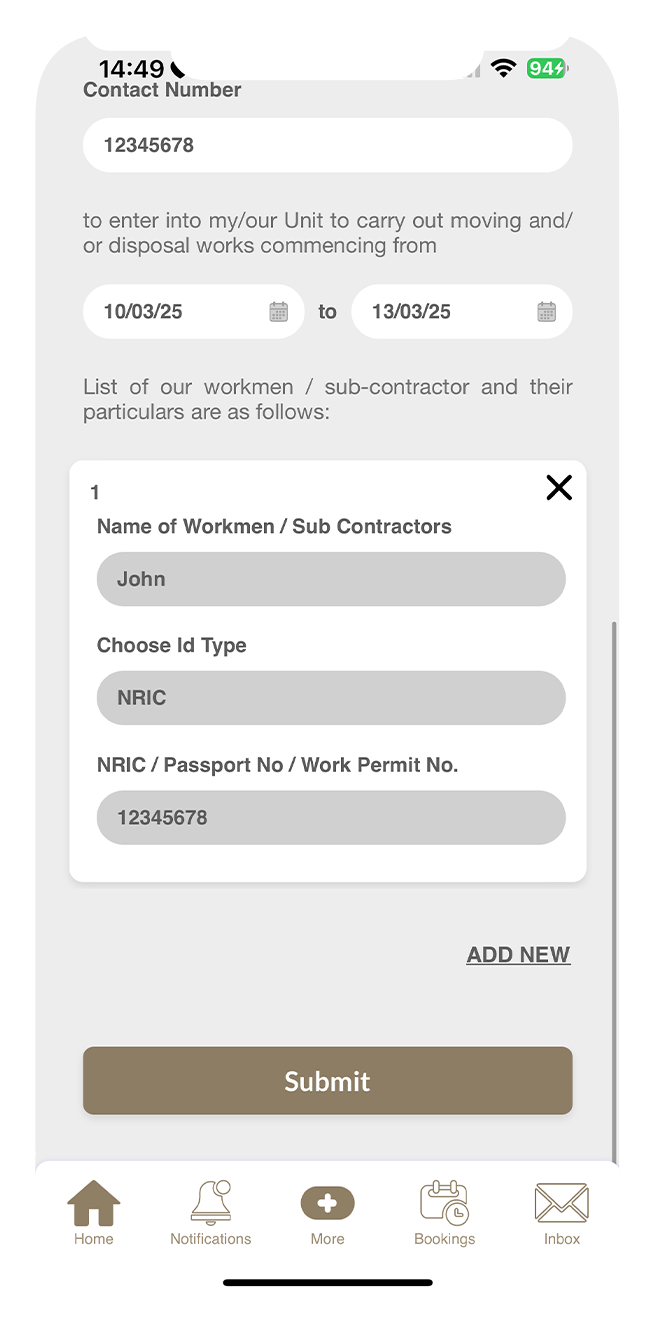
Step 2
Fill in the required information in each field of the form.
Step 3
Once finished, tap on the Submit button.
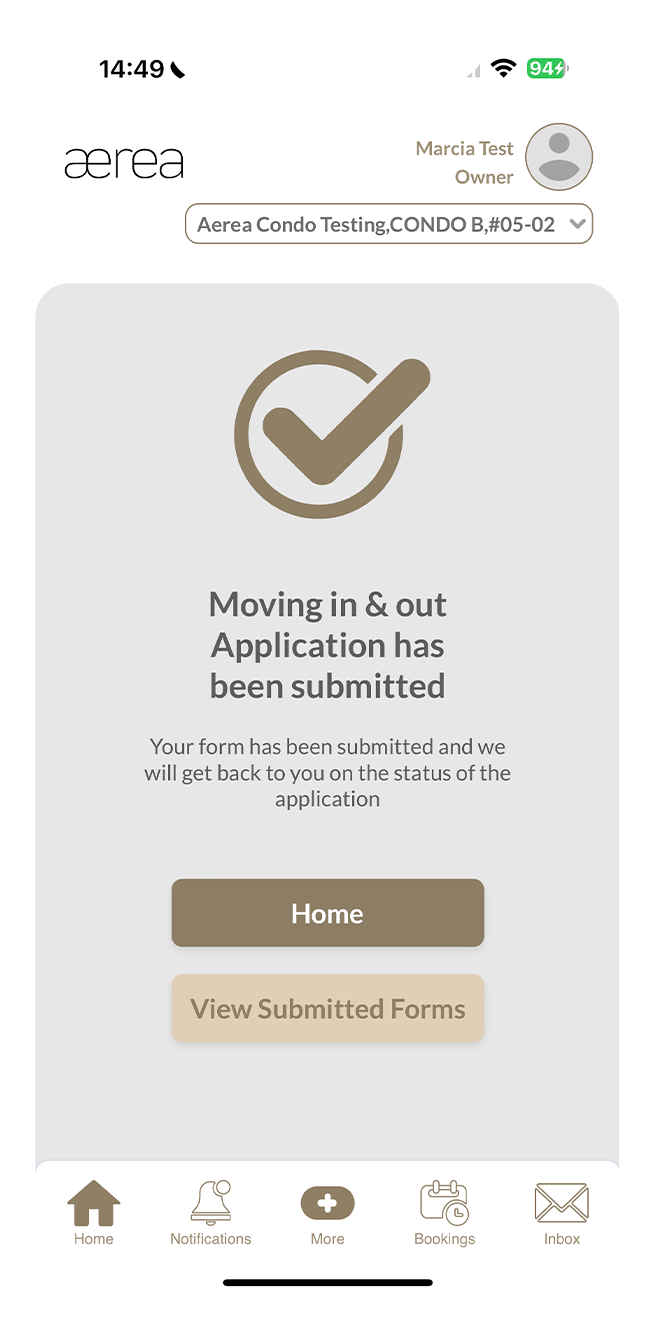
Step 4
A confirmation screen will appear to indicate successful submission of your e-form.
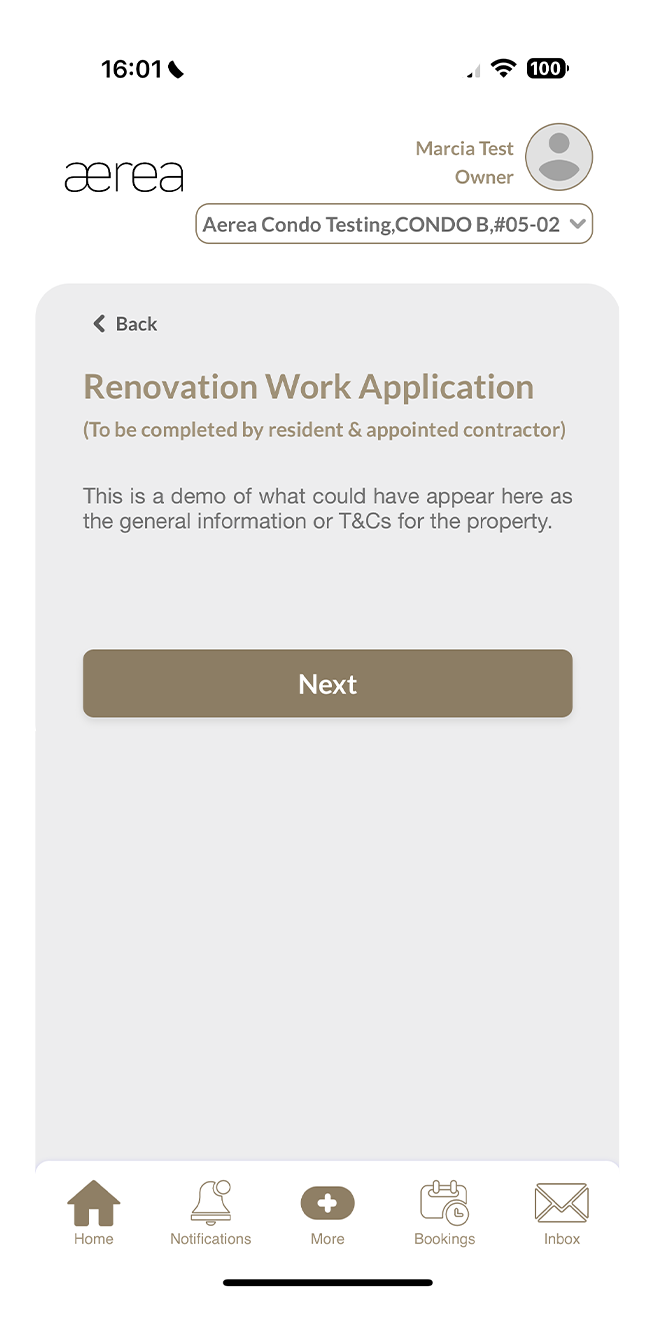
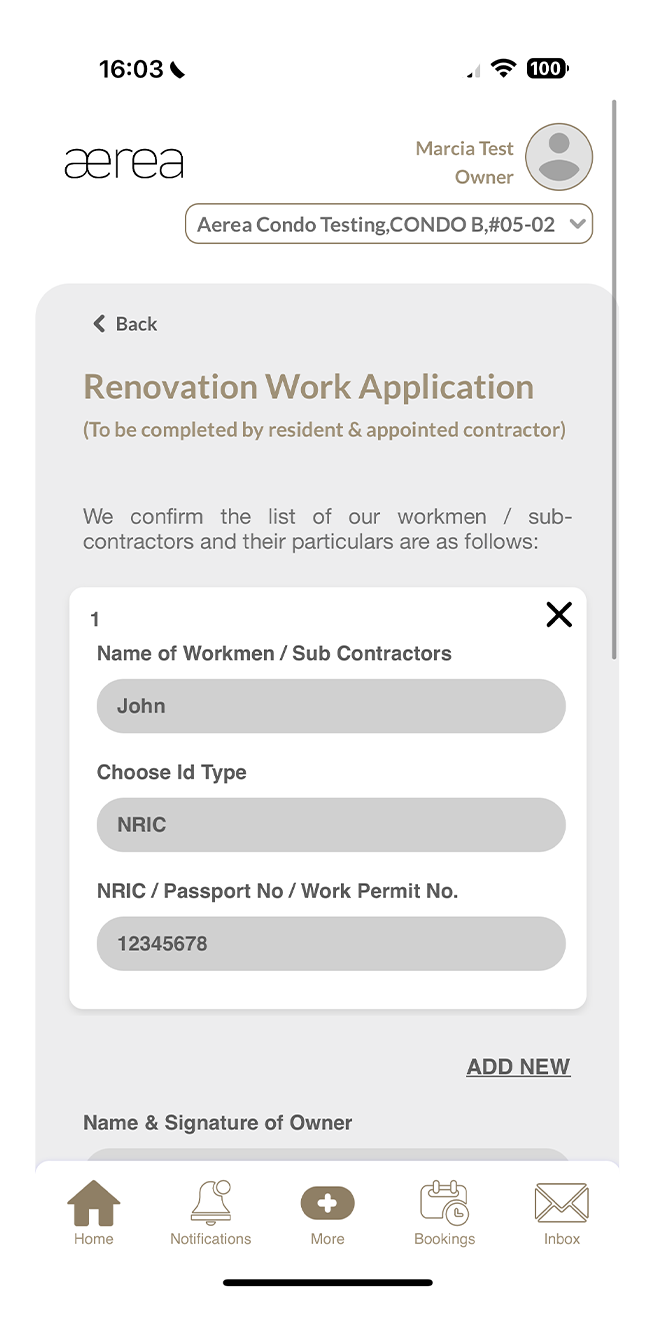
12.3 Renovation work application
How it works
Step 1
As you begin filling out the Renovation Work Application e-form, you'll encounter an agreement; be sure to read it carefully before proceeding by tapping on Next.
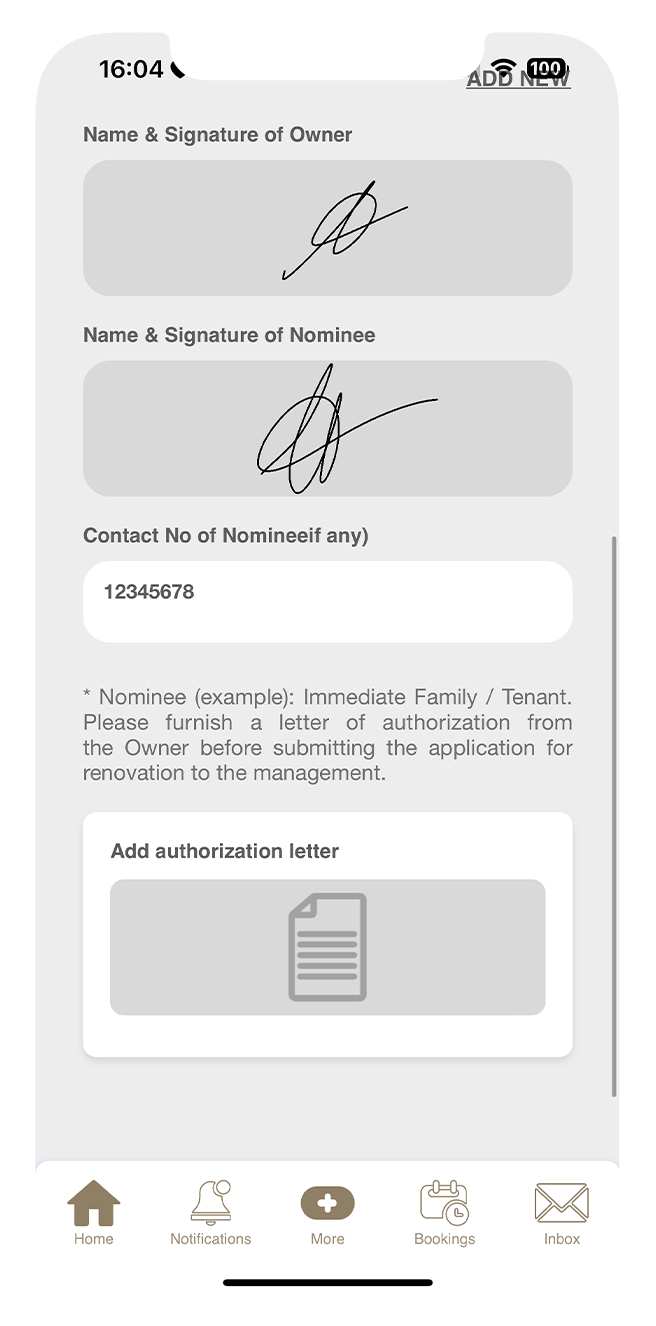
Step 2
Fill in the required information in each field of the form.
Step 3
Once finished, tap on the Submit button.
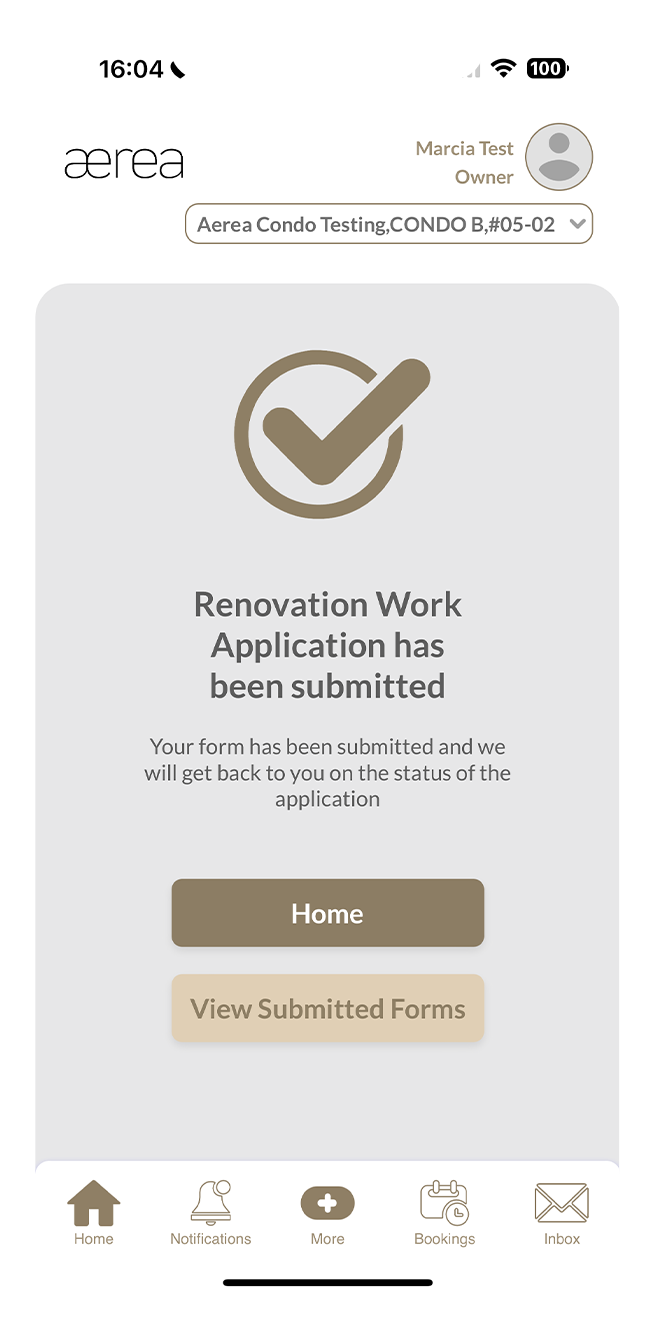
Step 4
A confirmation screen will appear to indicate successful submission of your e-form.
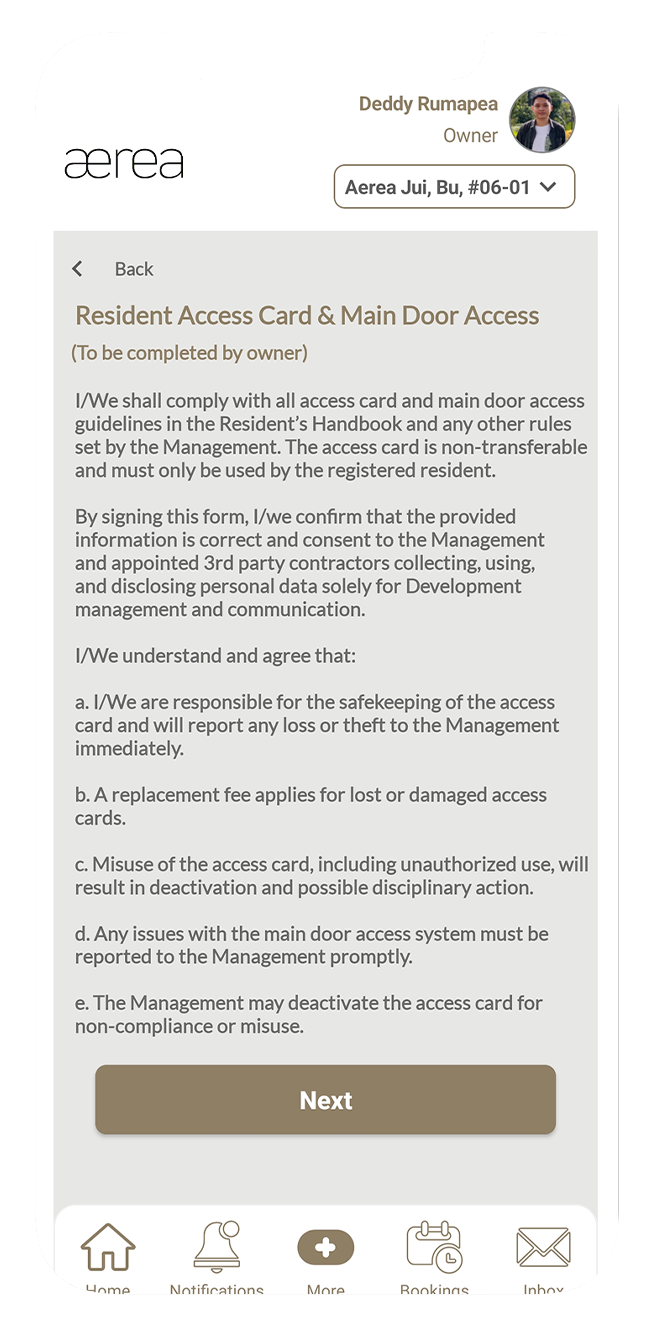
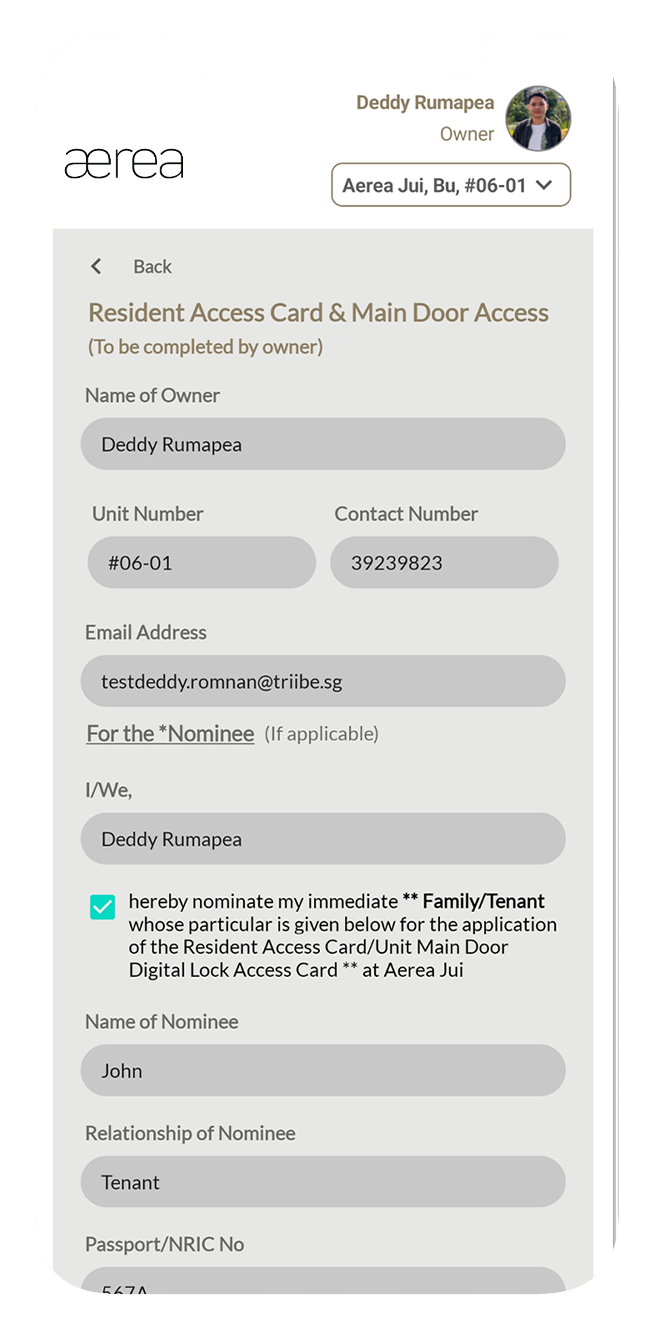
12.4 Resident access card & main door access
How it works
Step 1
Read the agreement carefully, then tap Next to proceed.
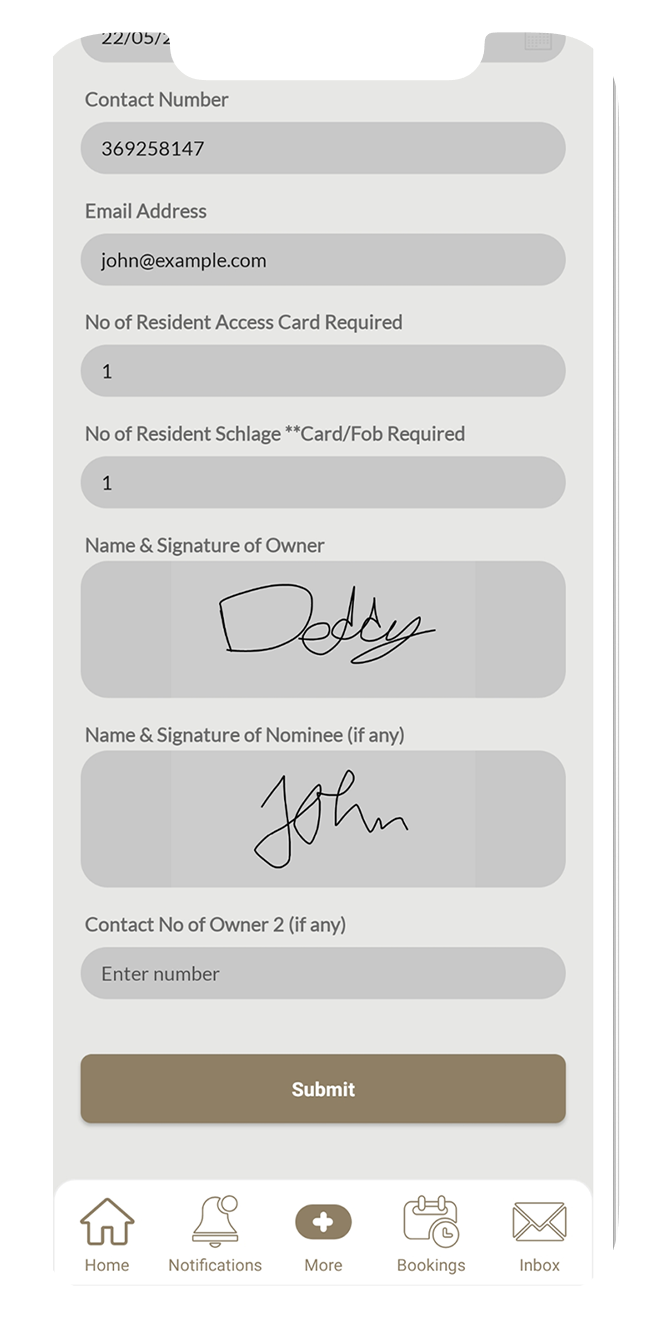
Step 2
Fill in the required information in each field of the form.
Step 3
Once finished, tap on the Submit button.
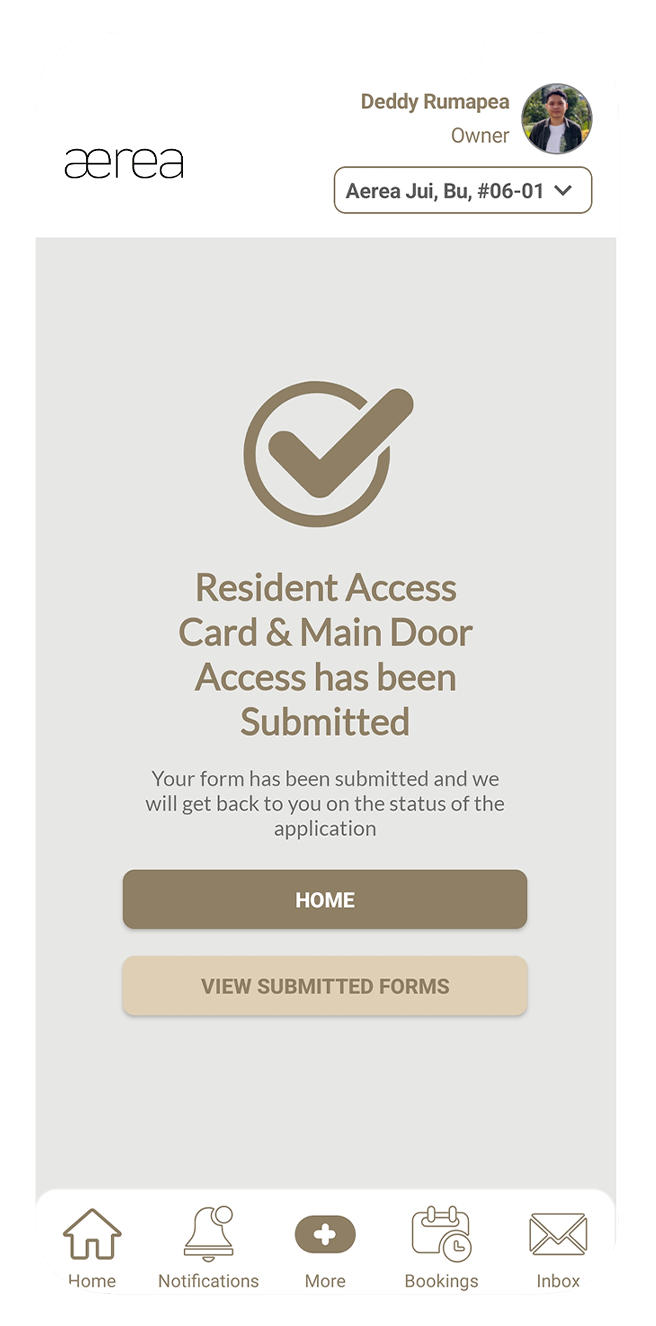
Step 4
A confirmation screen will appear to indicate successful submission.
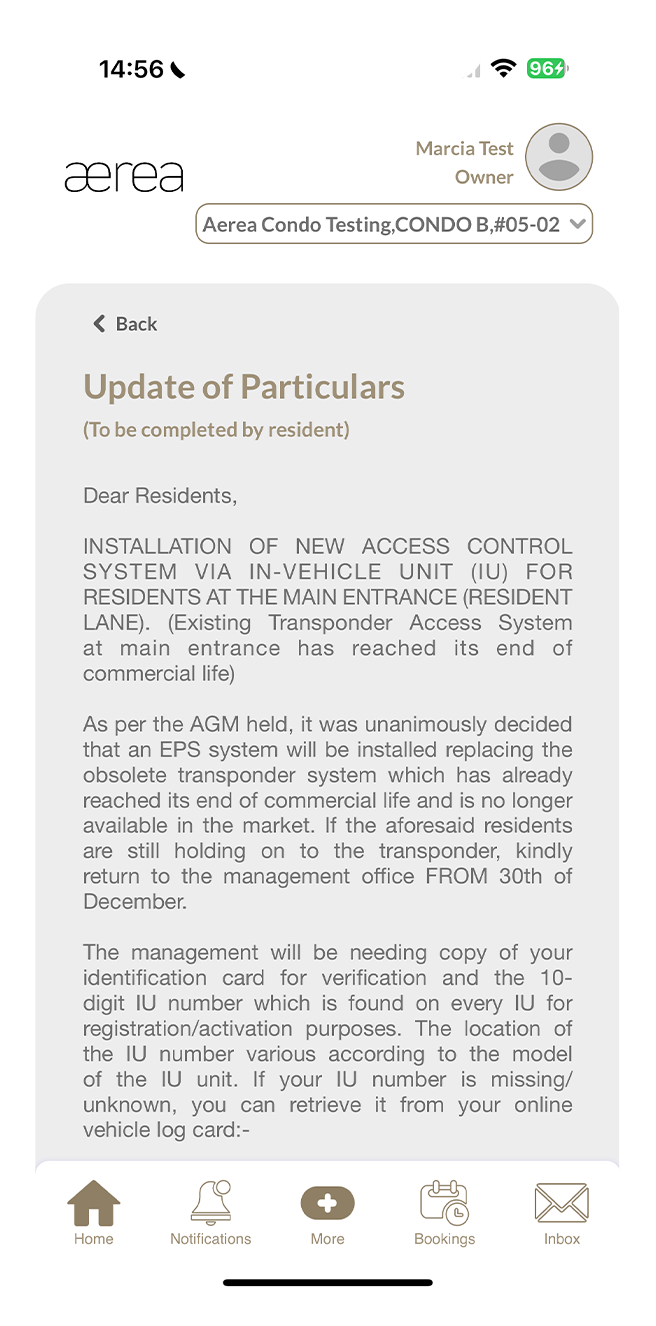
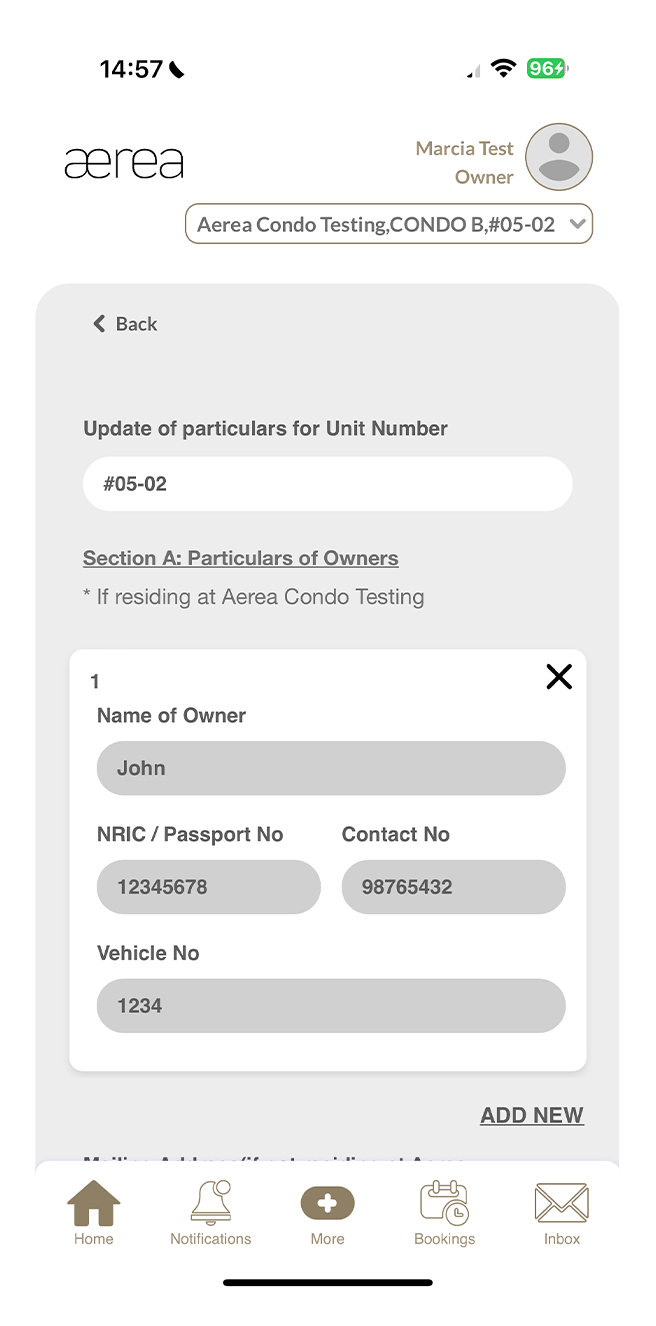
12.5 Update of particulars
How it works
Step 1
As you begin filling out the Update of Particulars e-form, you'll encounter an agreement; be sure to read it carefully before proceeding by tapping on Next.
Step 2
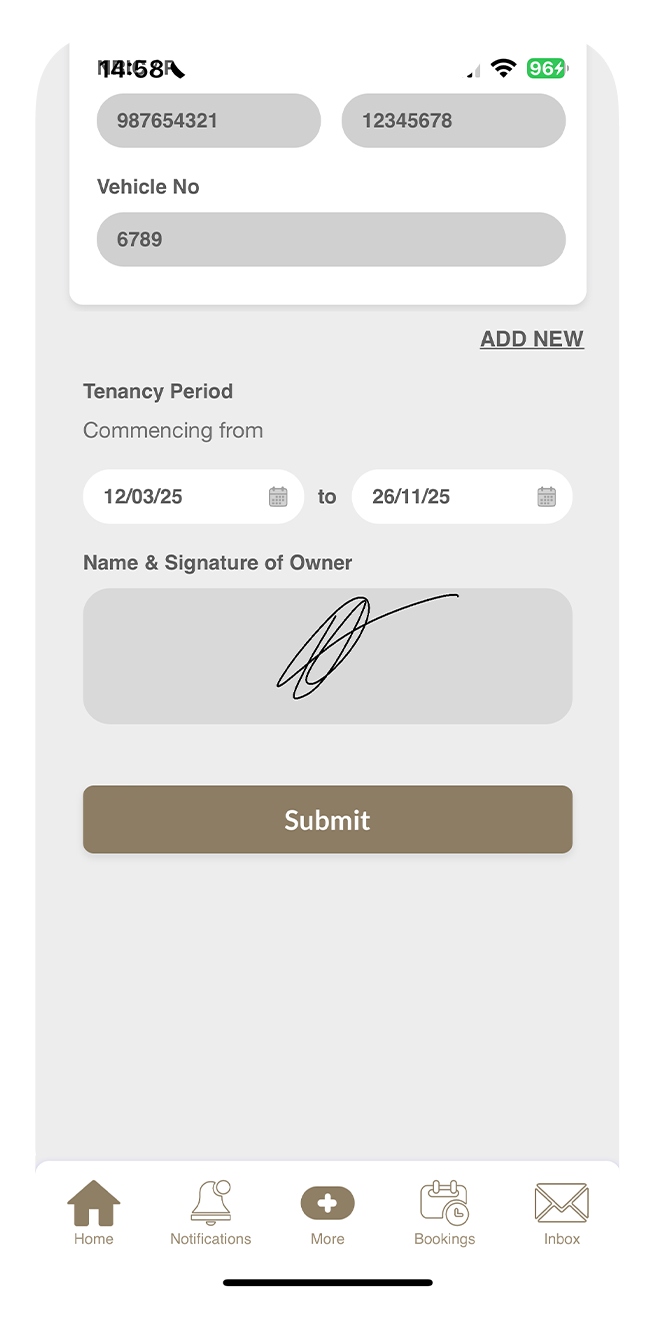
Fill in the required information in each field of the form.
Step 3
Once finished, tap on the Submit button.
Step 4
A confirmation screen will appear to indicate successful submission of your e-form.
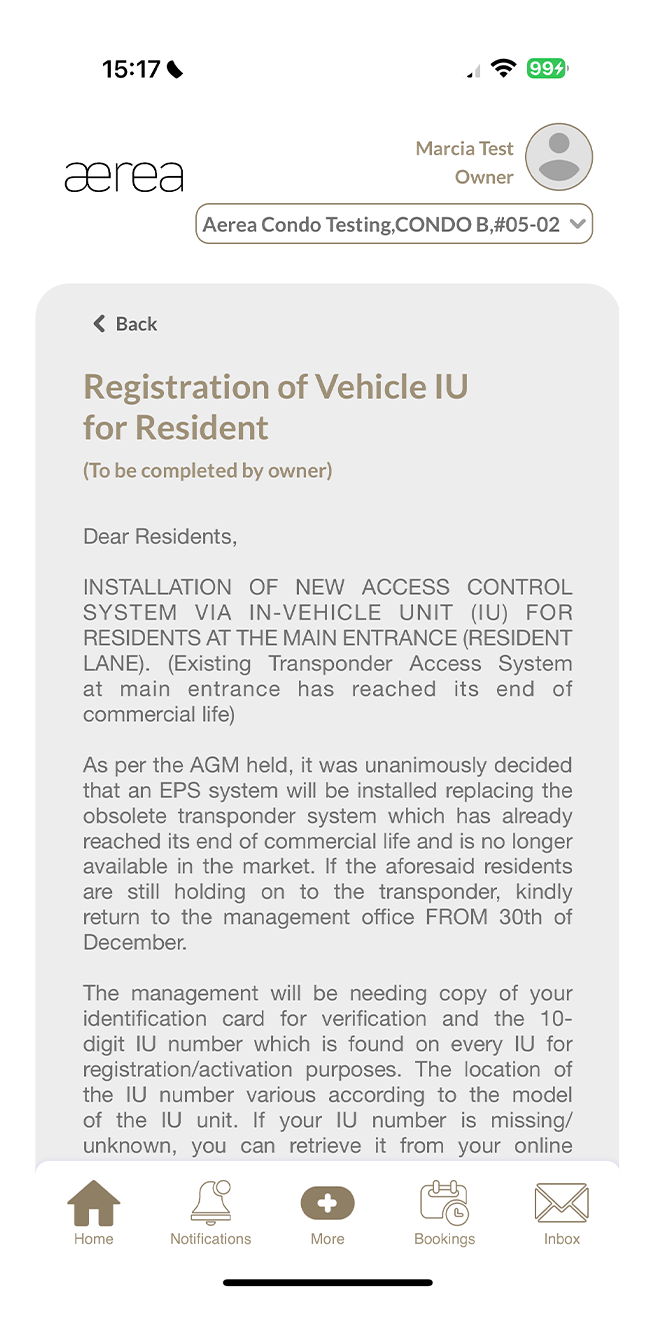
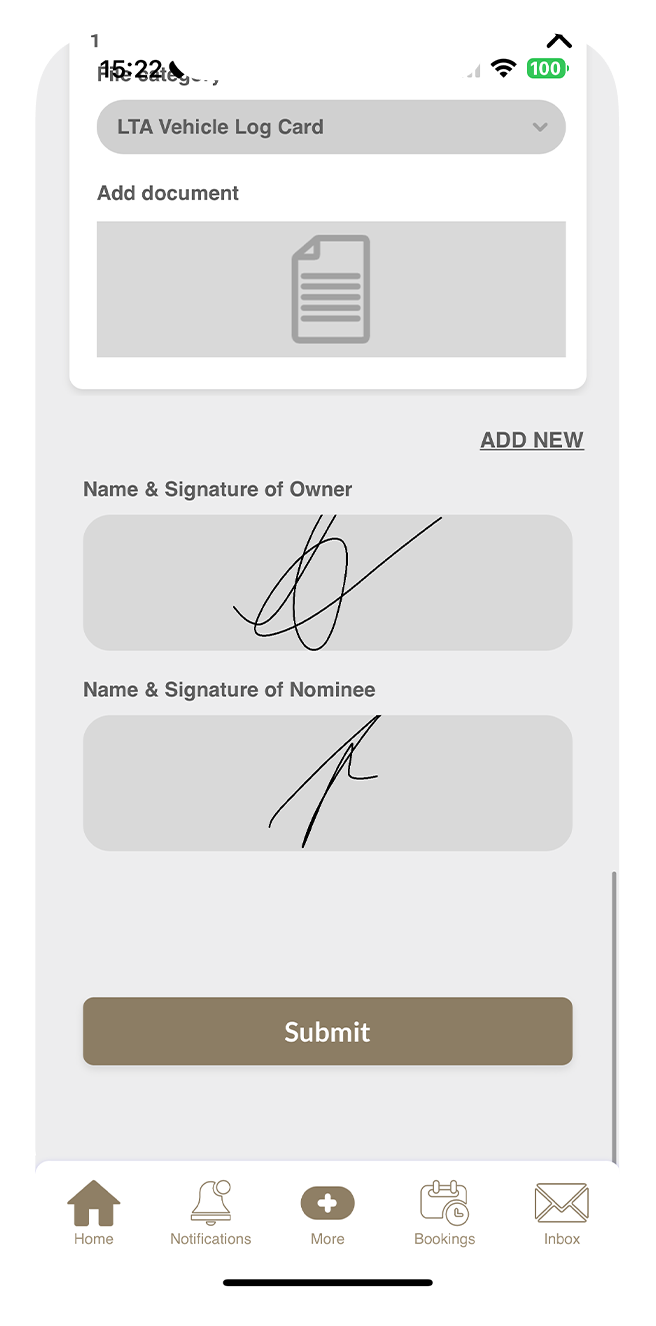
12.6 Registration of vehicle IU for residents
How it works
Step 1
As you begin filling out the Registration of Vehicle IU for Residents e-form, you'll encounter an agreement; be sure to read it carefully before proceeding by tapping on Next.
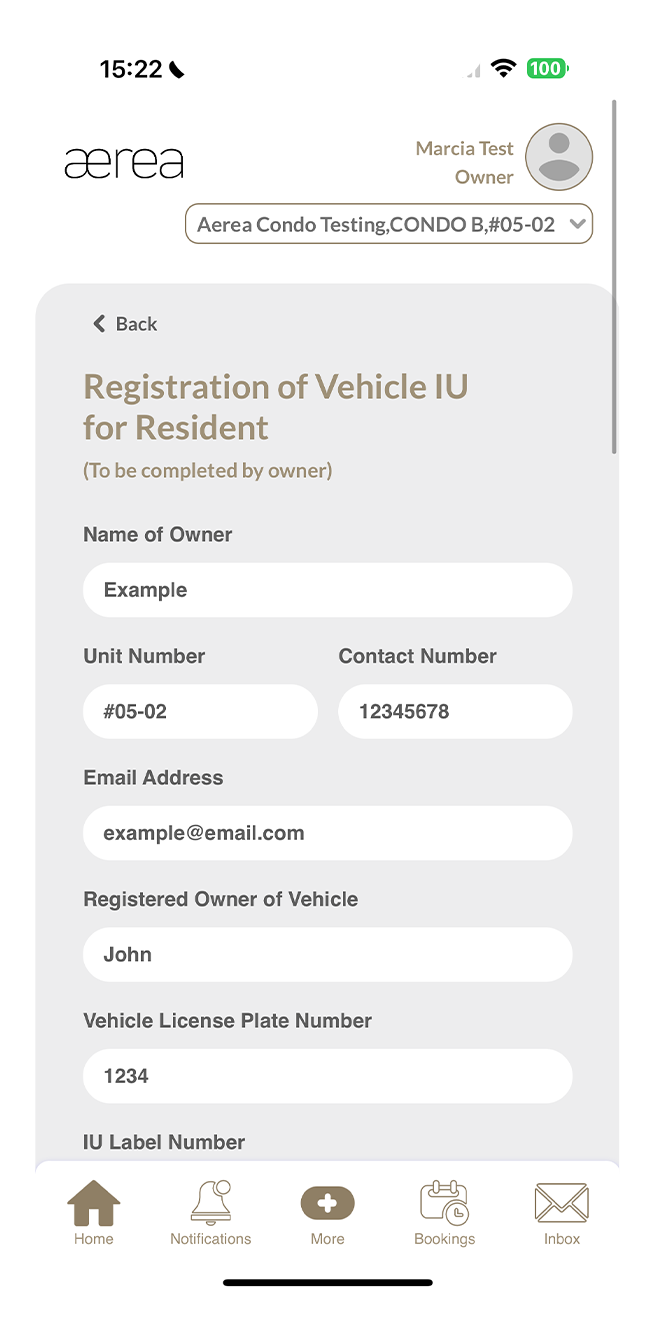
Step 2
Fill in the required information in each field of the form.
Step 3
Once finished, tap on the Submit button.
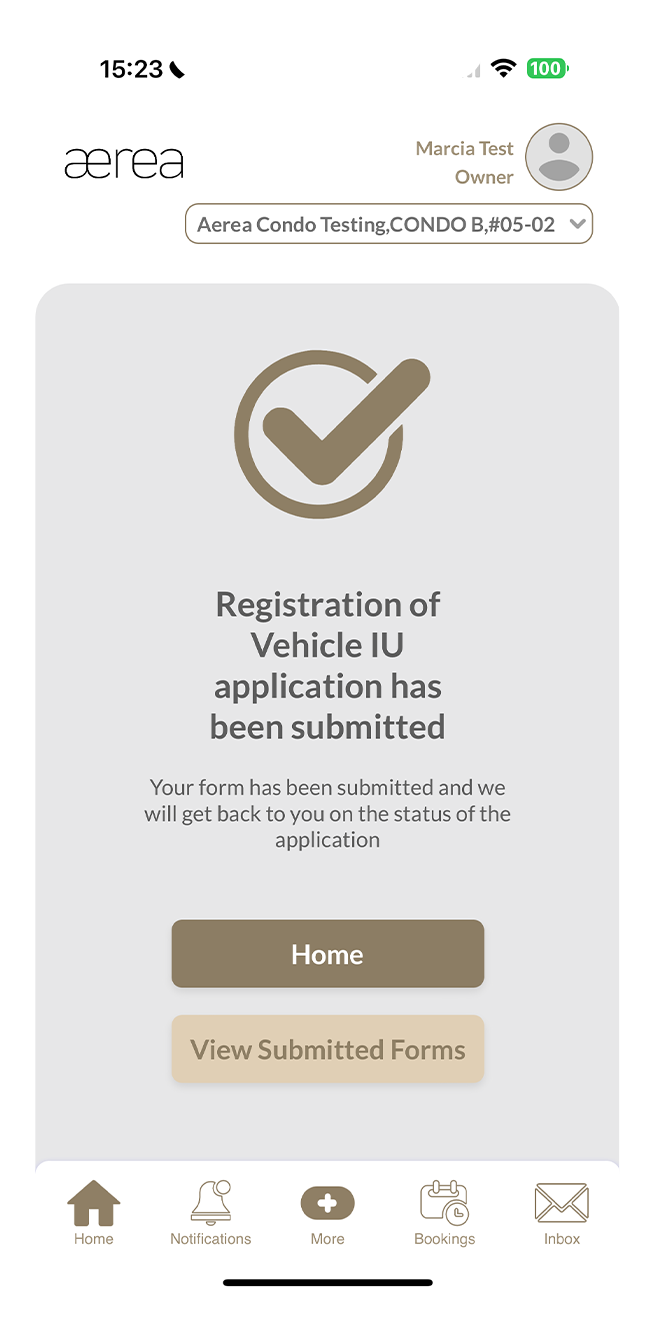
Step 4
A confirmation screen will appear to indicate successful submission of your e-form.
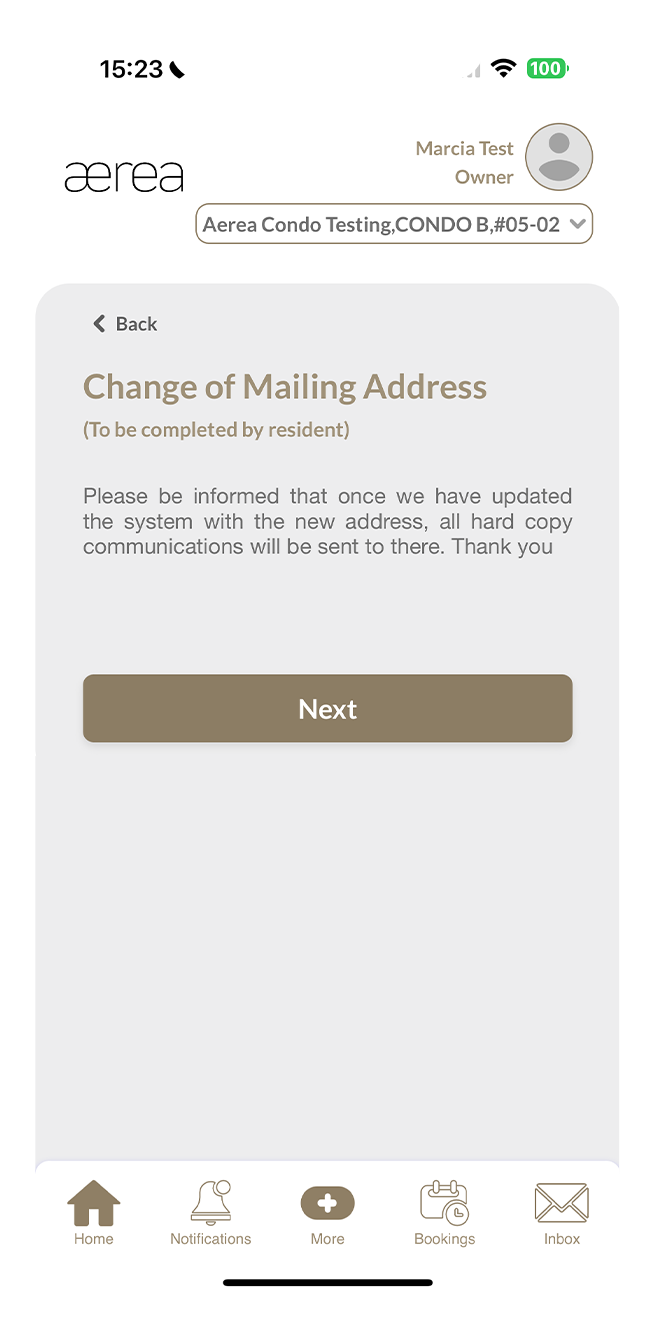
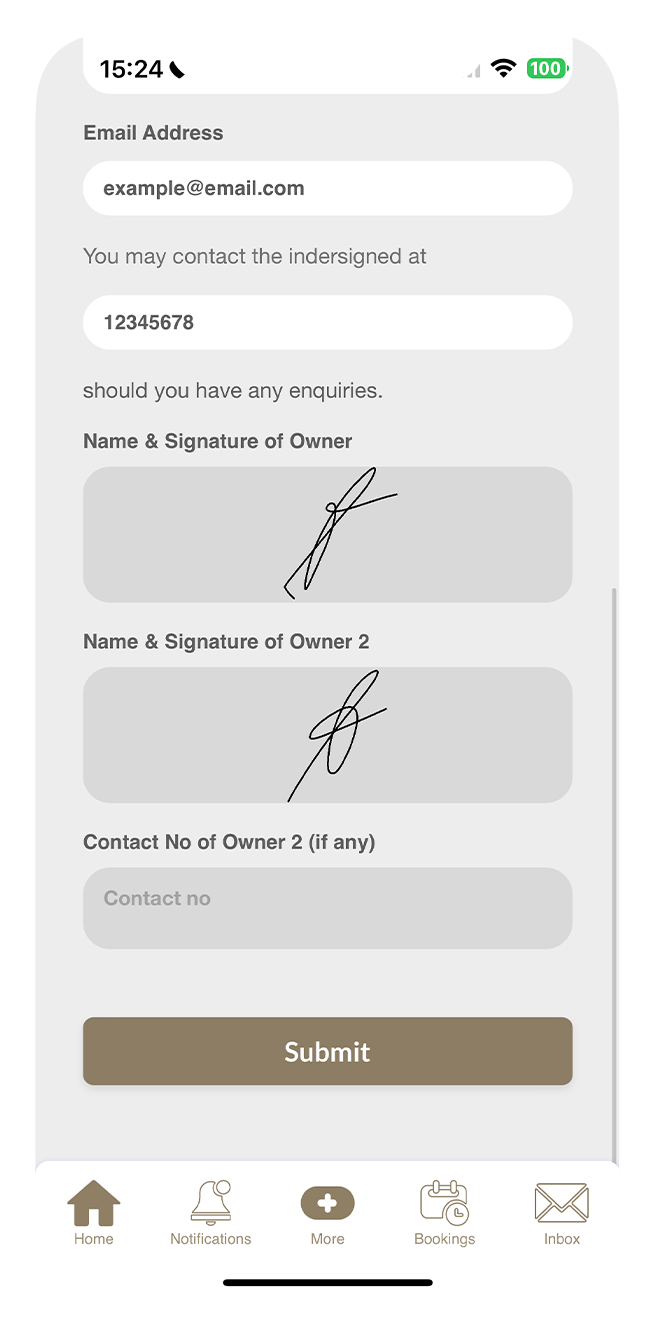
12.7 Change of mailing address
How it works
Step 1
As you begin filling out the Change of Mailing Address e-form, you'll encounter an agreement; be sure to read it carefully before proceeding by tapping on Next.
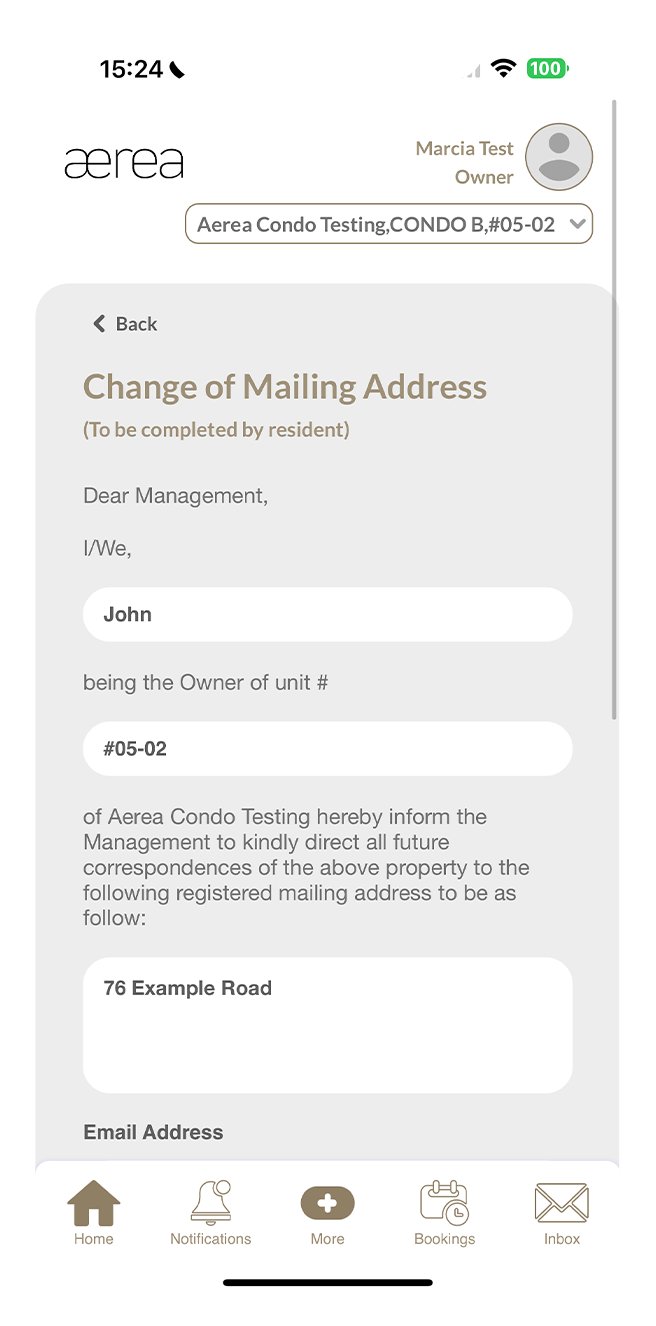
Step 2
Fill in the required information in each field of the form.
Step 3
Once finished, tap on the Submit button.
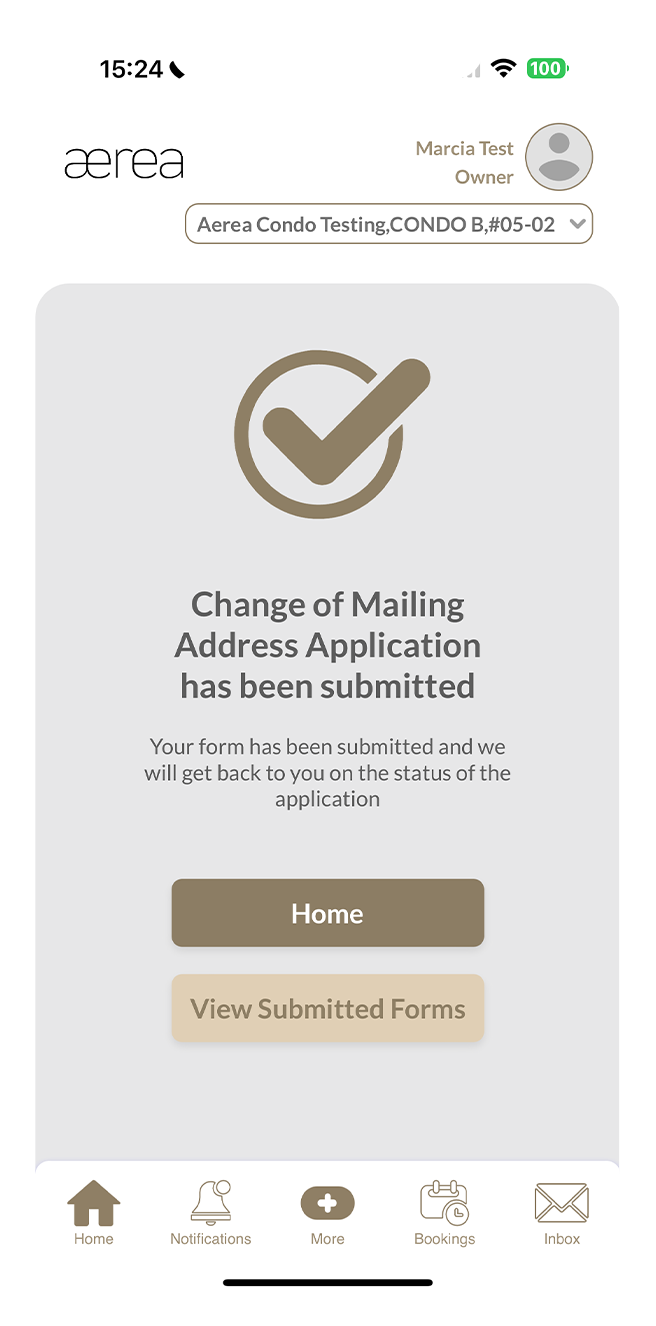
Step 4
A confirmation screen will appear to indicate successful submission of your e-form.
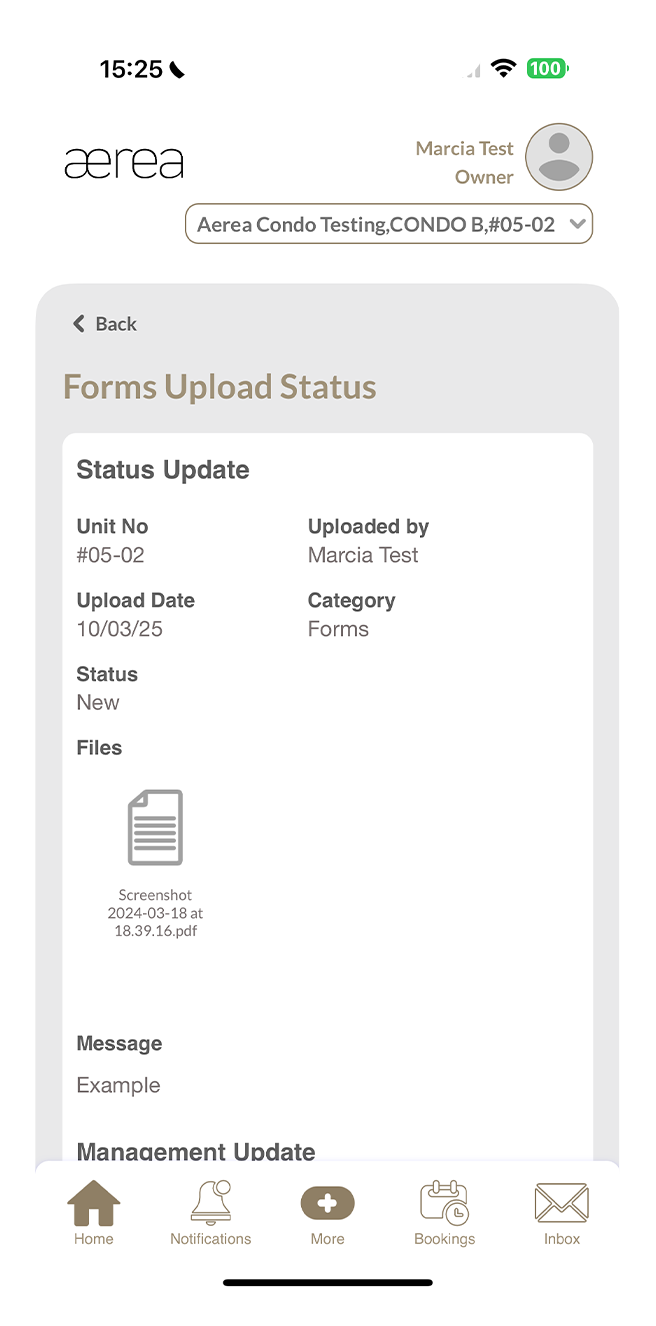
13.1 File Submissions
How it works
Step 1
When you go to Resident’s File Upload, you'll find your uploaded files history.
Step 2
Tap on any item in your uploaded files history list to view its details.
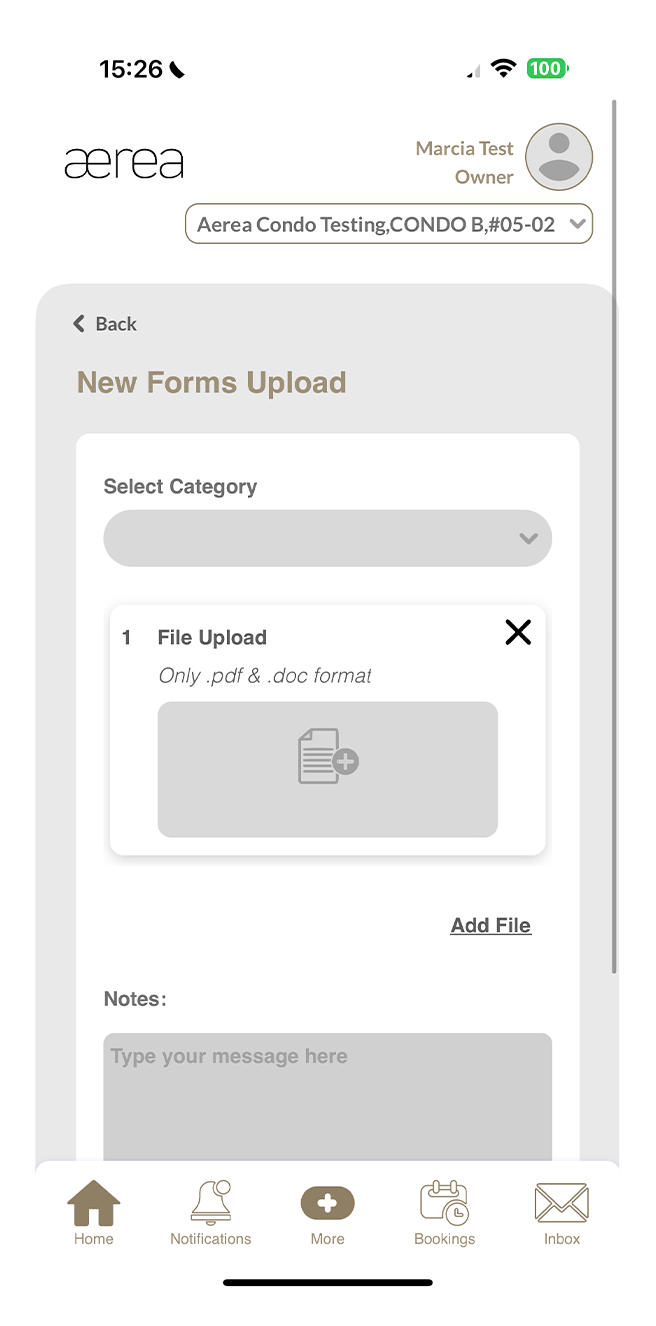
13.2 Uploading a new file
How it works
Step 1
Tap on the '+' button located above the list of uploaded file history.
Step 2
Choose the category, add your files, and write any necessary notes. Then, tap on the Submit button.
Step 3
You'll see a confirmation page once your submission has been successfully uploaded.
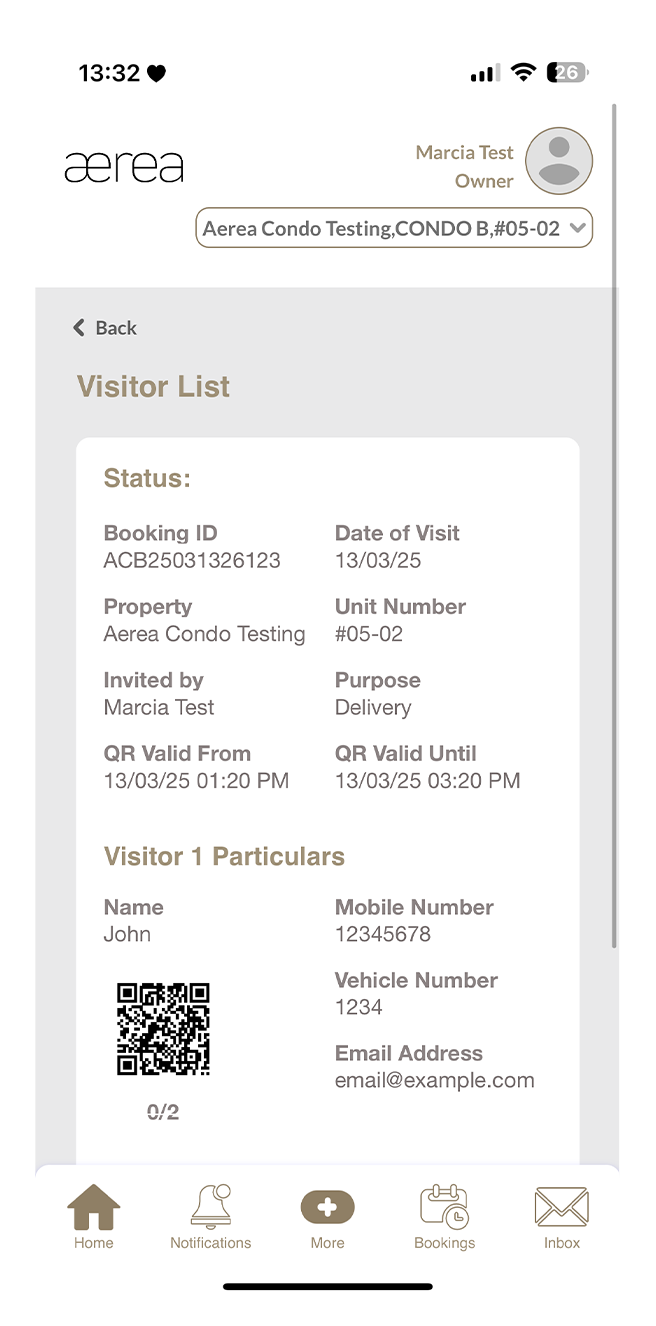
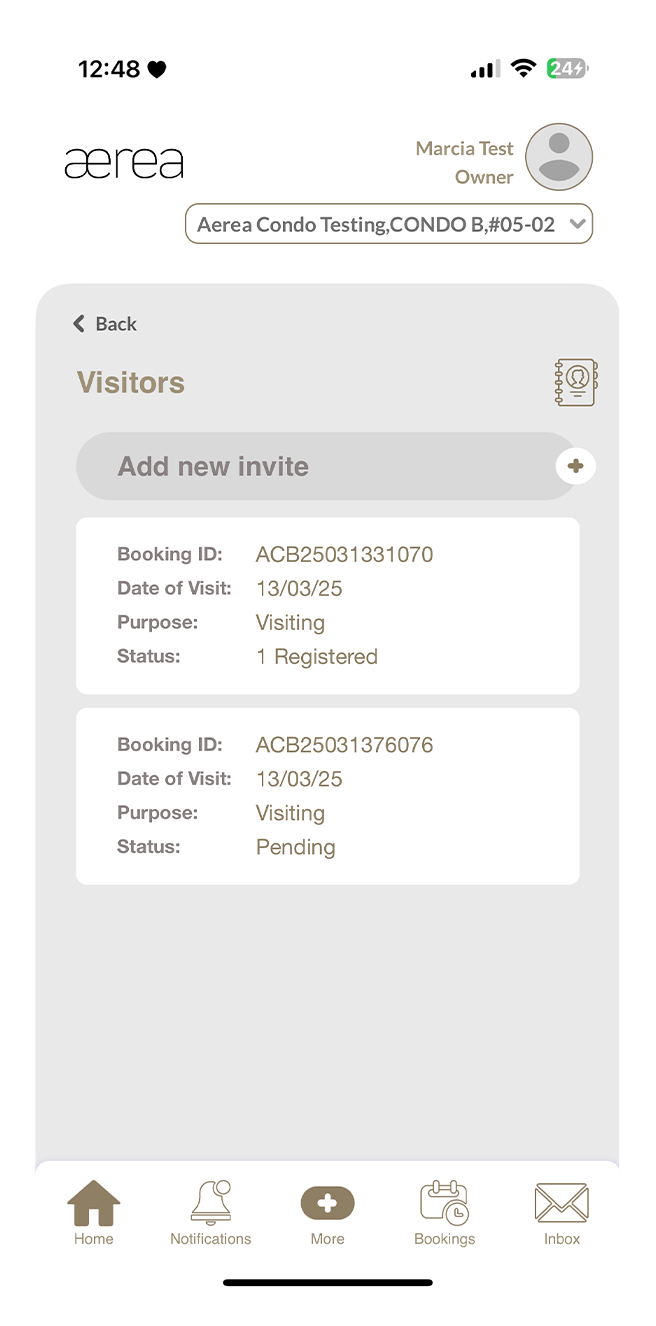
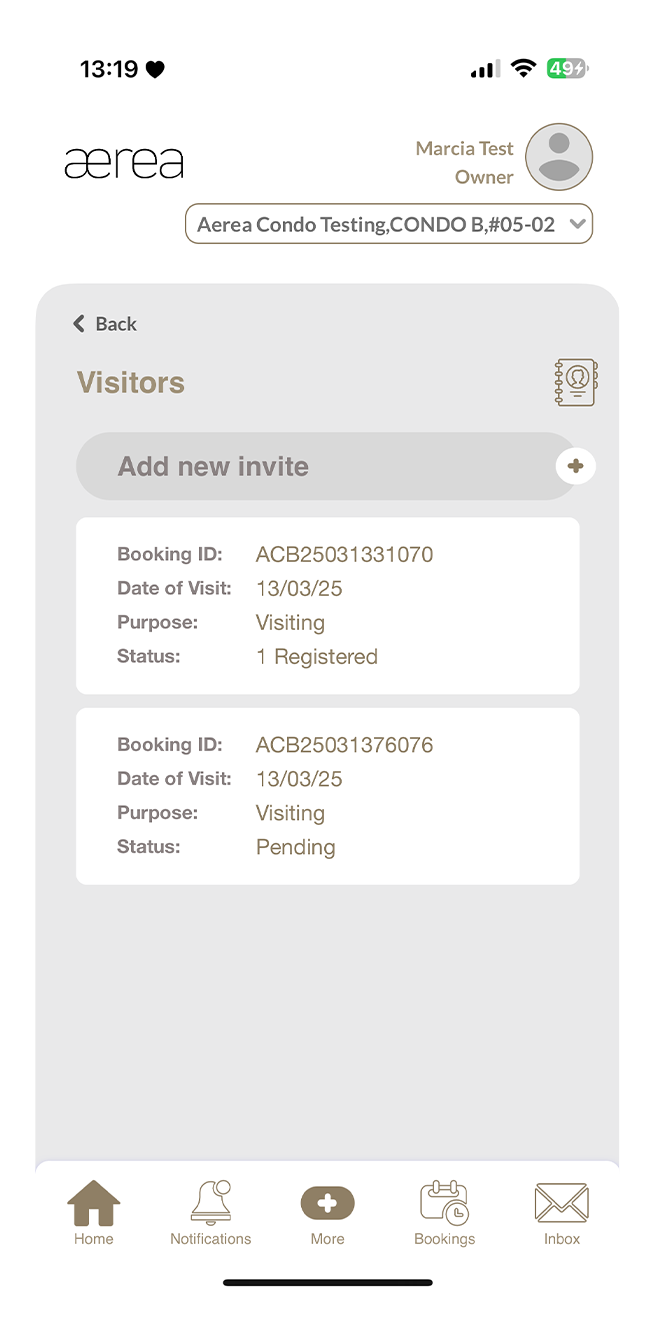
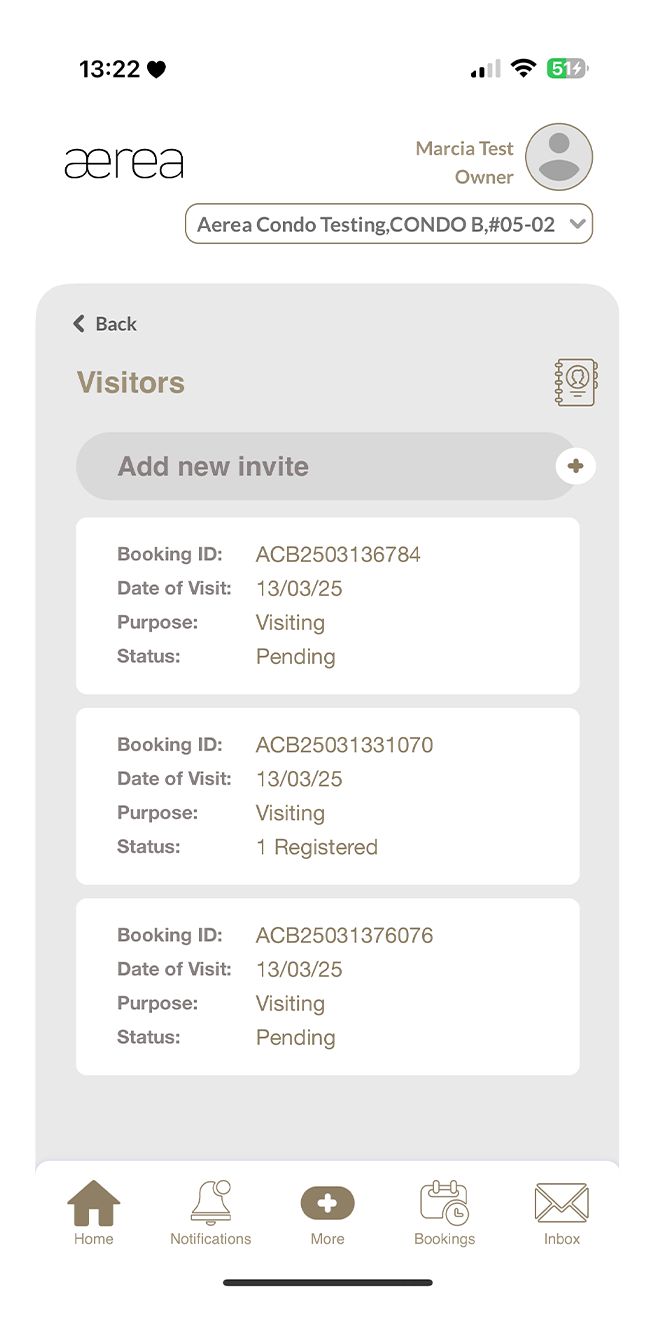
14.1 Visitor bookings
How it works
Step 1
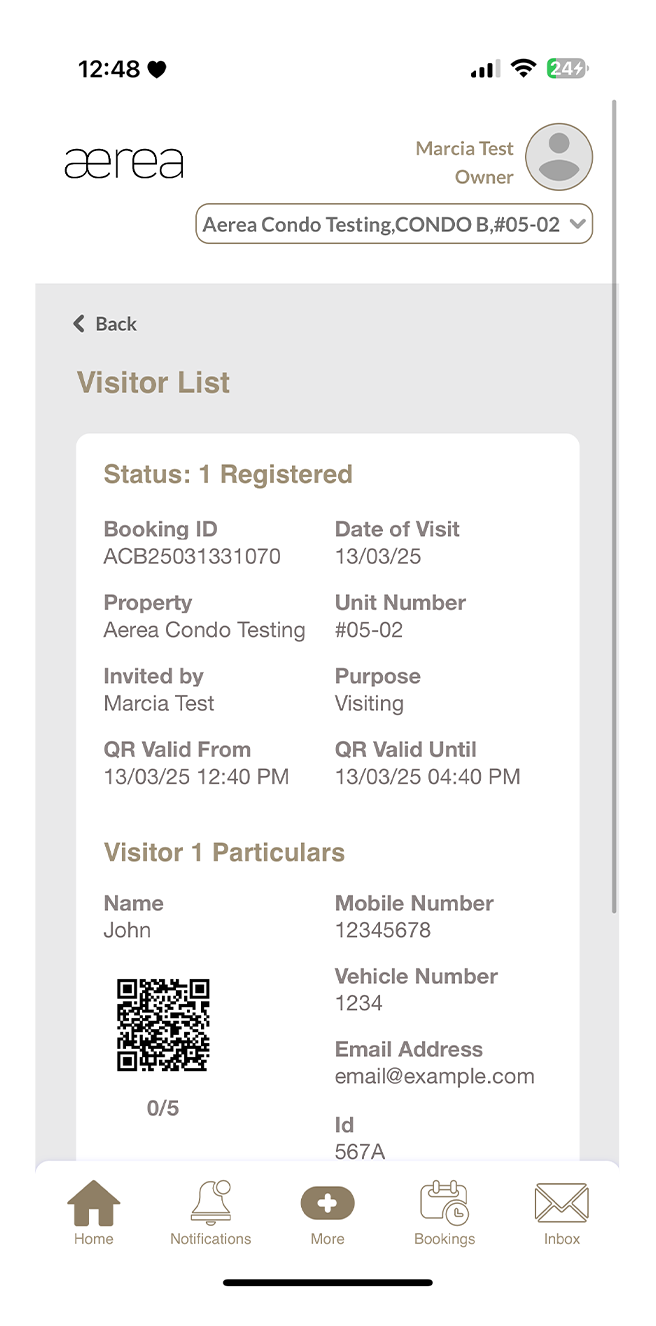
In Visitor Management, you can see your visitor booking history. To view details of any item, simply tap on it in your visitor bookings list.
Step 2
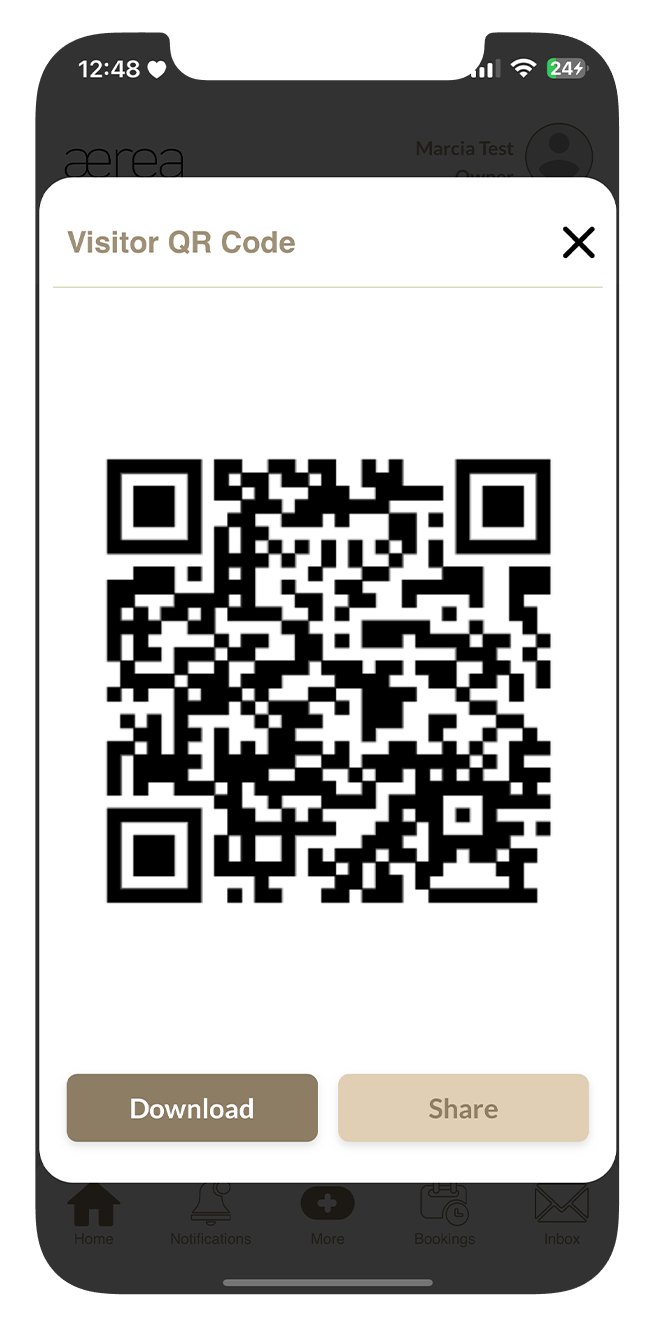
You can also tap the visitor QR code image to enlarge it.
Step 3
Access options to download or share the QR code
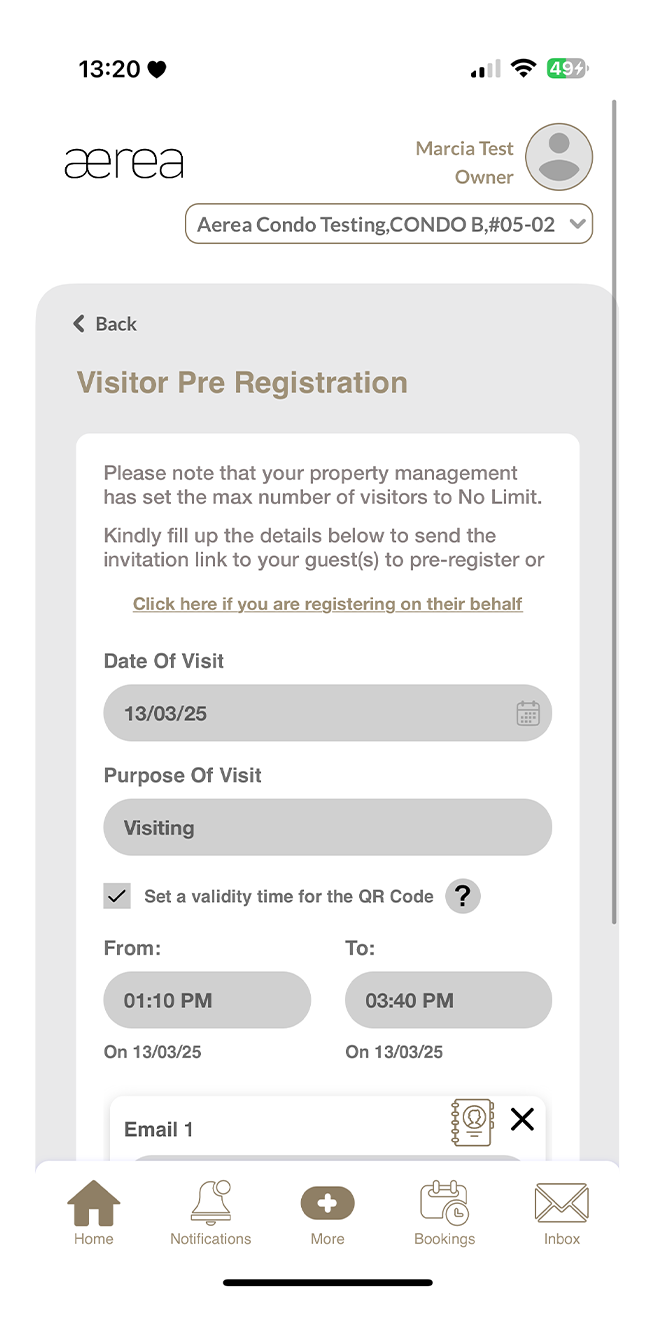
14.2 Creating a visitor invitation
How it works
Step 1
Tap on the '+' button located above the visitor bookings list.
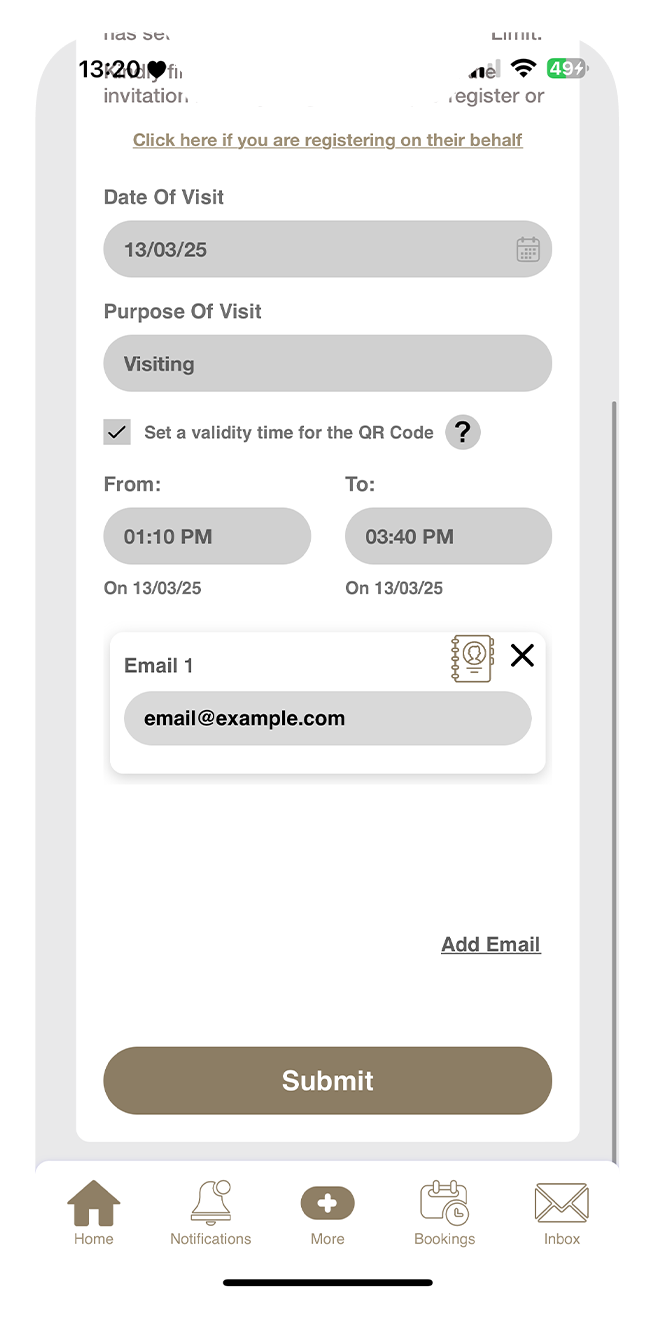
Step 2
Pick the date of visit, visiting end date, purpose of visit, and visitor email address(es). You can add more email addresses by tapping on the 'Add Email' button. You can autofill email address from your contact book by clicking on the icon.
Step 3
Then, tap on the 'Submit' button.
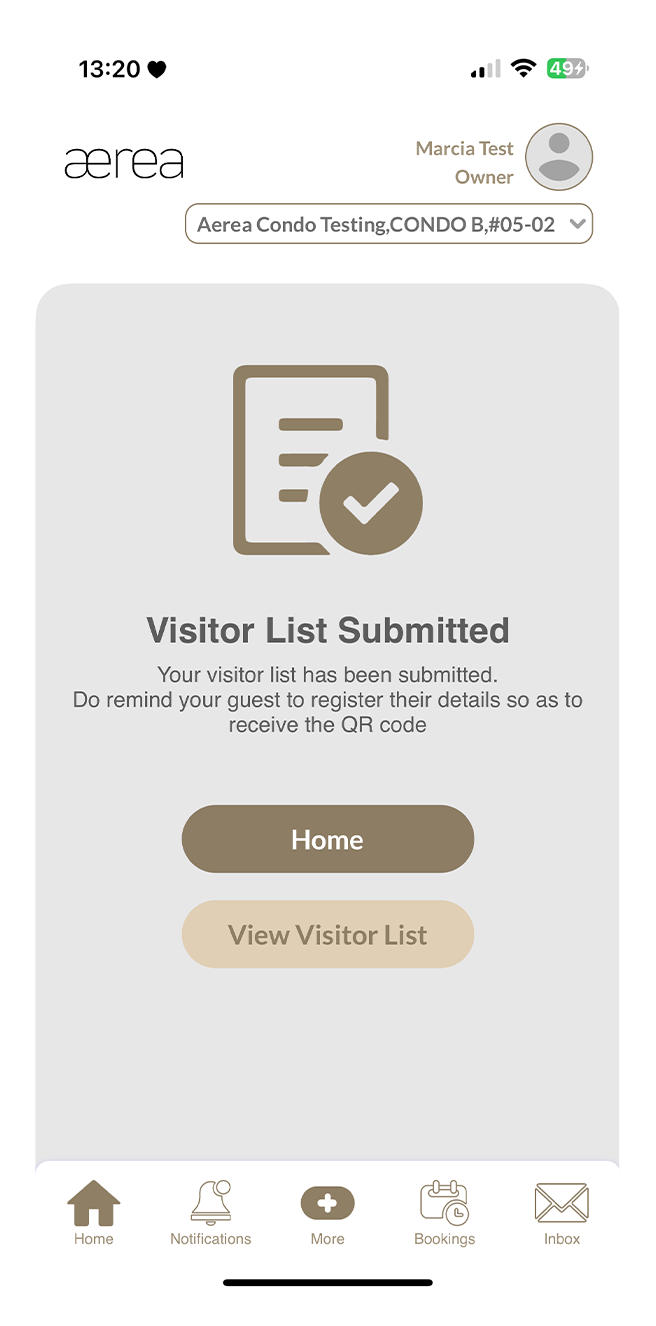
Step 4
You'll see a confirmation page once your invitation has been successfully created. Invitation emails will be sent to the visitor email addresses.
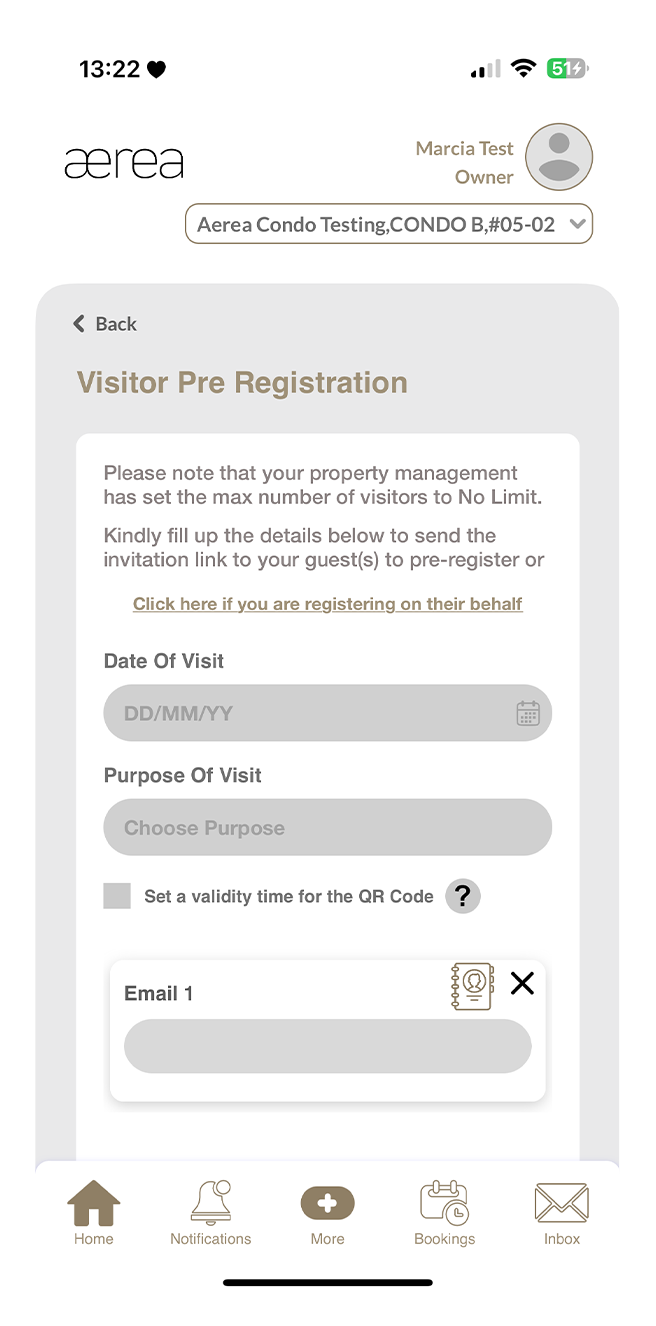
14.3 Register visitors on their behalf
How it works
Step 1
Tap on the '+' button located above the visitor bookings list.
Step 2
Tap on the “Click here if you are registering on their behalf” button.
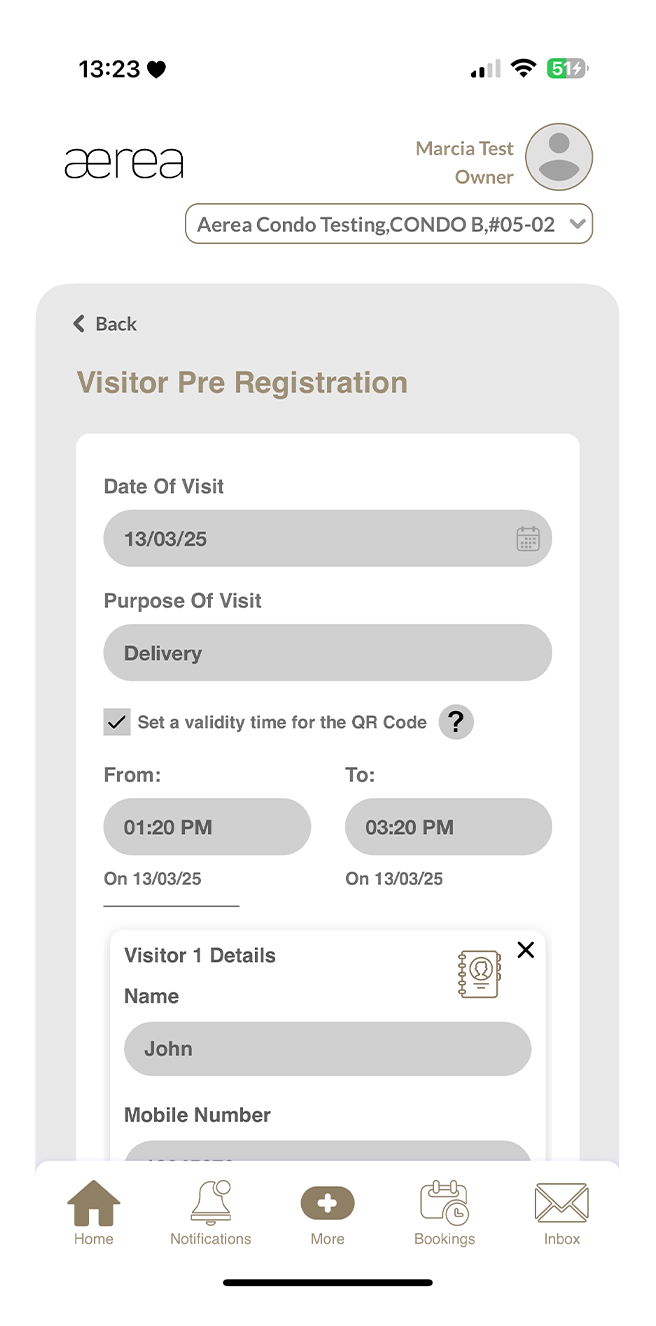
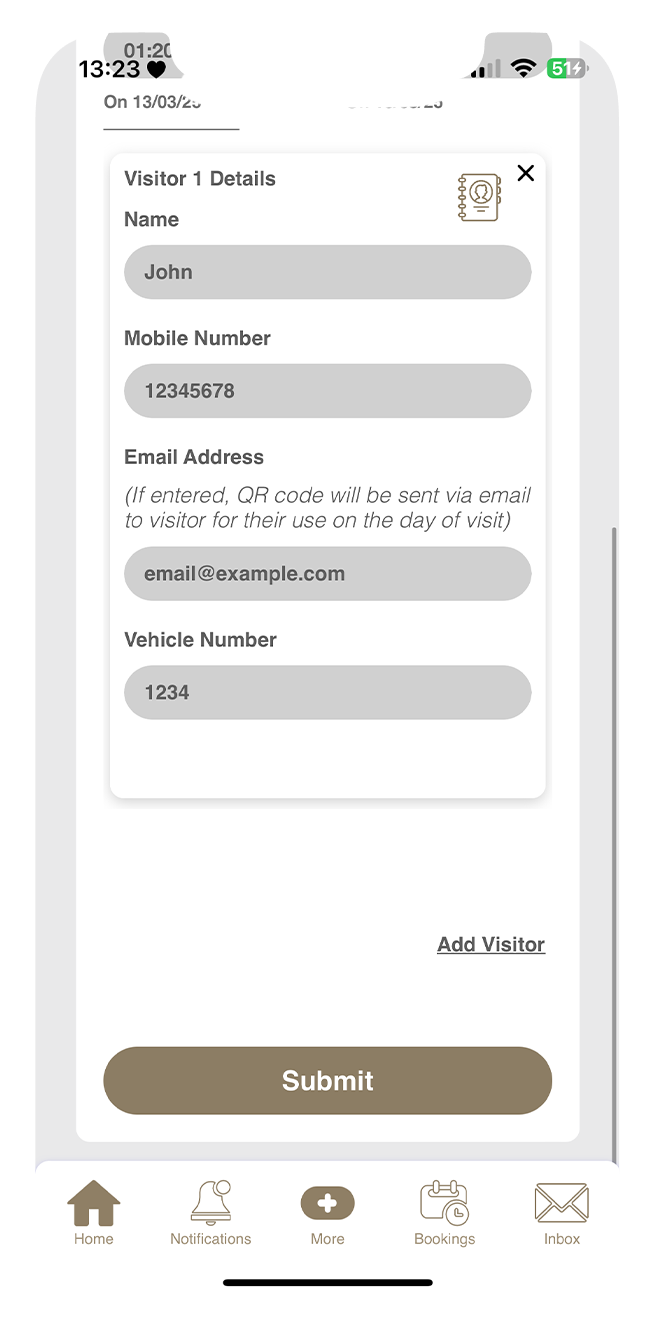
Step 3
Pick the date of visit, visiting end date, purpose of visit, and visitor details. You can add more visitors by tapping on the “Add Visitor” button. You can autofill visitor details from your contact book by clicking on the icon.
Step 4
Then, tap on the 'Submit' button.
Step 5
You'll see a confirmation page once your invitation has been successfully created. Invitation emails will be sent to the visitor email addresses.
14.4 Creating a new contact in contact book
How it works
Step 1
Tap on the contact book icon above the visitor booking list.
Step 2
Tap on the '+' above the contact list
Step 3
Enter the contact name, ID number, contact number, email, and vehicle number in the provided fields.
Step 4
Then tap on the Submit button.
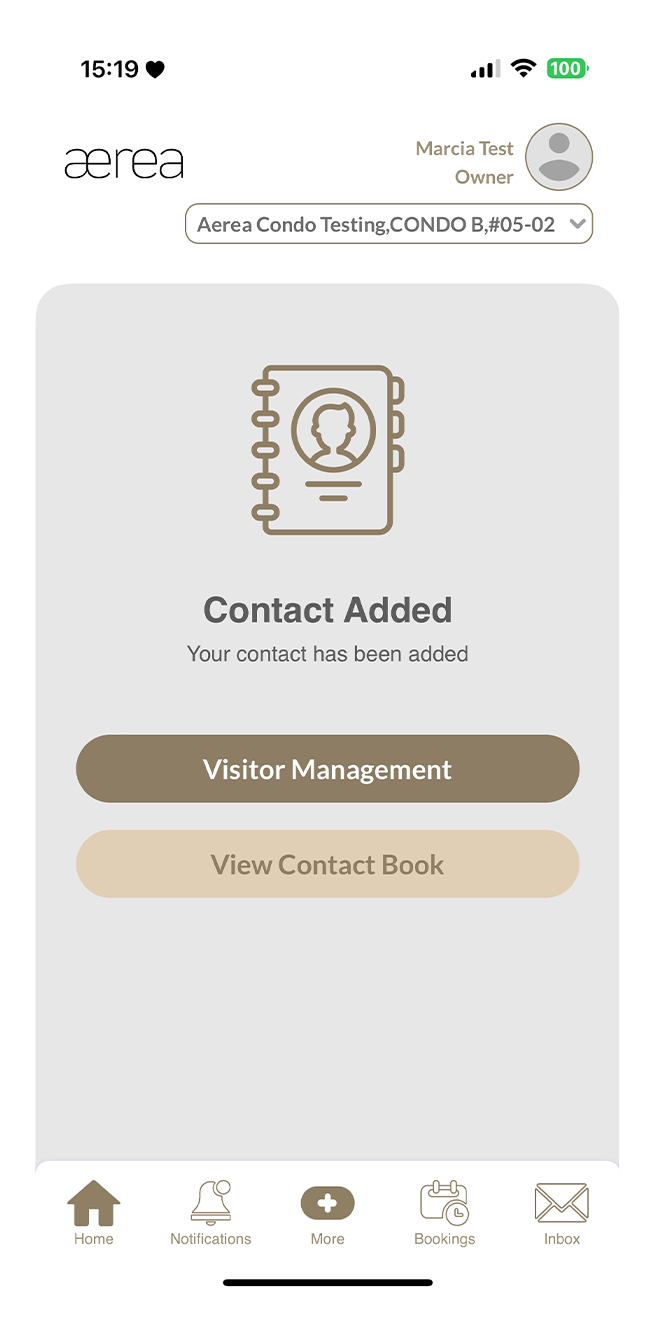
Step 5
A confirmation screen will appear when the contact has been saved successfully.
14.5 Updating a contact in contact book
How it works
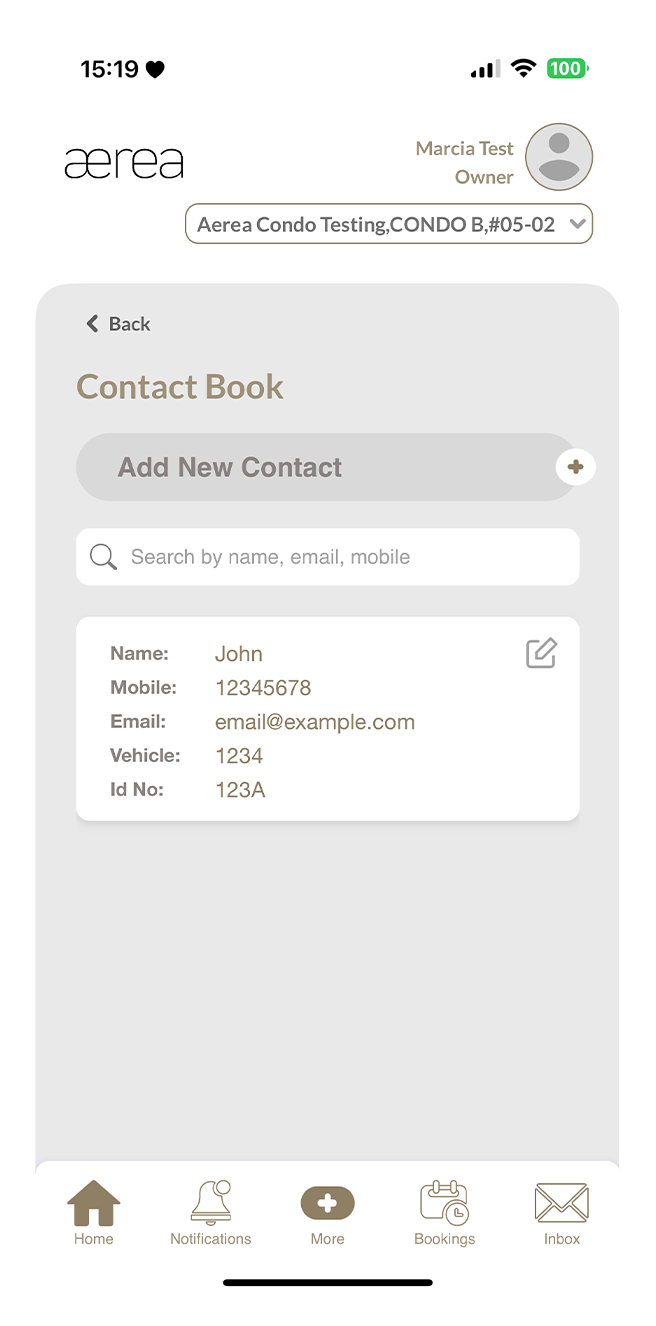
Step 1
Tap on the contact book icon above the visitor booking list.
Step 2
Tap on the 'Edit' icon of any item in the contact list.
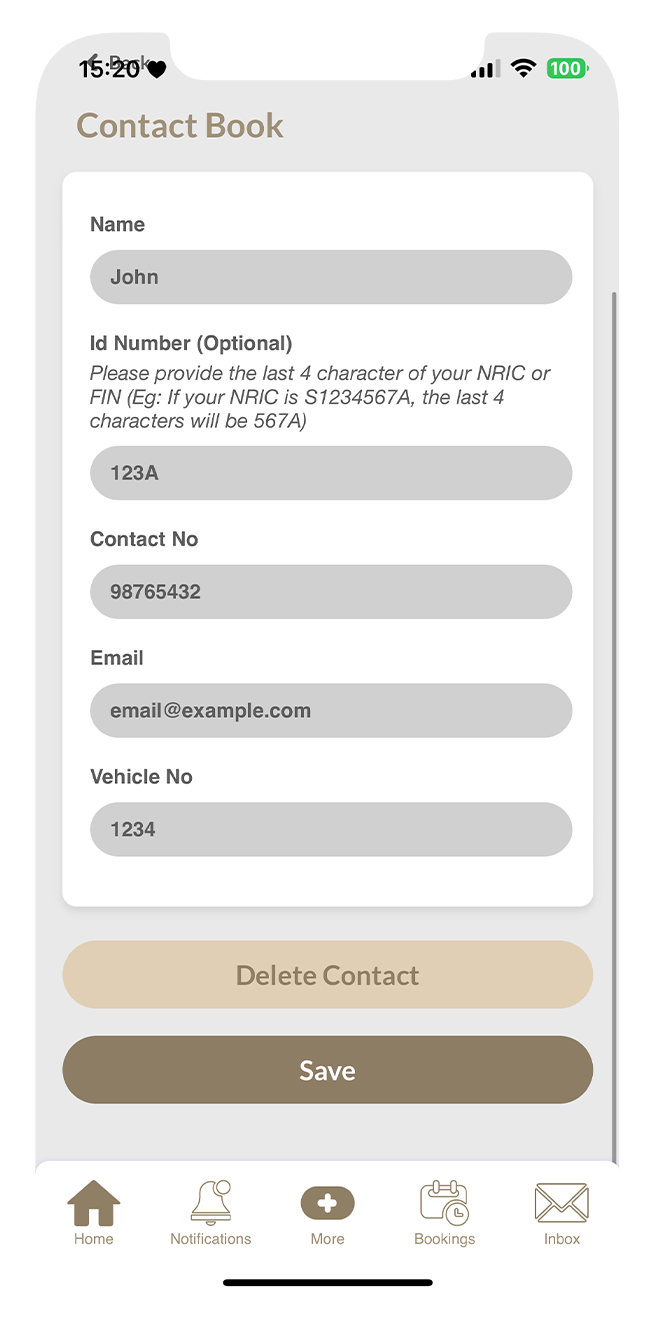
Step 3
Update the contact name, ID number, contact number, email, and/or vehicle number in the provided fields.
Step 4
Then tap on the Save button.
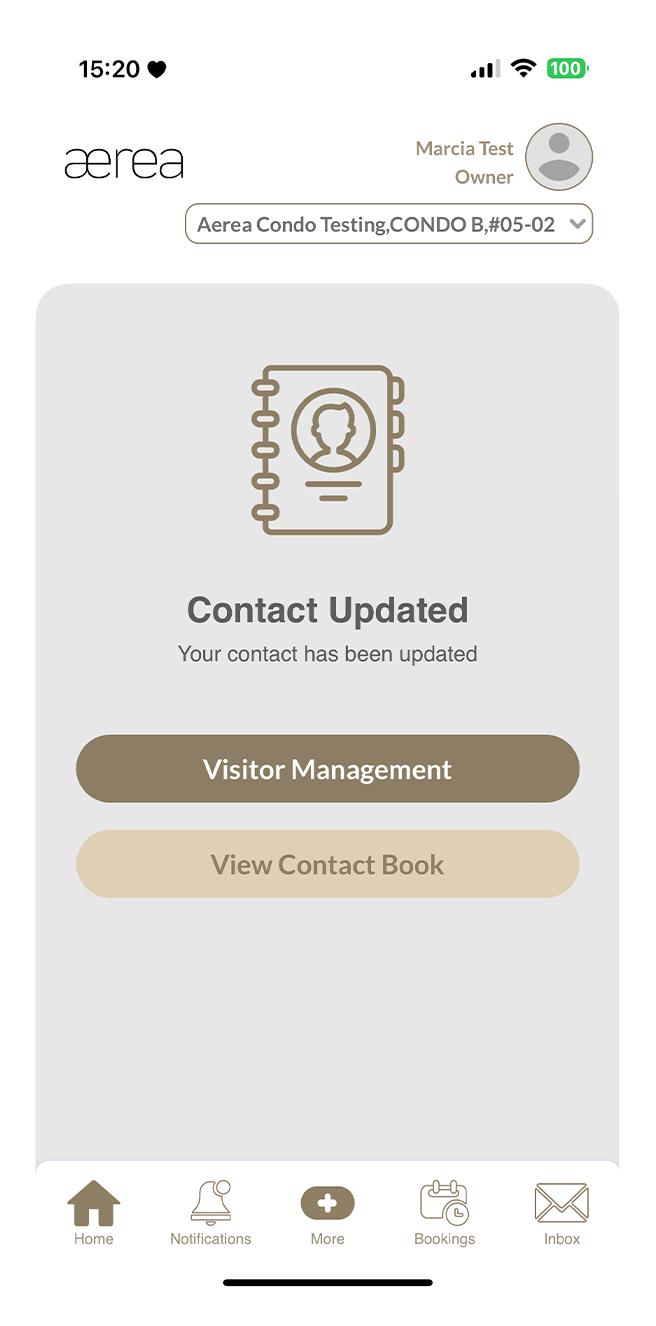
Step 5
A confirmation screen will appear when the contact has been updated successfully.
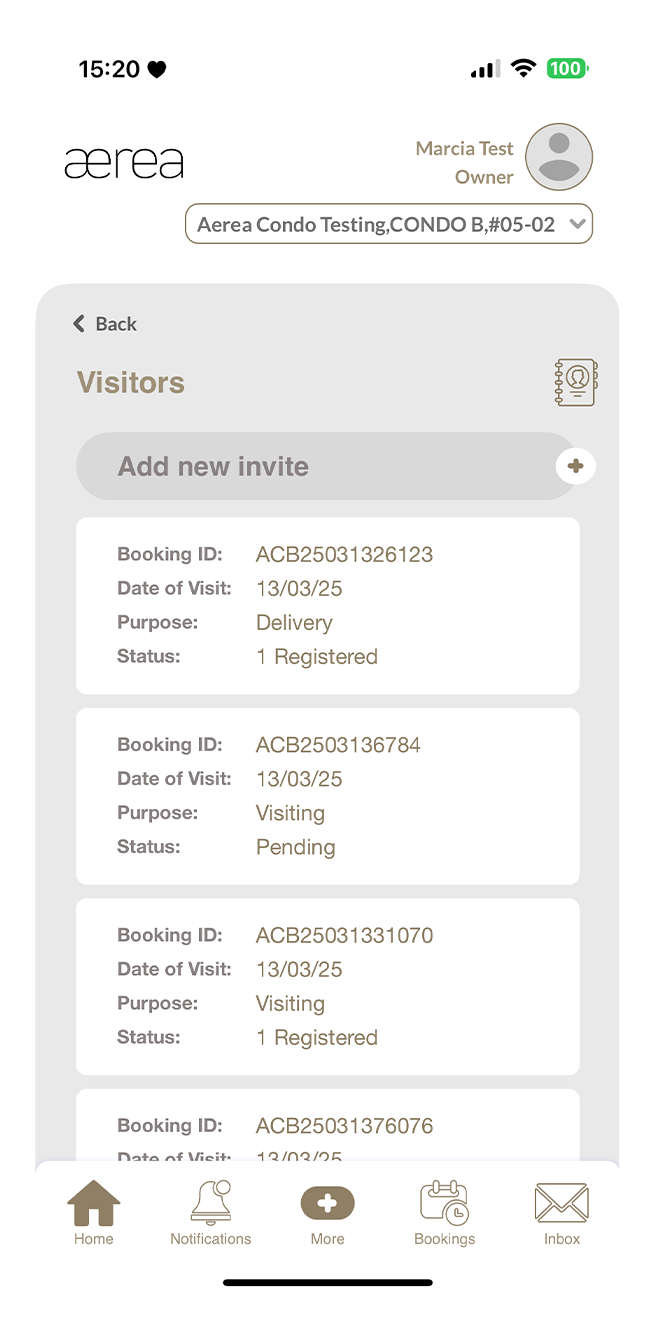
14.6 Deleting a Contact in Contact Book
How it works
Step 1
Tap on the contact book icon above the visitor booking list.
Step 2
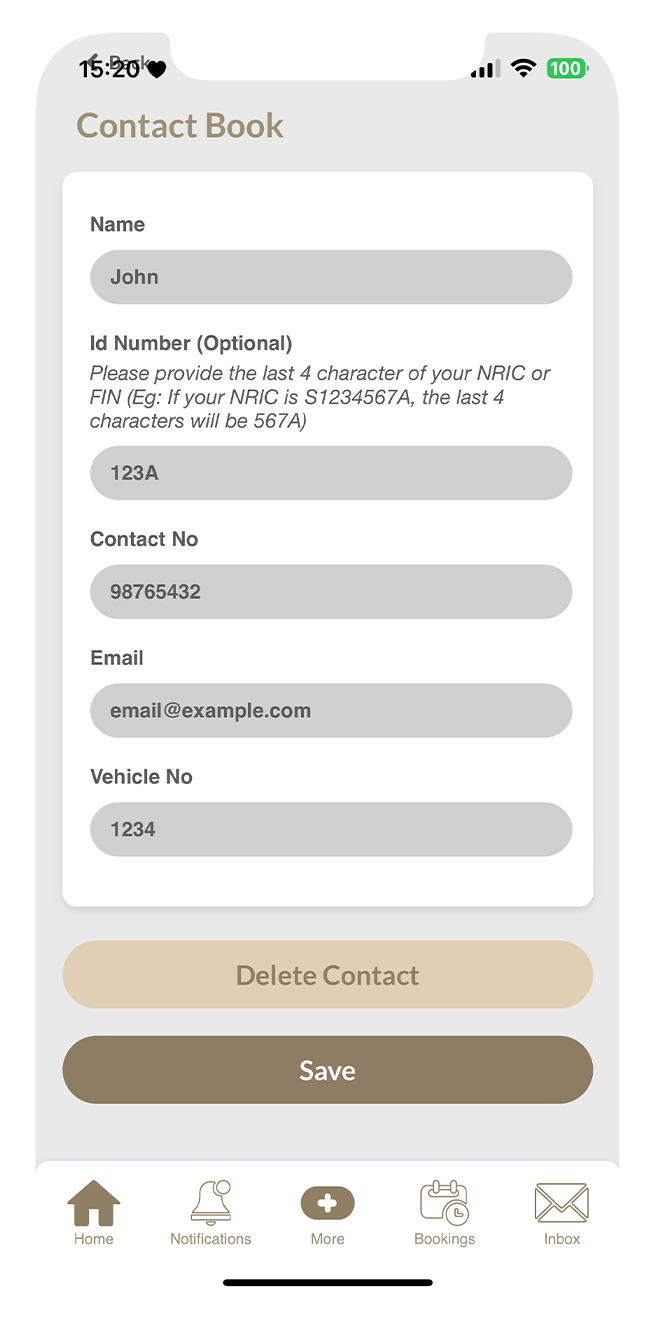
Tap on the 'Edit' icon of any item in the contact list.
Step 3
Tap on the “Delete Contact” button
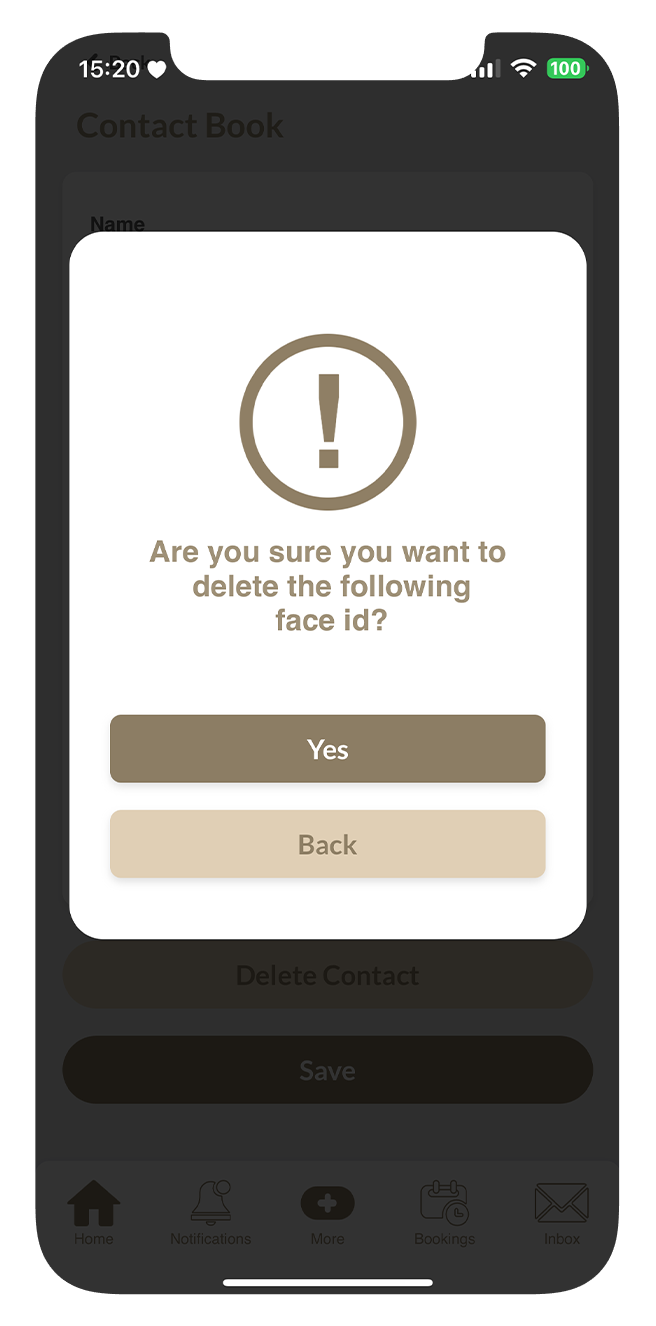
Step 4
Then tap “Yes” in the confirmation popup.
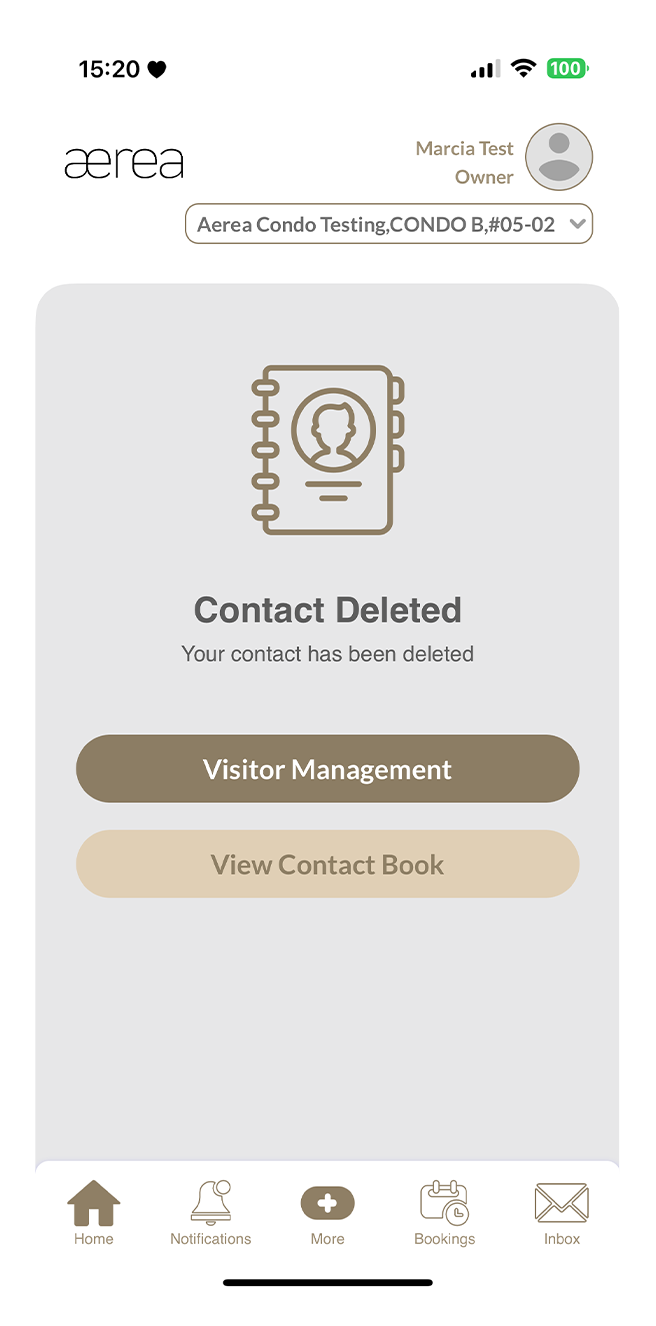
Step 5
A confirmation screen will appear when the contact has been deleted successfully.
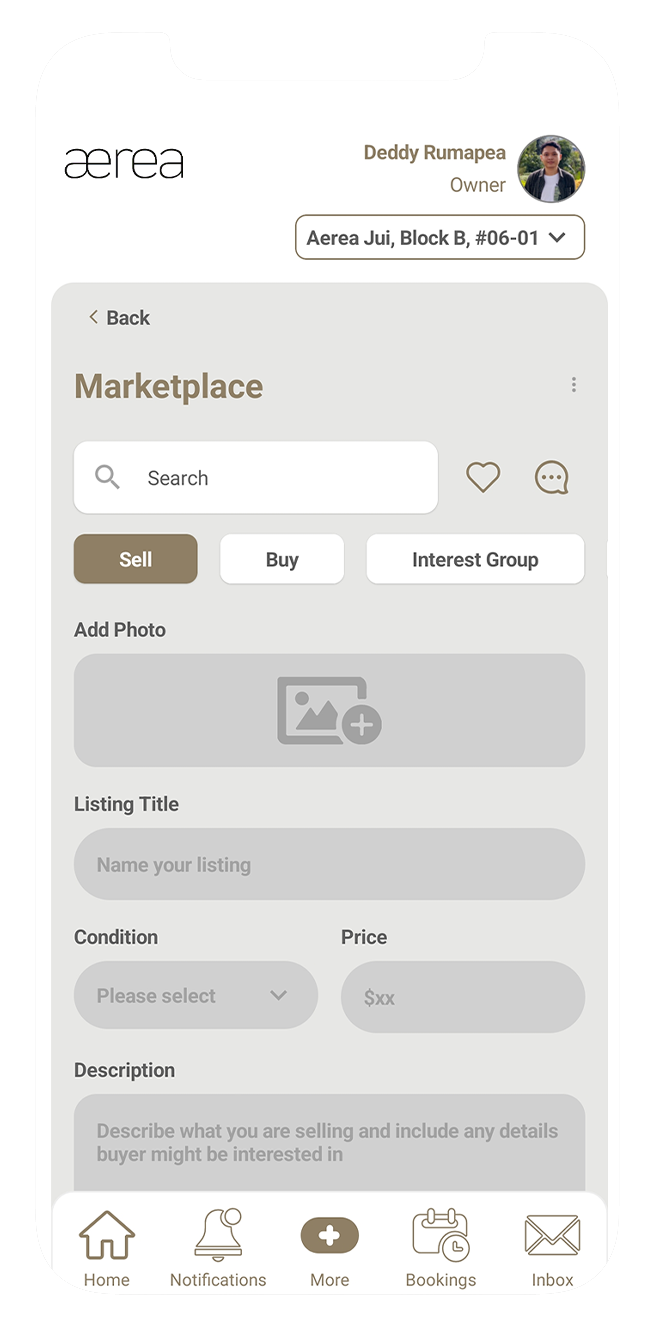
15.1 Creating a listing
How it works
Step 1
Open the Marketplace in the AEREA Home app and go to the 'Sell' tab.
Step 2
Add photos, a title, the item's condition, price, and a description, then tap Submit.
Step 3
You'll receive a confirmation once your listing is successfully added to the Marketplace.
15.2 Browsing available listings
How it works
Step 1
Navigate to the “Buy” tab to see all items for sale. Tap on any item to view its details.
Step 2
To contact the seller, tap the "Chat Now" button.
Step 3
Type your message in the chat room and hit send to communicate with the seller.
15.3 Marketplace chats
How it works
Step 1
Tap on the chat icon.
Step 2
You'll see a list of all your chats.
Step 3
Tap on any chat to view the messages.
15.4 Browsing available interest groups
How it works
Step 1
Go to the Interest Group tab to see a list of available groups.
Step 2
Tap on a group to view its details.If interested, tap Register Your Interest to join.
Step 3
A confirmation will appear once you're successfully registered.
15.5 Creating an interest group
How it works
Step 1
Go to the 'Interest Group' tab in Marketplace and tap on the '+' icon.
Step 2
Fill in the details: upload photos, provide a title, specify the number of members, set a price, and write a brief description.
Step 3
Tap the Submit button.
Step 4
A confirmation screen will appear once your interest group is successfully listed in the Marketplace.
15.6 Liking / Unliking a listing item or interest group
How it works
Step 1
Tap the heart icon at the bottom right of a listing or interest group.
Step 2
This will toggle between liking or unliking the item.
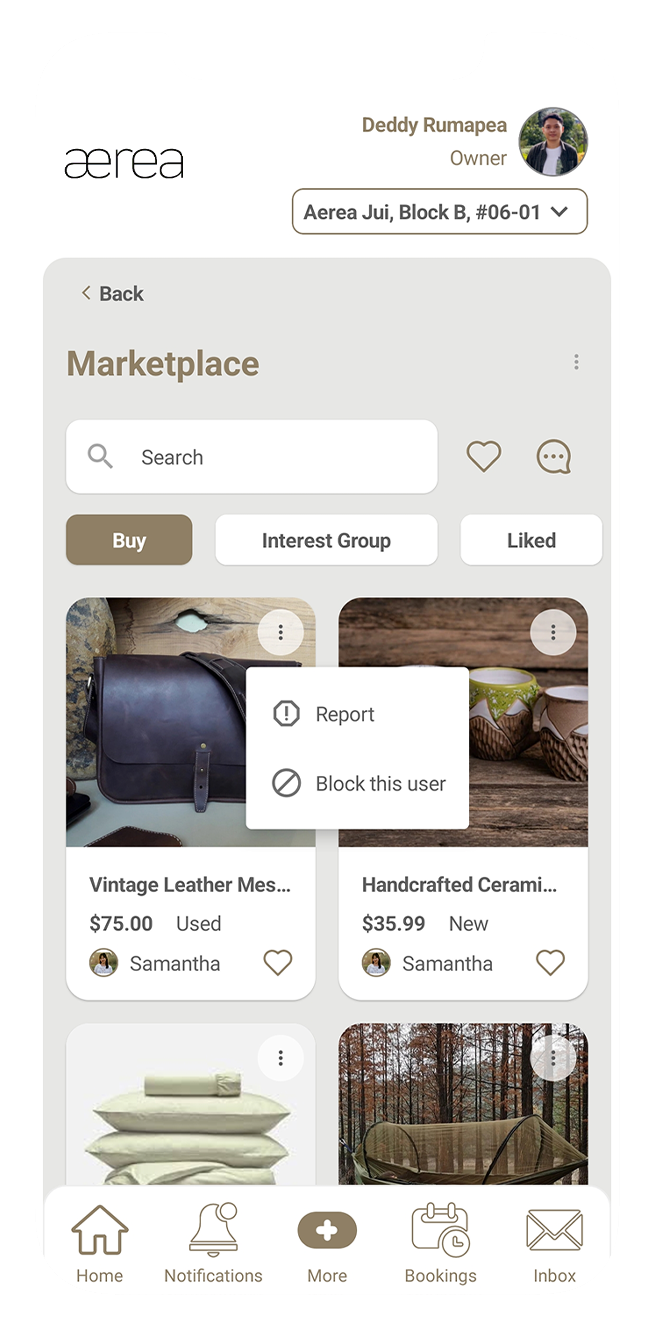
15.7 Reporting a listing item or interest group
How it works
Step 1
Tap the 3 dots in the top right corner of the listing item or interest group.
Step 2
Select the "Report" option.
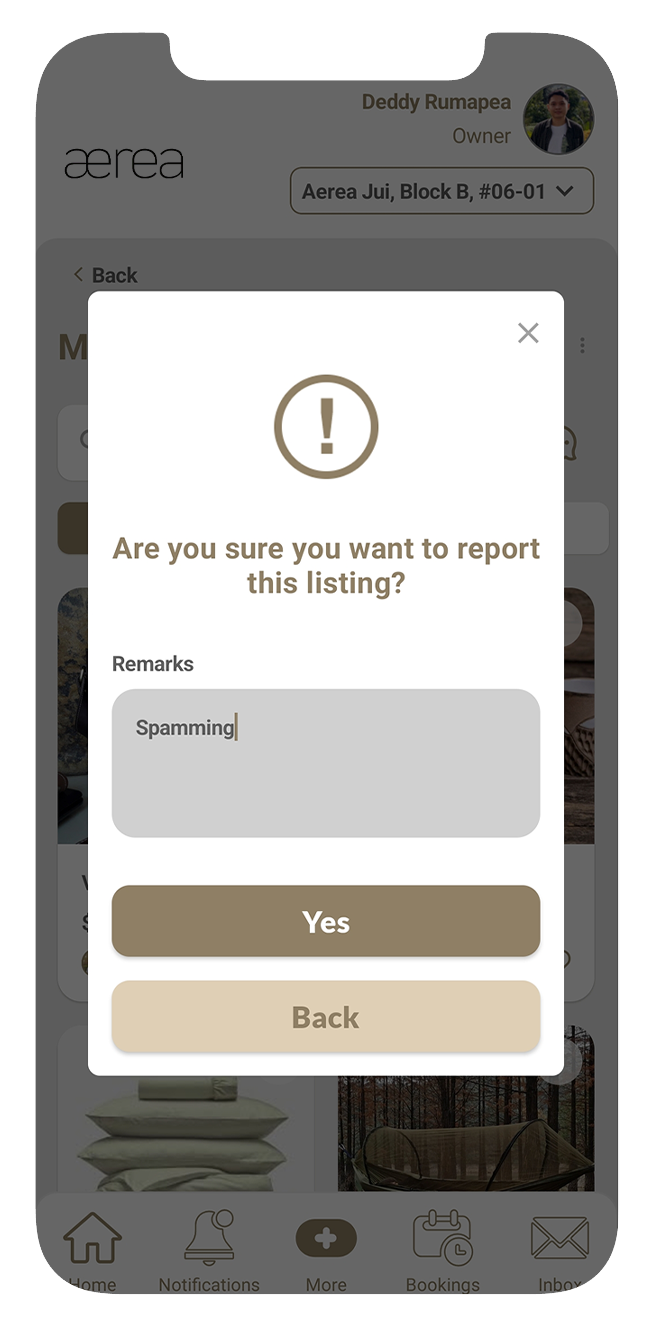
Step 3
In the confirmation popup, enter your report remarks and tap "Yes."
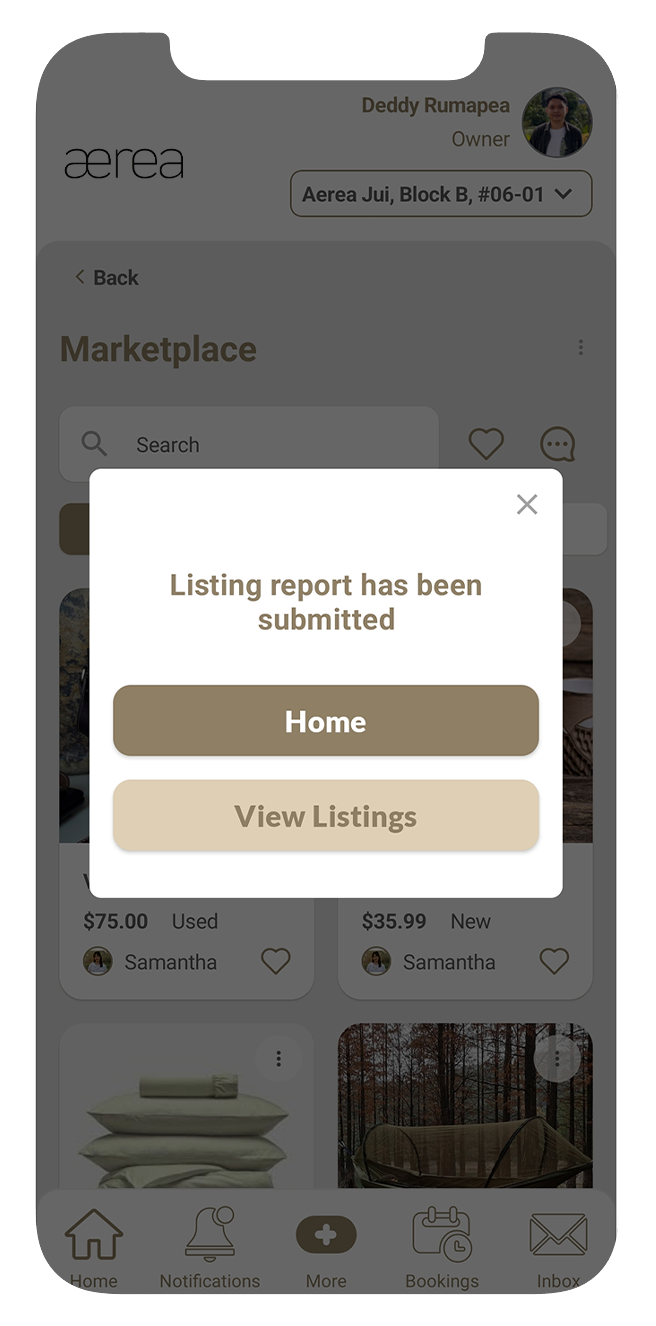
Step 4
If the report is successful, a confirmation popup will appear.
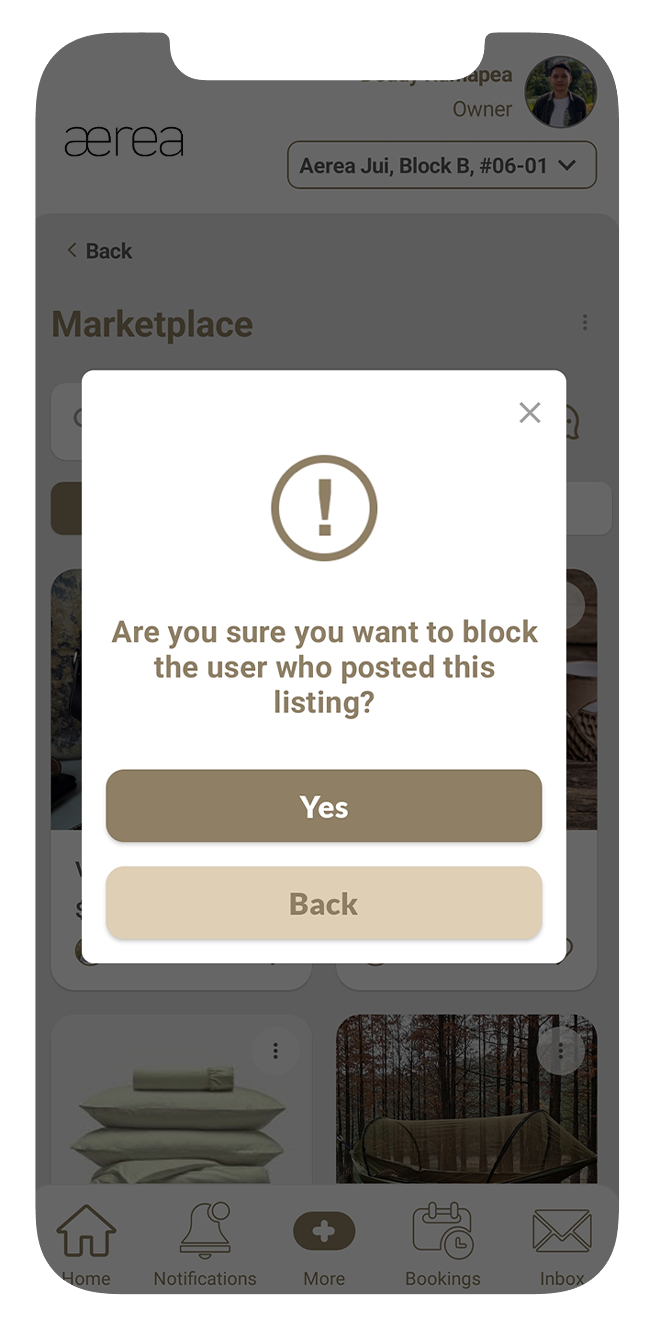
15.8 Blocking a listing item or interest group creator
How it works
Step 1
Tap the 3 dots at the top right of the listing item or interest group.
Step 2
Select "Block" from the options.
Step 3
Confirm by tapping "Yes" on the popup.
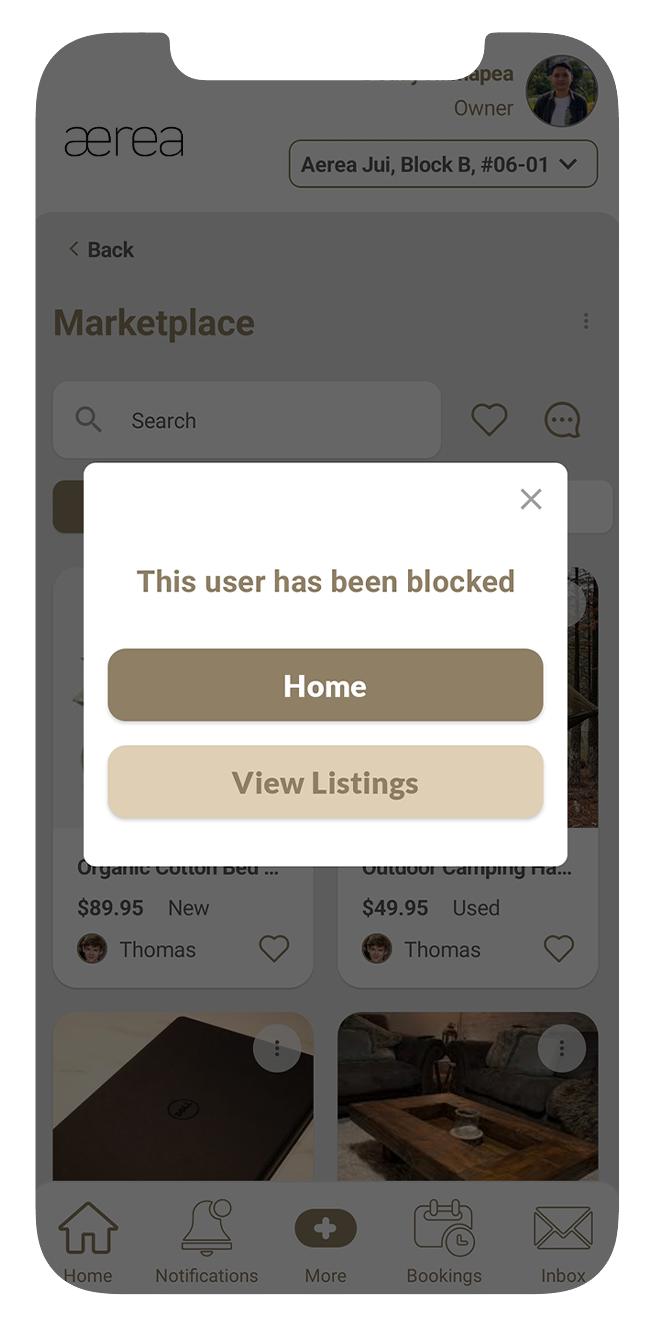
Step 4
A confirmation popup will appear, indicating that the user has been successfully blocked.
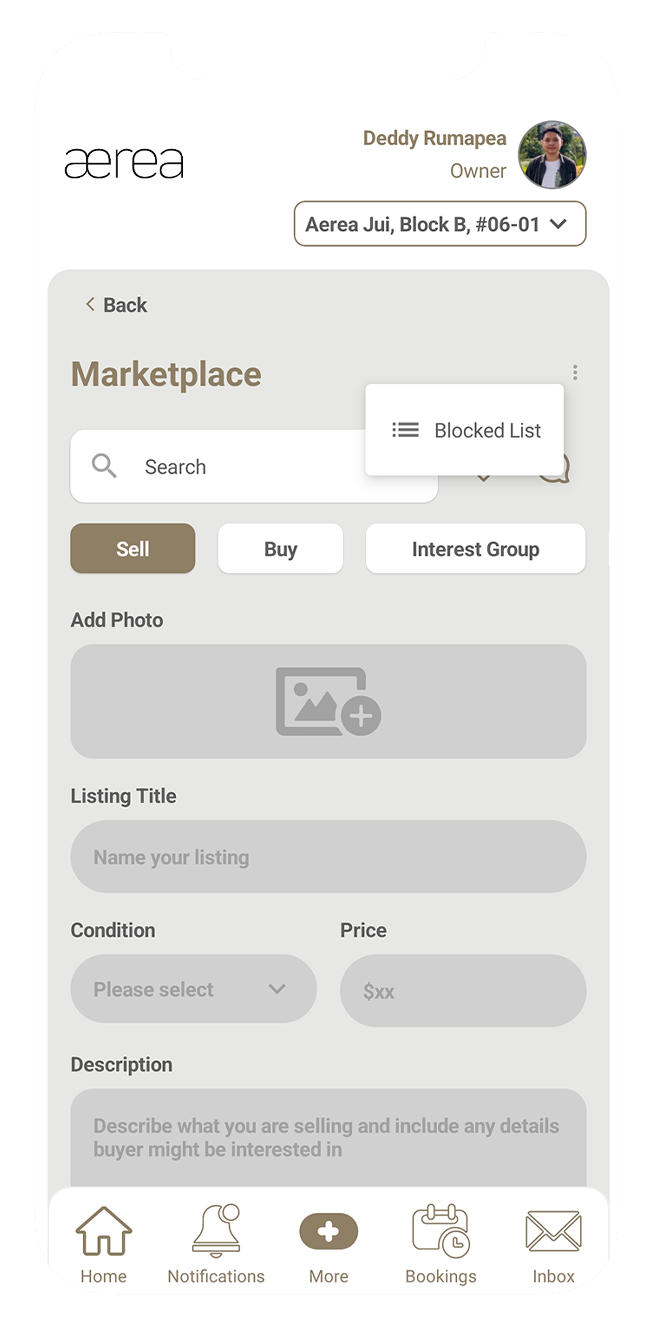
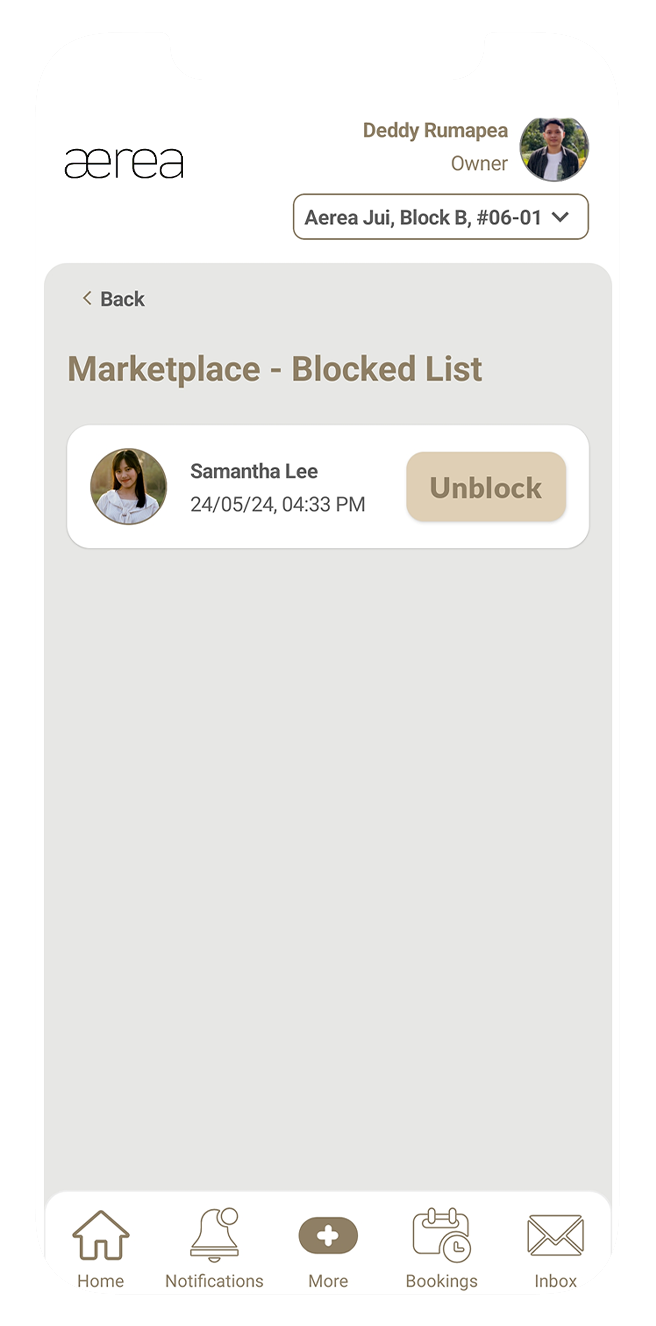
15.9 Unblocking a user
How it works
Step 1
Tap the 3 dots in the top right corner of the Marketplace screen.
Step 2
From the menu that appears, select "Blocked List."
Step 3
Find the user you want to unblock and tap the "Unblock" button next to their name.
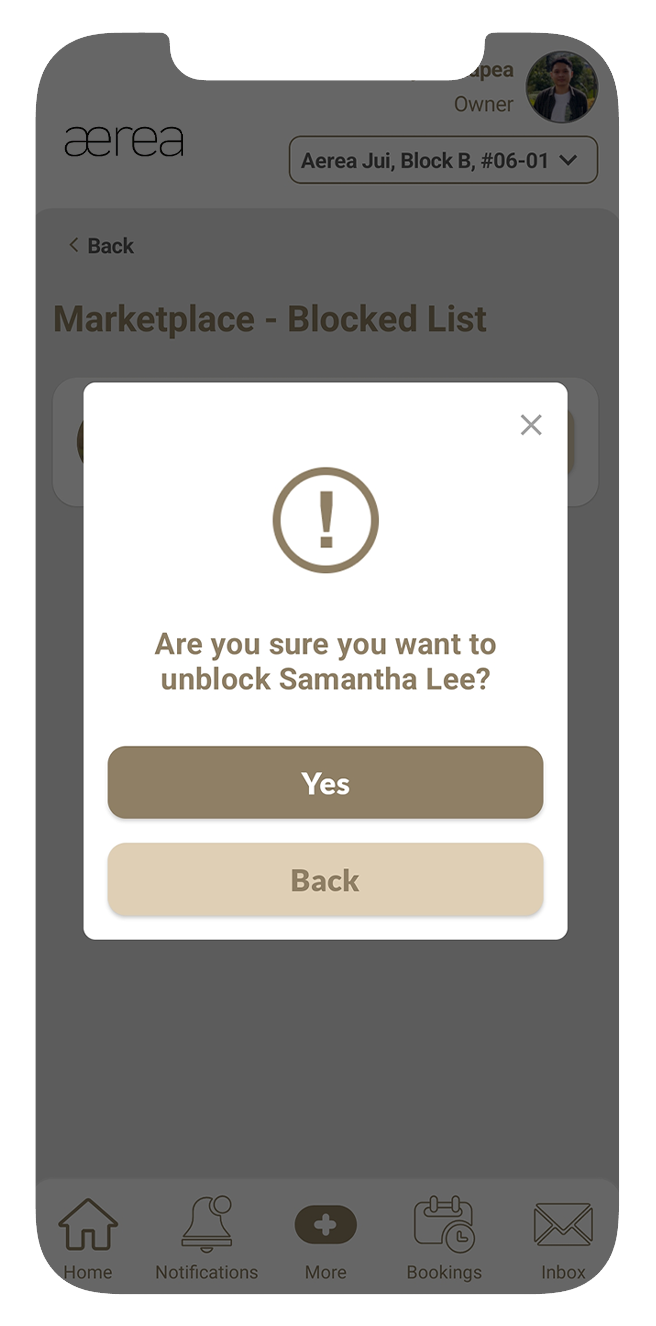
Step 4
Confirm your choice by tapping "Yes" on the popup.
Step 5
A confirmation popup will appear once the user has been successfully unblocked.
15.10 Updating a listing item or interest group
How it works
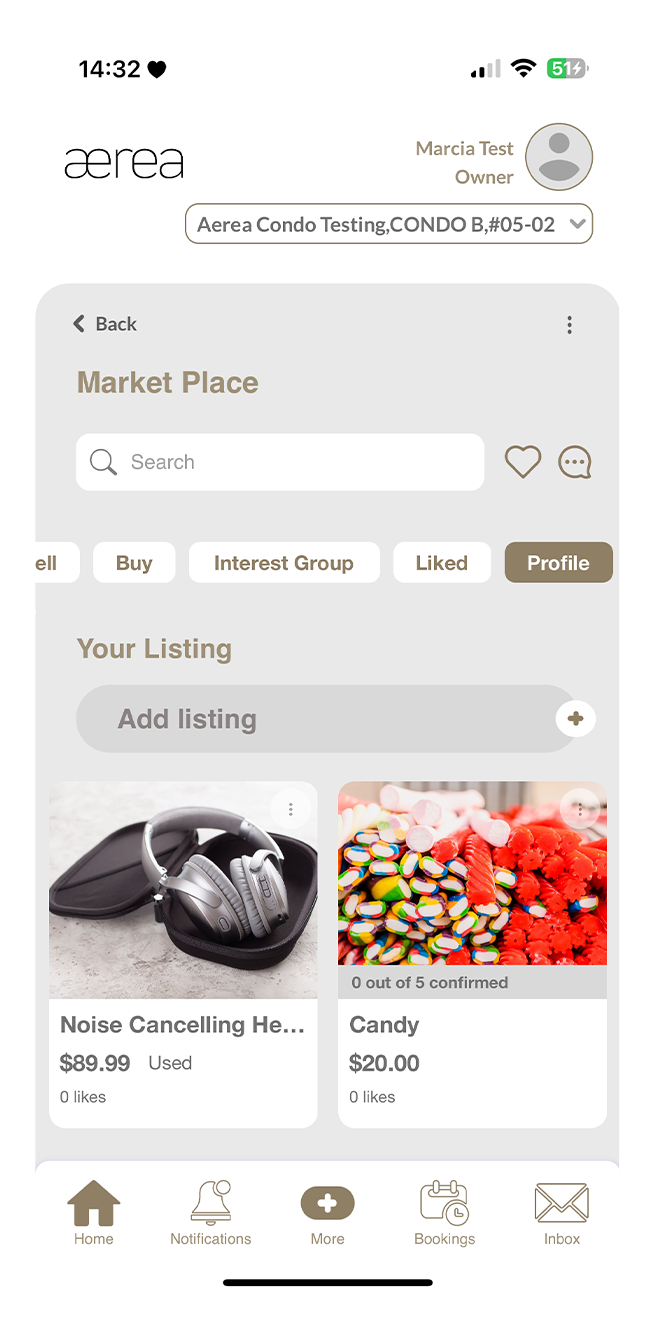
Step 1
Go to the Profile tab and select the listing item or interest group you want to update.
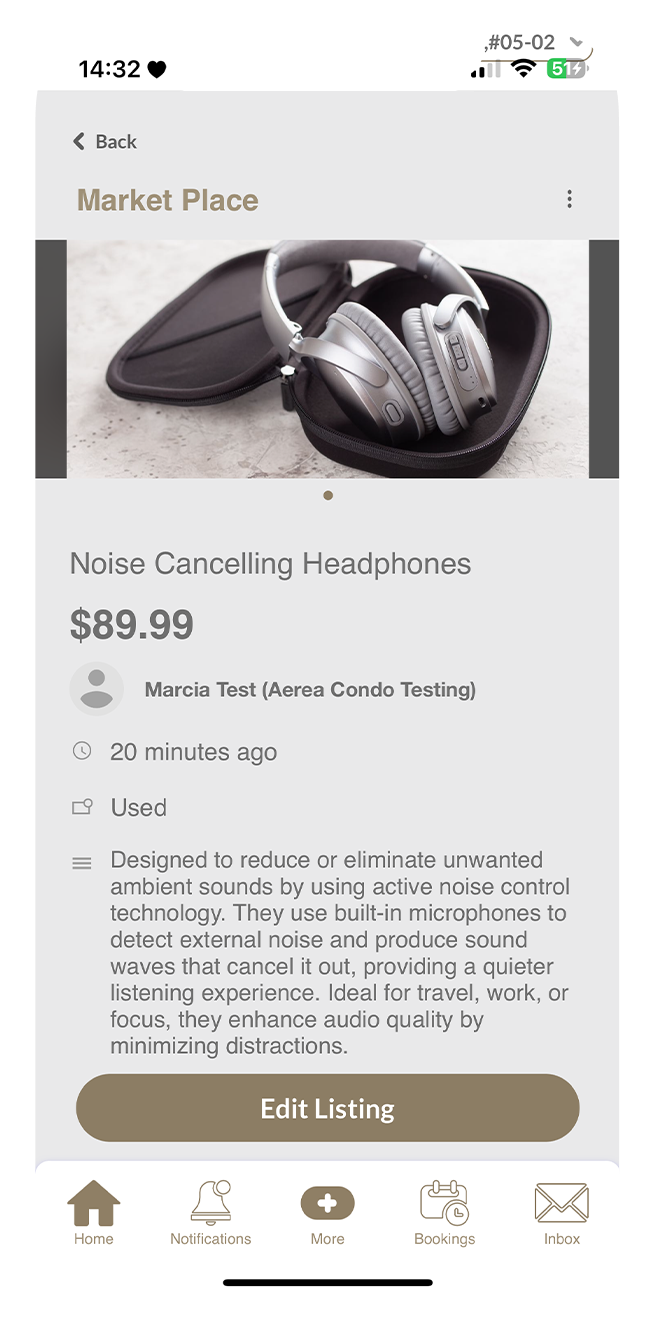
Step 2
Tap the "Edit Listing" button.
Step 3
Make your desired changes and tap Submit.
Step 4
A confirmation popup will appear once your changes are successfully saved.
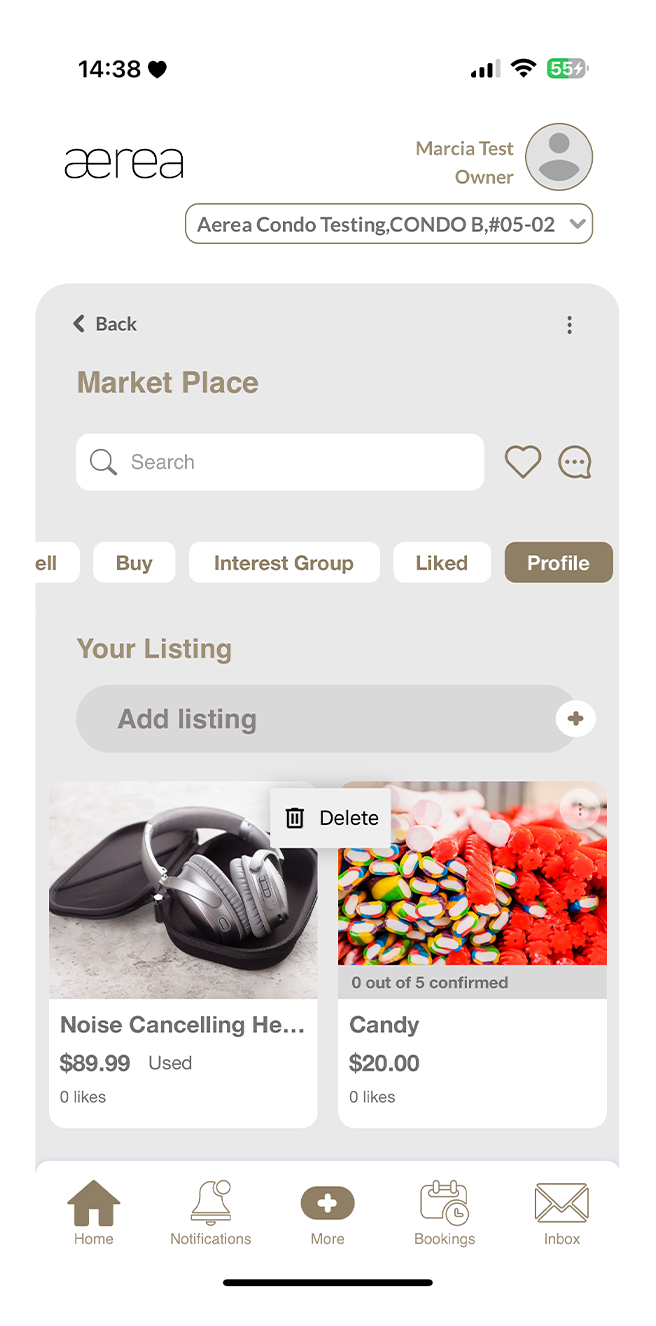
15.11 Deleting a listing item or interest group
How it works
Step 1
Tap the 3 dots button at the top right of your listing item or interest group.
Step 2
Select "Delete" from the options that appear.
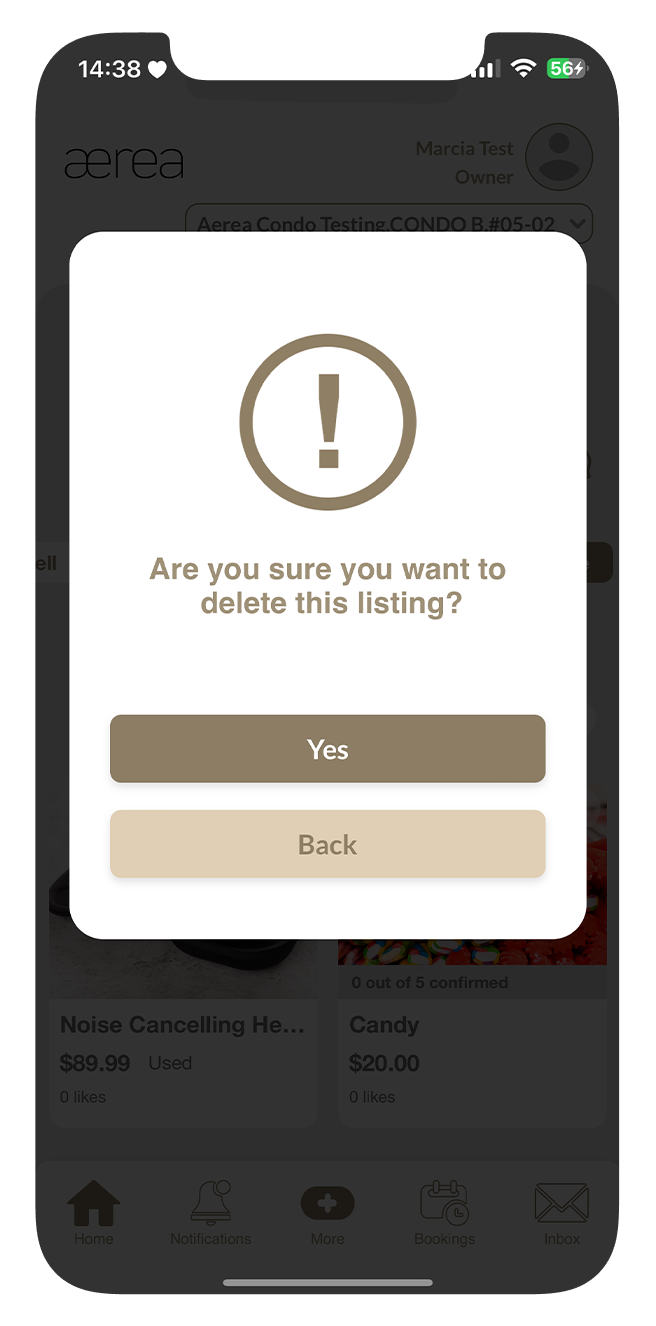
Step 3
Confirm the deletion by tapping "Yes" on the confirmation popup.
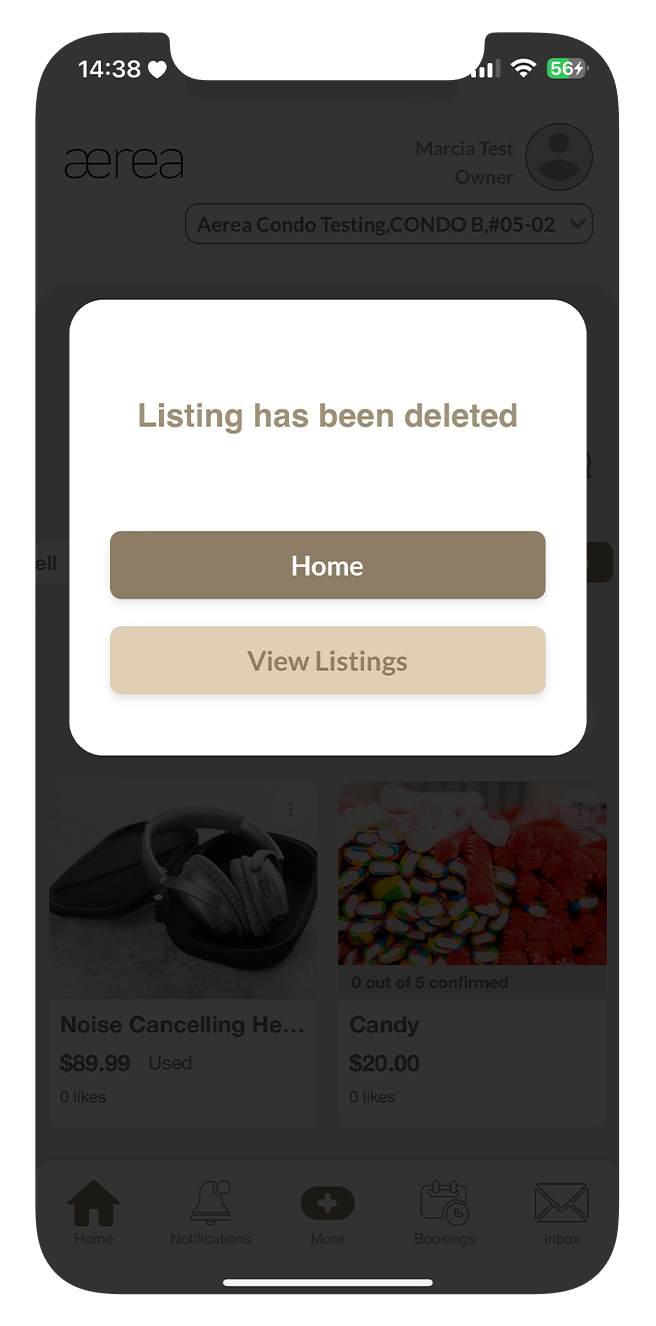
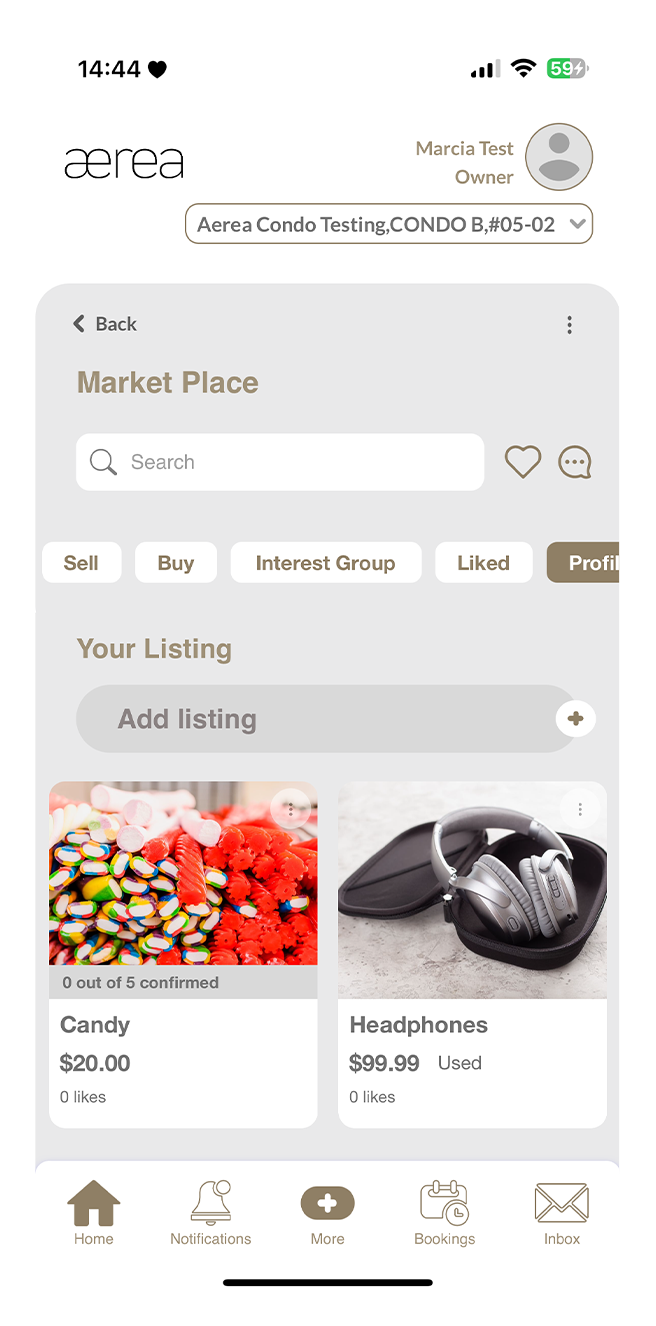
Step 4
A confirmation popup will appear once the listing item or interest group has been successfully deleted.
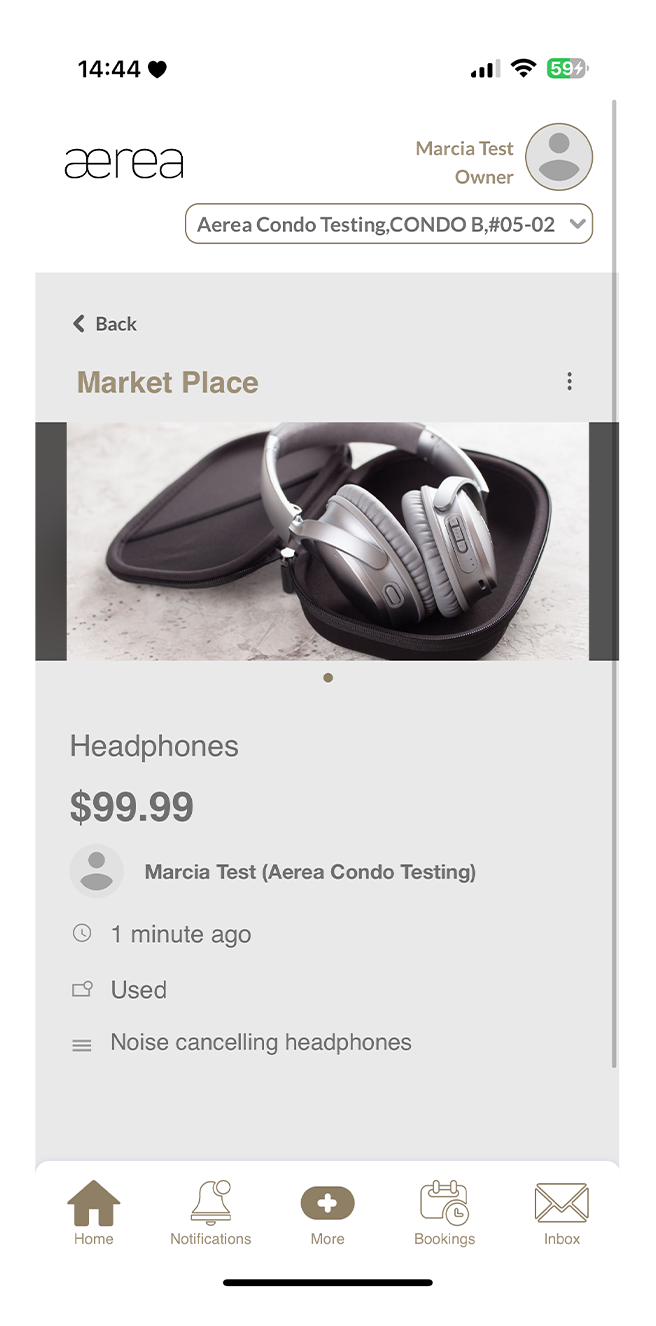
15.12 Marking / Unmarking a listing item or interest group as sold
How it works
Step 1
Navigate to the Profile tab and select the item or group you wish to mark as sold.
Step 2
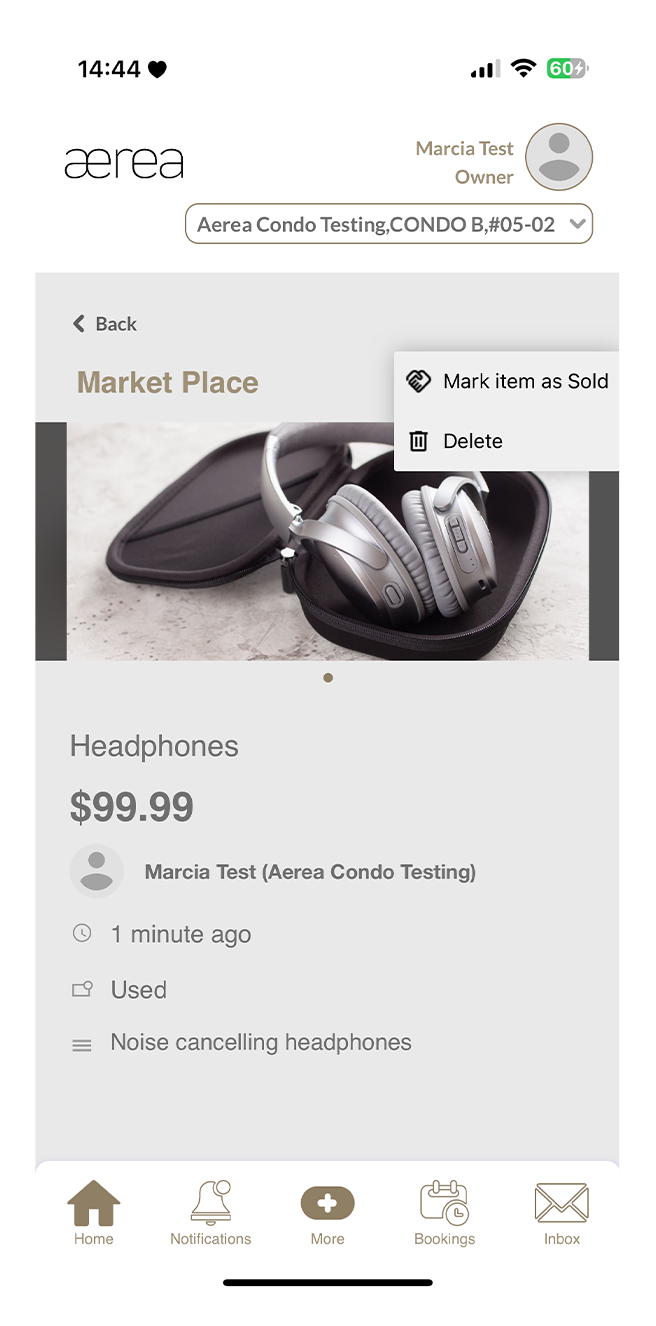
On the detail page, tap the 3 dots button at the top-right corner.
Step 3
Tap "Mark as Sold."
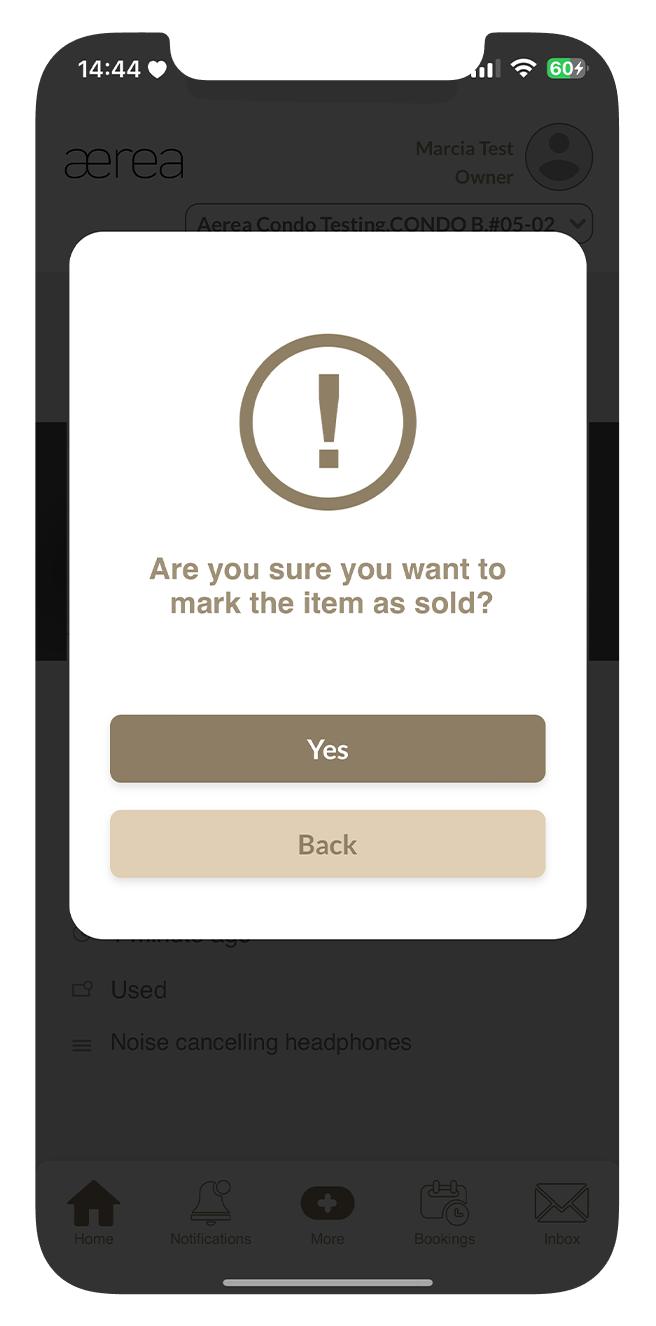
Step 4
Confirm the action by tapping "Yes" on the confirmation popup.
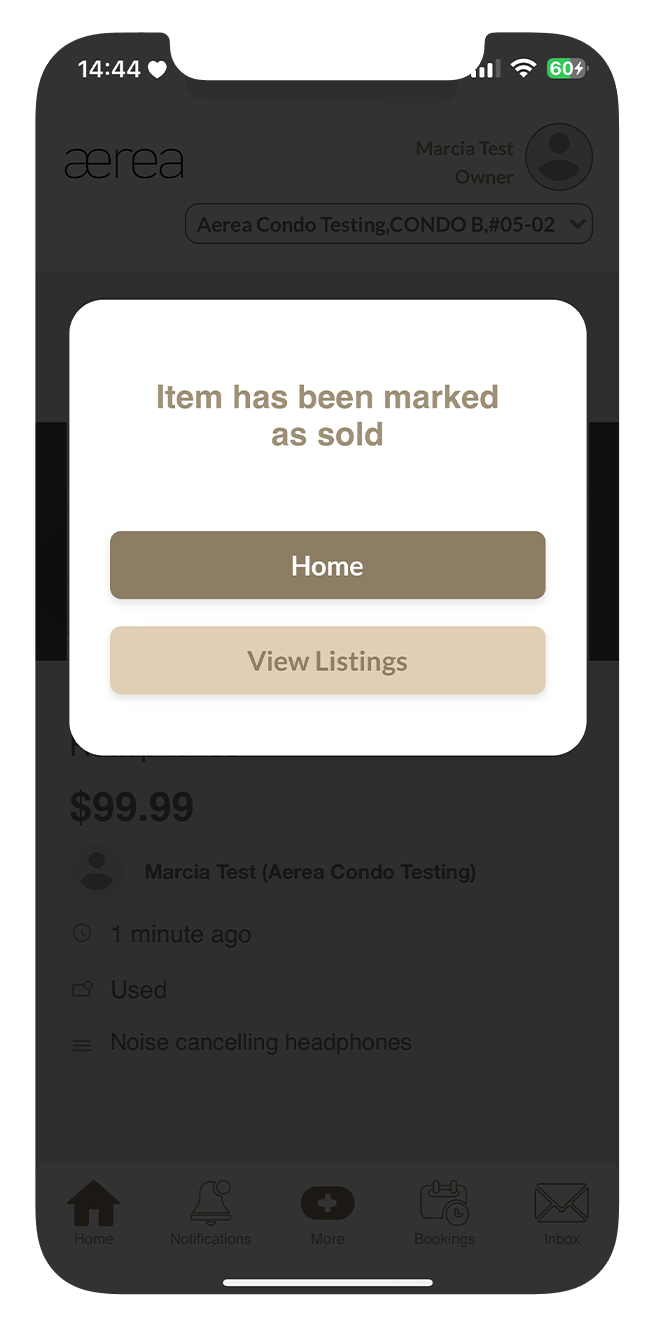
Step 5
A confirmation popup will appear once your item or group is successfully marked as sold.
16.1 Viewing Submission Details
How it works
Step 1
To see more details, tap on your choice of submission
Step 2
View the full details of the submitted form
16.2 Viewing Submission Payment Information
How it works
Step 1
To see payment details, tap on the payment icon
Step 2
View the full payment details.
17.1 Opening a door with bluetooth
How it works
Step 1
Turn on Bluetooth on your smartphone, ensure you are near the door device and tap on Bluetooth opening.
Step 2
A list of doors you can open will appear. Select the door you want to open (e.g., Sliding Gate) and wait a moment for it to unlock.
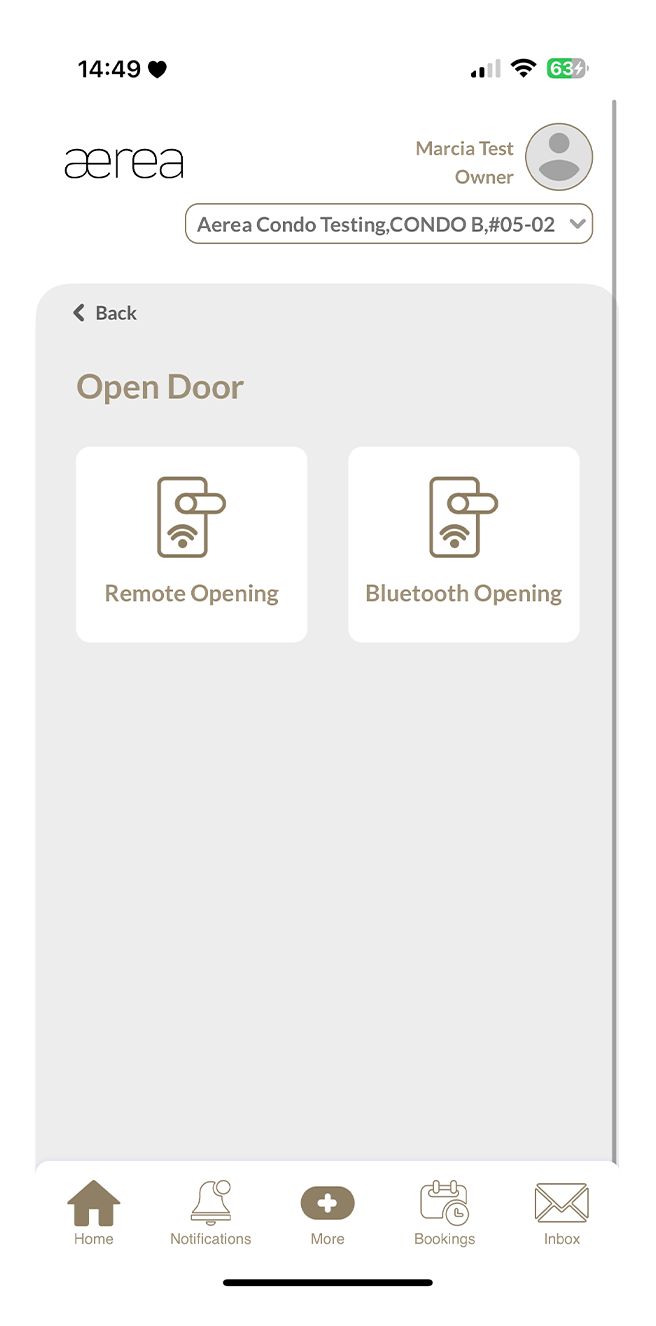
17.2 Opening a door remotely
How it works
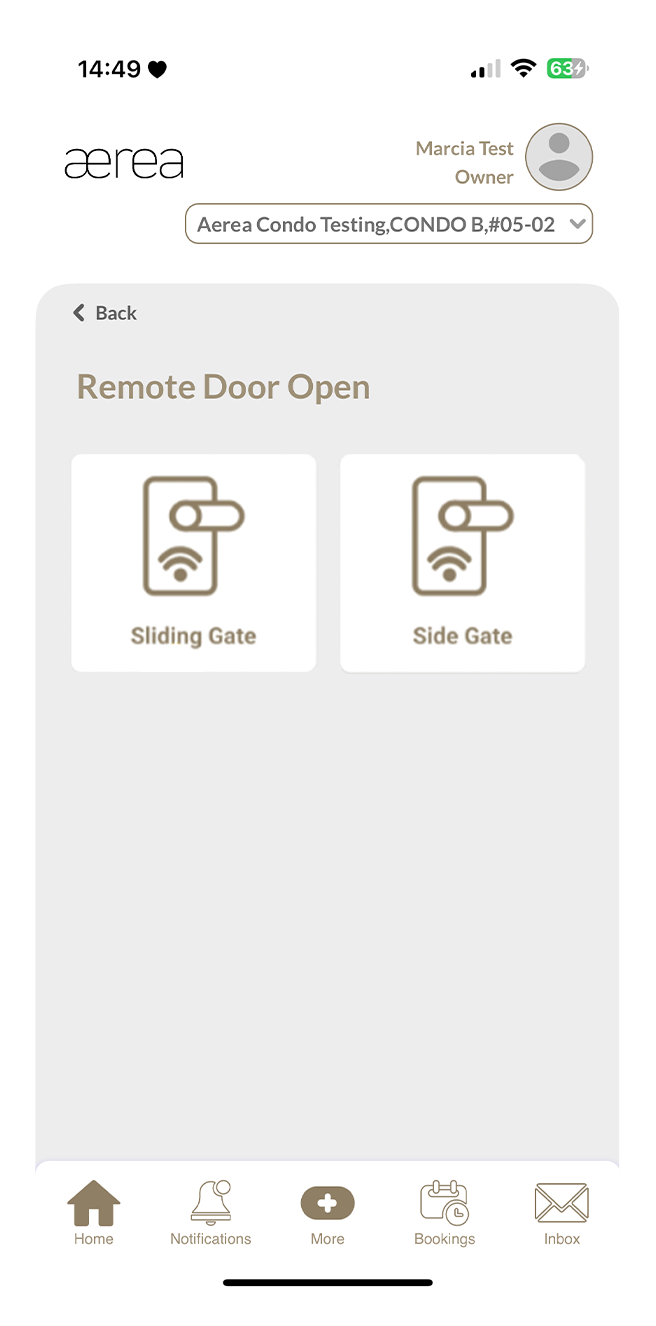
Step 1
Tap "Remote Opening" in the Open Door menu.
Step 2
Choose the door (e.g., Side Gate) you want to open from the list and wait a moment for it to unlock.
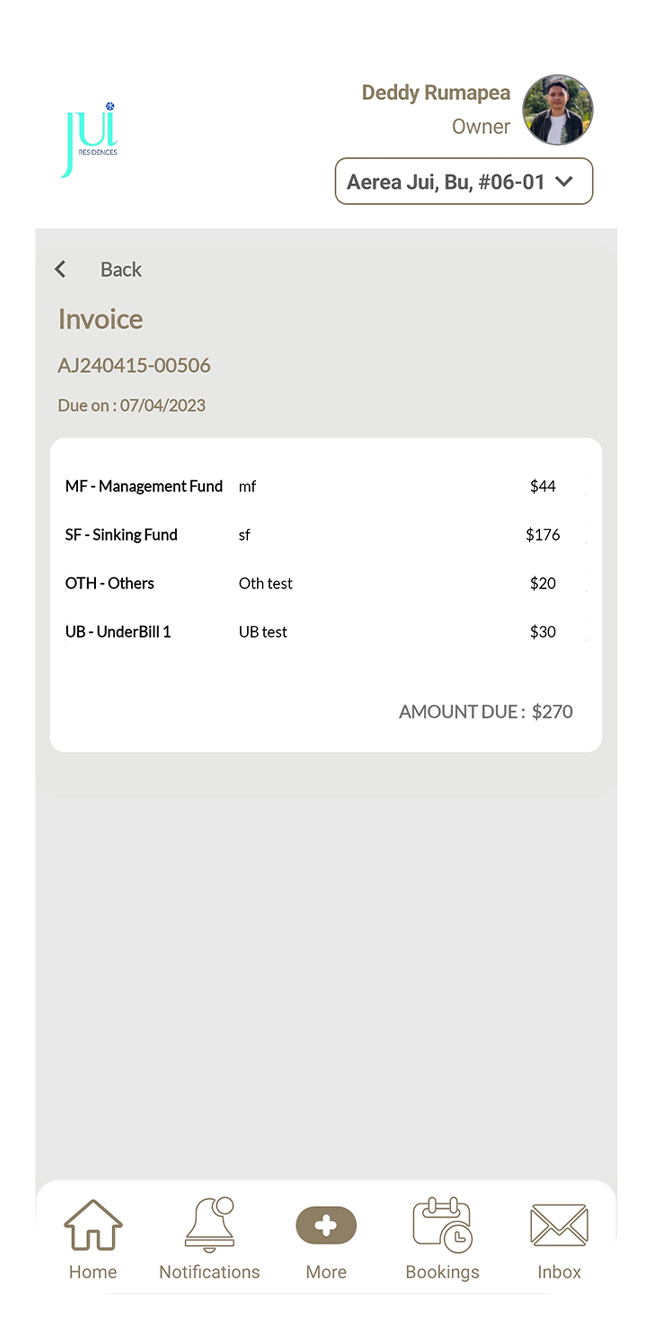
18.1 Paying due invoice
How it works
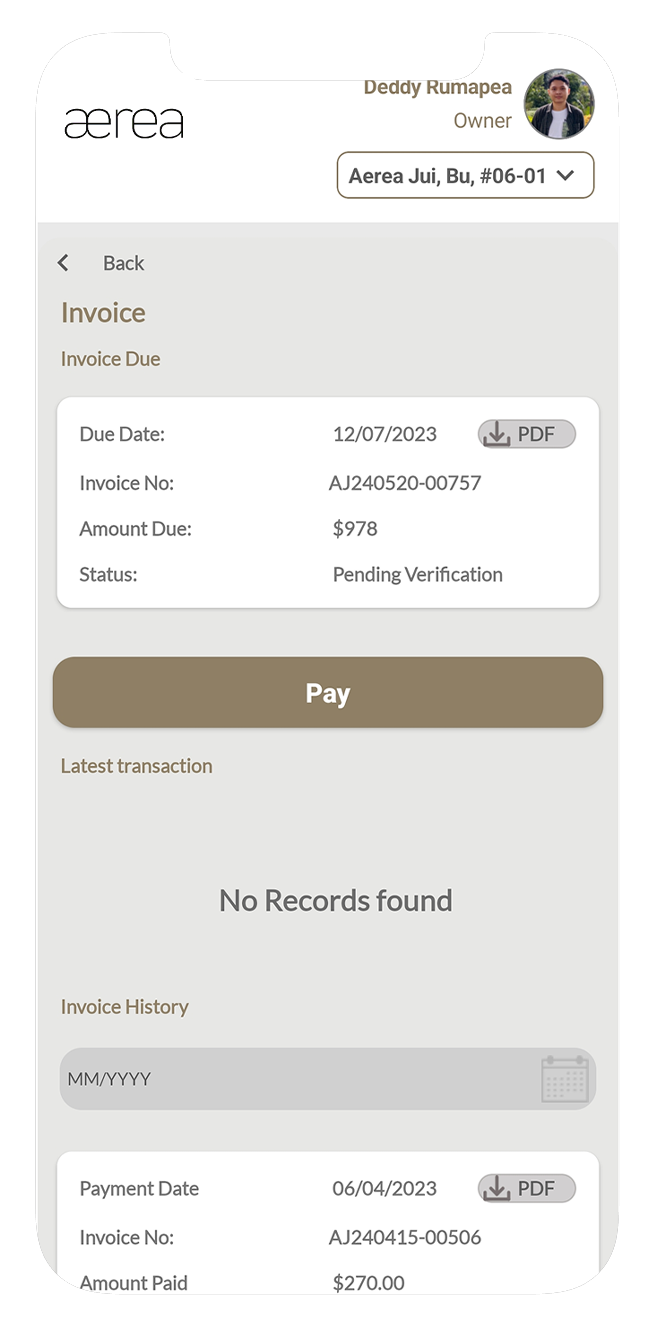
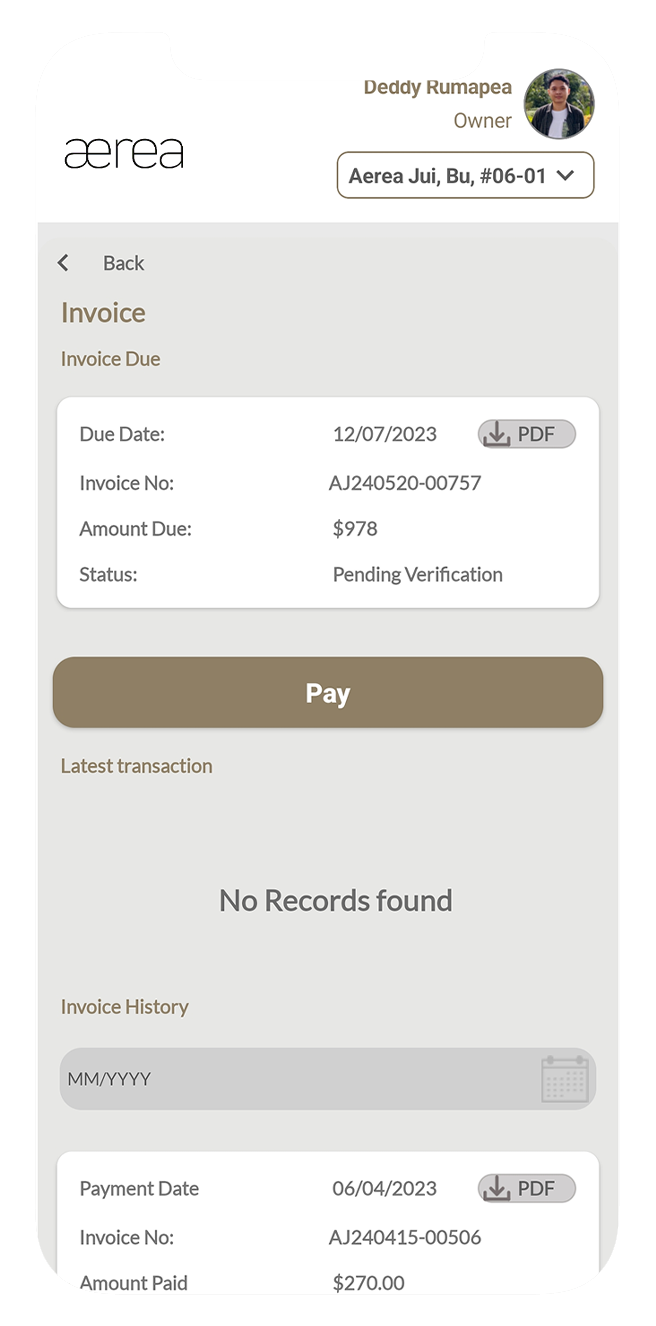
Step 1
Select the invoice that is due.
Step 2
Review the invoice details, then tap the "Pay Now" button.
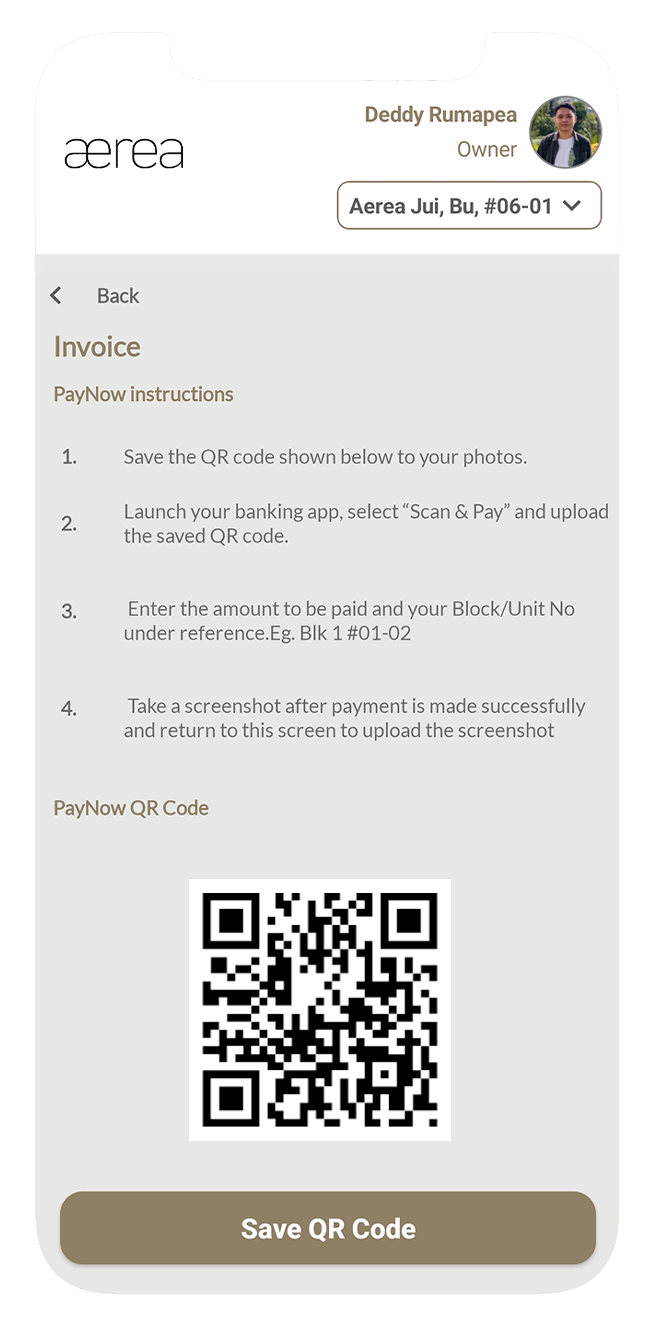
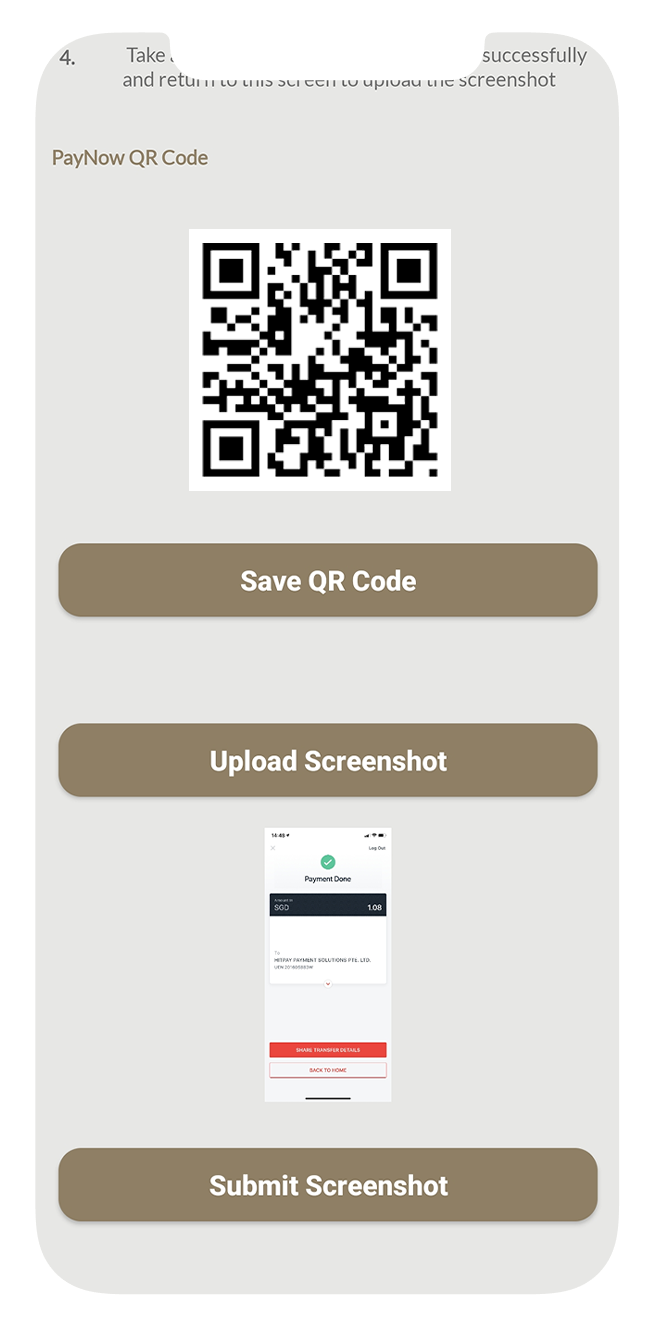
Step 3
Save the PayNow QR code to your gallery. Open your banking app, select "Scan & Pay," and upload the saved QR code. Enter the payment amount and your Block/Unit No (e.g., Block 1 #01-02) as a reference. Take a screenshot of the payment confirmation, then return to the Aerea Home app.
Step 4
Tap the "Upload Screenshot" button, select your payment confirmation screenshot, and then tap "Submit."
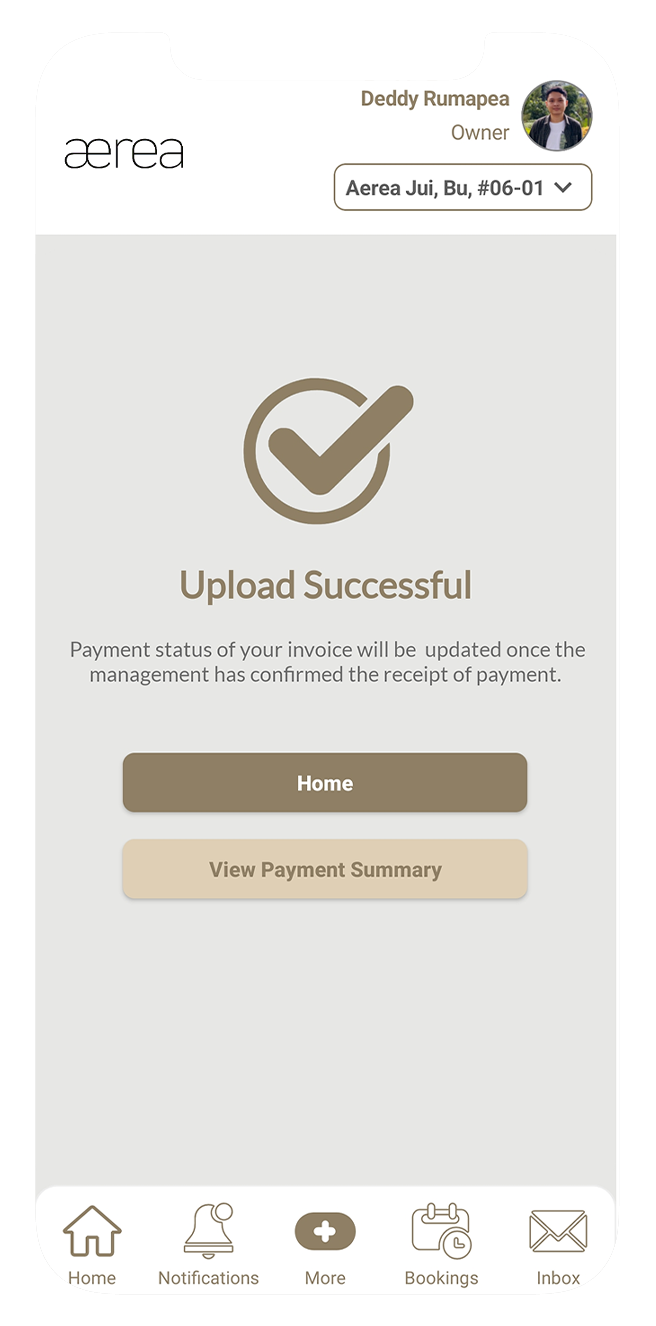
Step 5
A confirmation page will appear once your payment has been successfully submitted.
18.2 Reviewing invoice history
How it works
Step 1
Scroll down to view your invoice history in Resident Management.
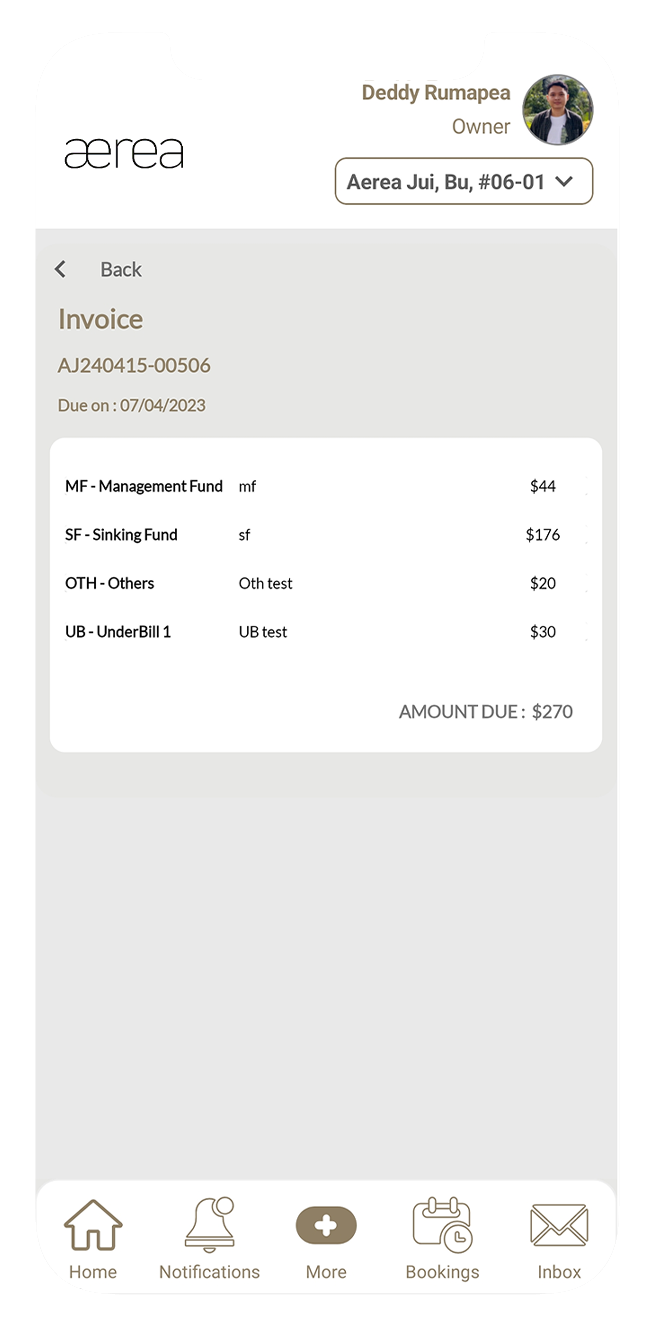
Step 2
Tap on any item to see its details.
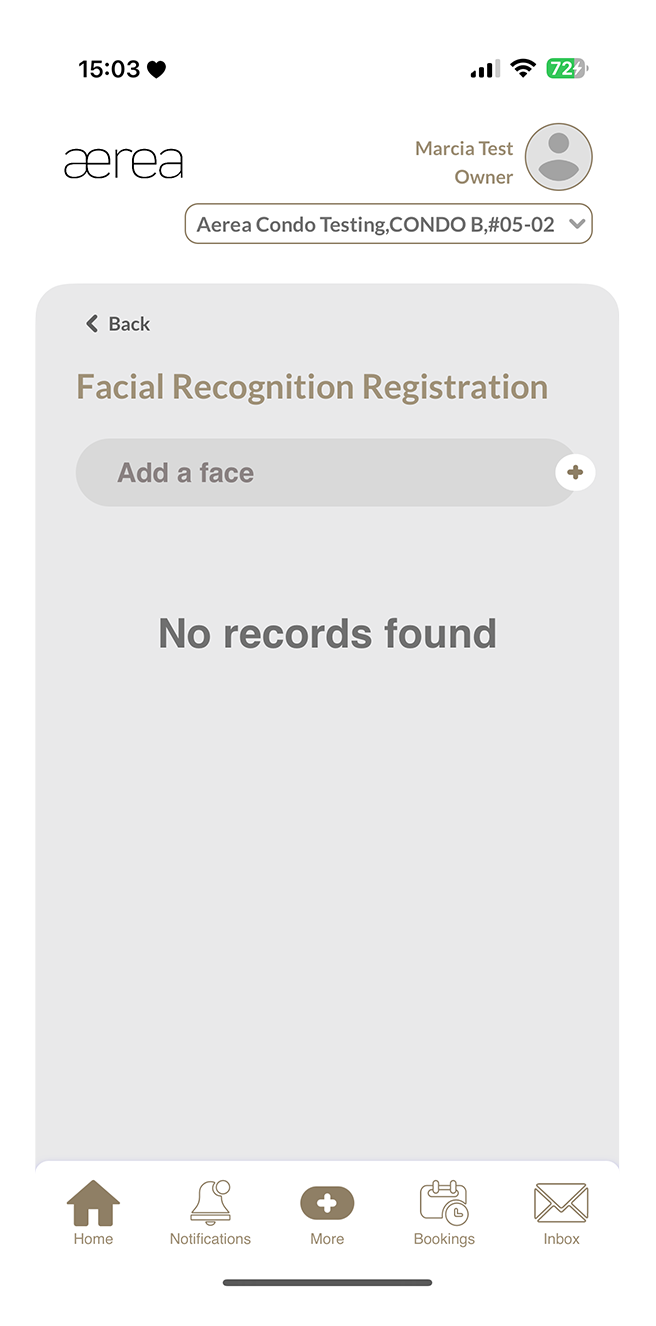
19.1 Registering a new face ID
How it works
Step 1
Tap the "Add a Face" button above the list of registered Face IDs.
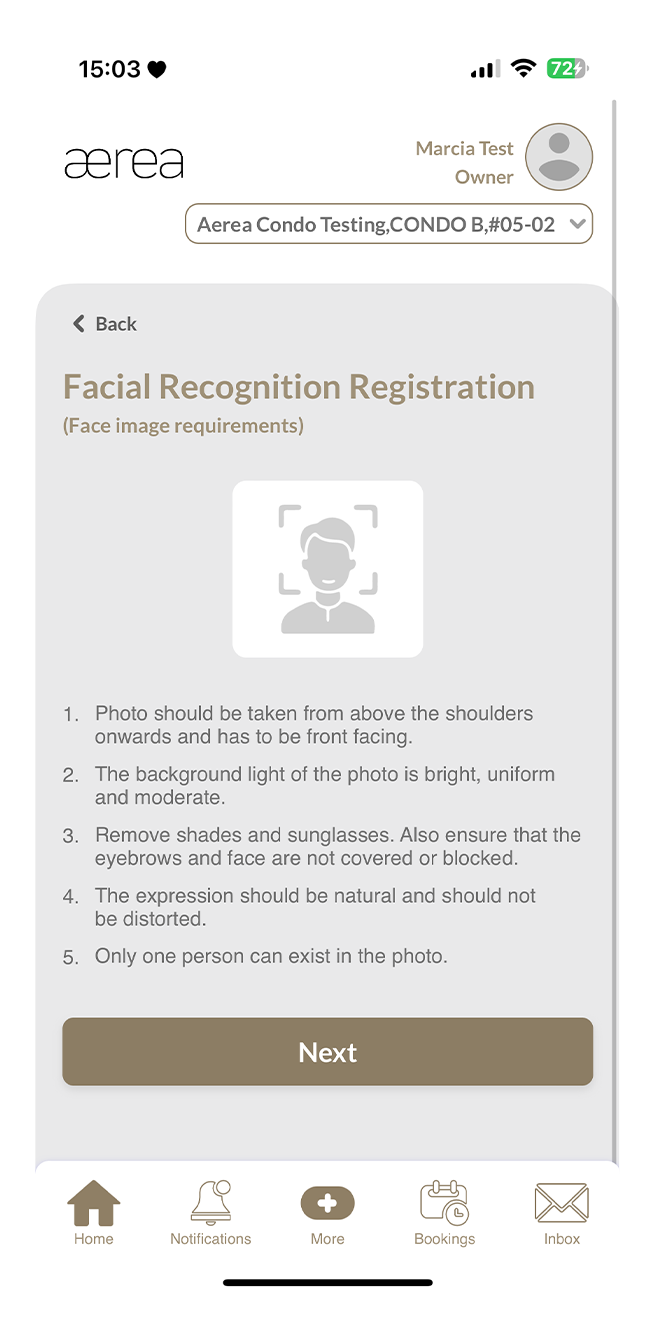
Step 2
Read through the face image requirements, then tap "Next."
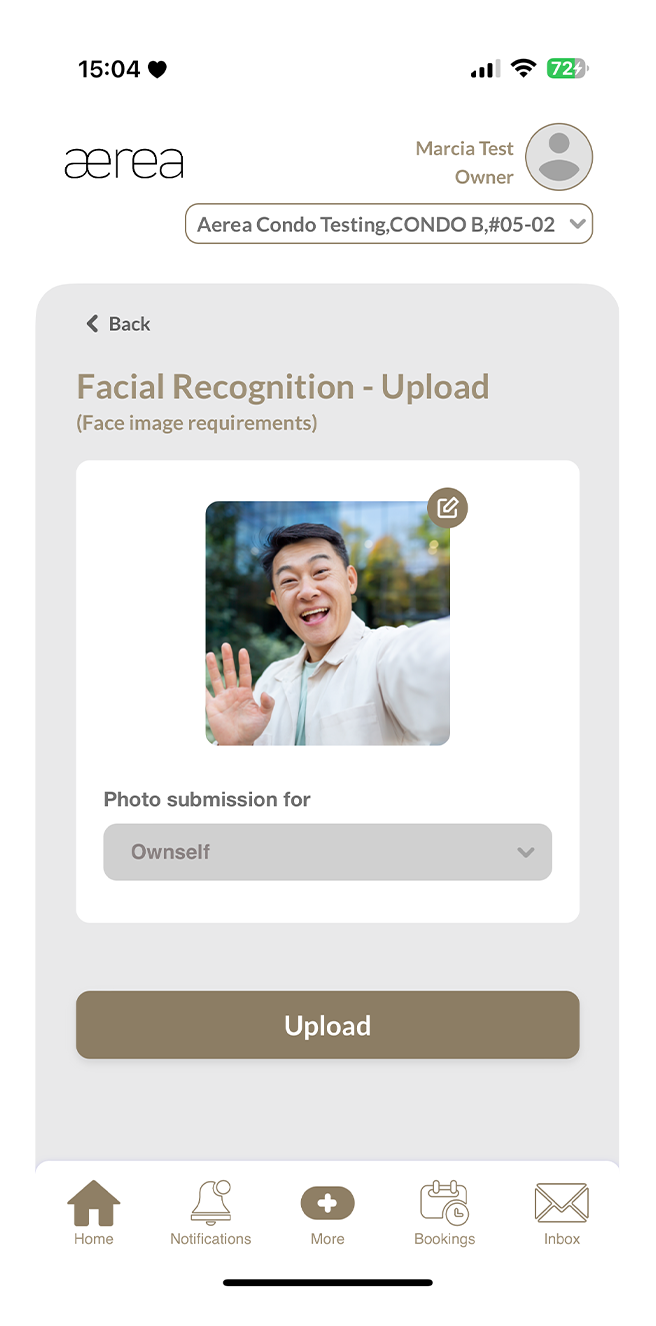
Step 3
A popup will appear, allowing you to choose an image from either the camera or gallery. Make your selection.
Step 4
After selecting an image, crop it as needed and tap the "Crop" button.
Step 5
Choose the appropriate photo category and tap "Upload."
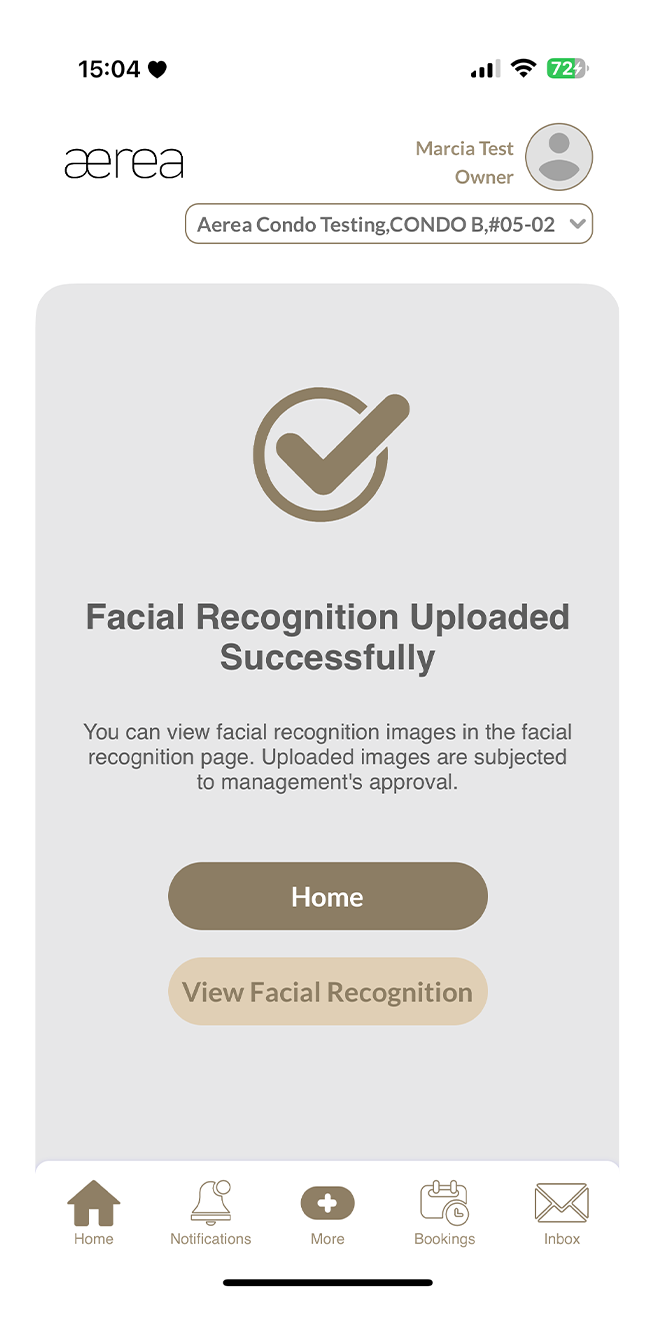
Step 2
A confirmation screen will appear once the Face ID has been successfully submitted.
19.2 Deleting a registered face ID
How it works
Step 1
Tap the delete button next to the Face ID in the list.
Step 2
Confirm the deletion by tapping "Yes" in the popup.
Step 3
A confirmation screen will appear once the Face ID has been successfully deleted.
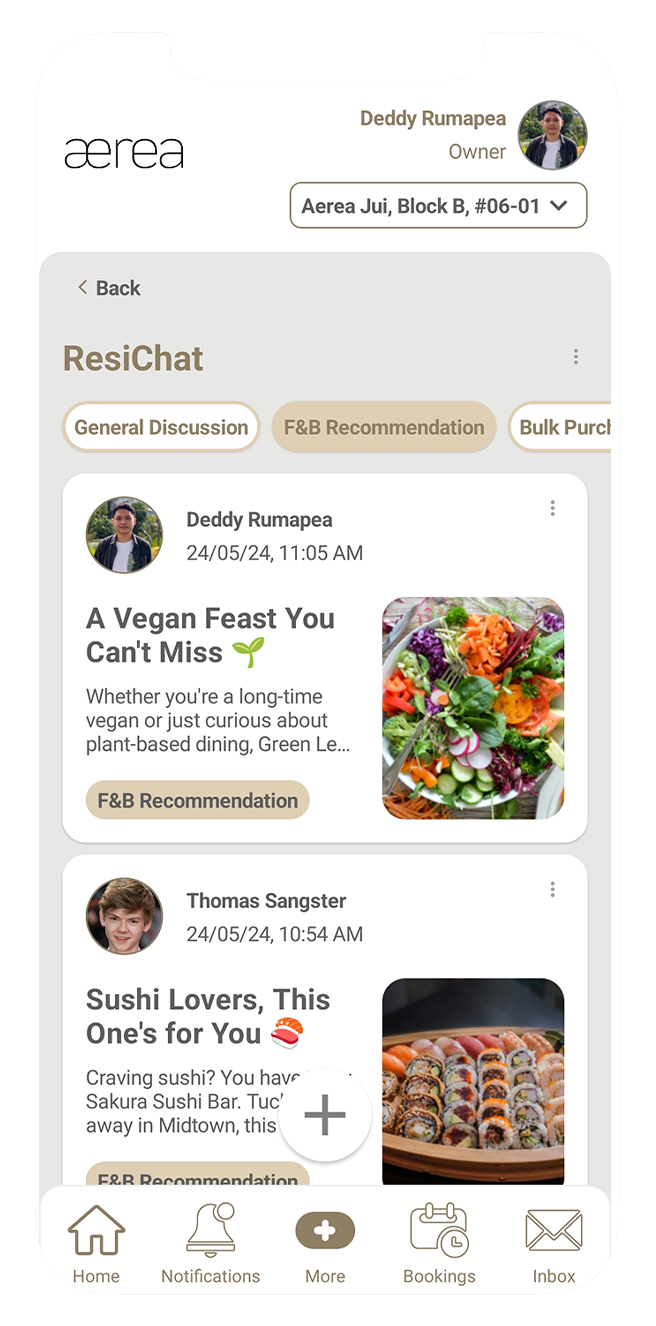
20.1 Browsing Posts Feed
How it works
Step 1
Open ResiChat, and you'll see a feed of posts. Scroll through to find posts of interest.
Step 2
Use the topic filter at the top to narrow posts by category (e.g., "F&B Recommendation").
Step 3
Tap on any post to view its details.
20.2 Creating a New Post
How it works
Step 1
Tap the + button on the feed to start a new post.
Step 2
Fill in the post title, message, and category.
Step 3
Optionally, attach an image if you want and tap on the ‘Submit’ button once all fields are filled.
Step 3
A confirmation message will appear once your post has been successfully submitted.
20.3 Deleting a Post
How it works
Step 1
Tap the 3 dots at the top right of your post.
Step 2
Select “Delete” from the options that appear.
Step 3
Confirm the deletion by tapping “Yes” on the confirmation popup.
Step 4
You will see another confirmation popup once the post has been successfully deleted- You will see another confirmation popup once the post has been successfully deleted
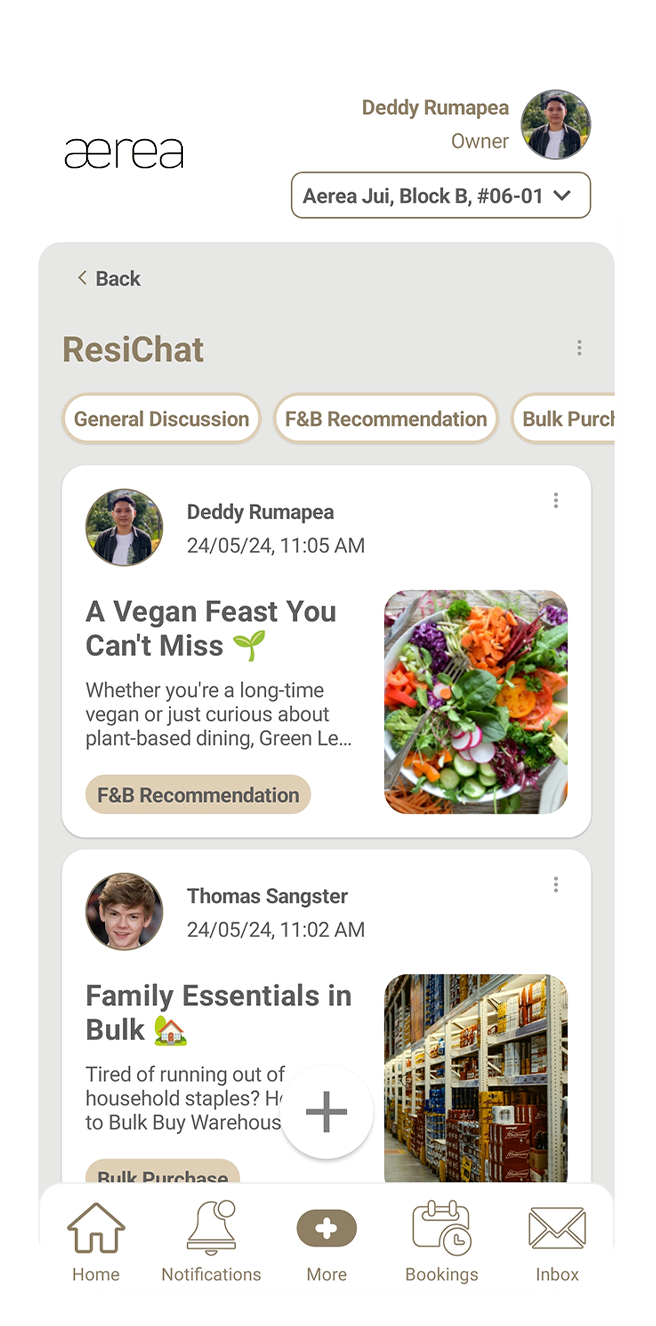
20.4 Reporting a Post
How it works
Step 1
Tap the 3 dots in the top right corner of the post.
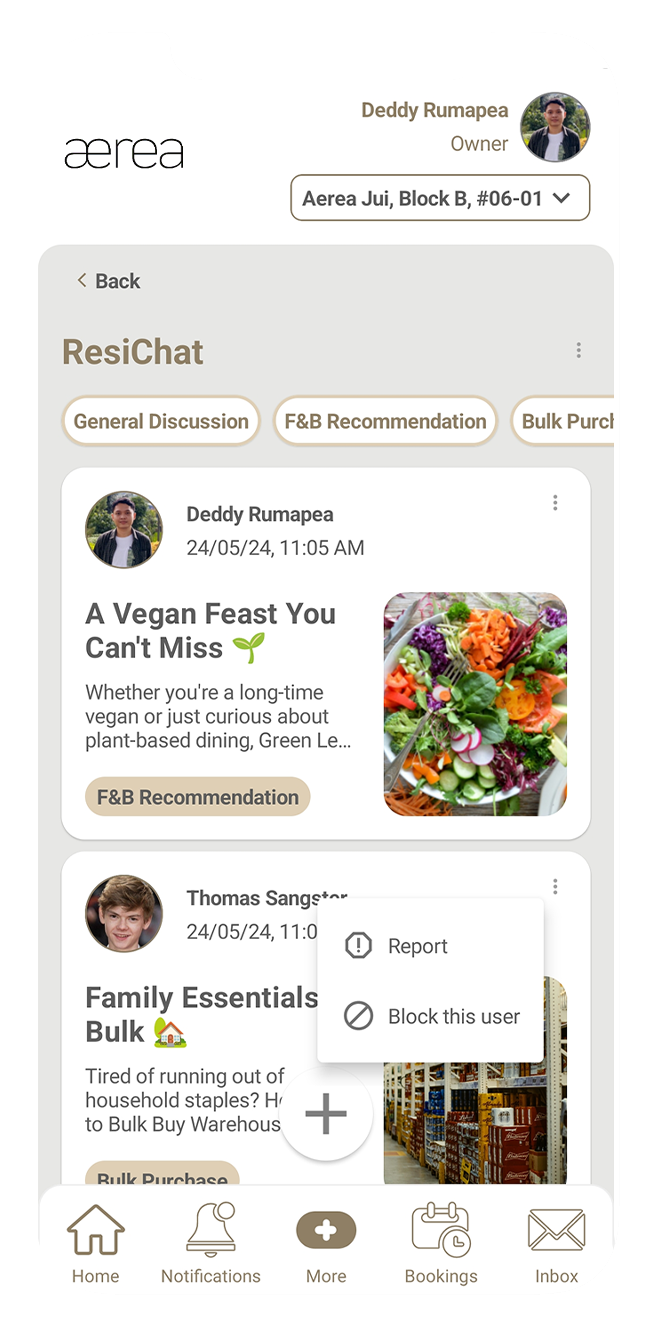
Step 2
Select the “Report” option that appears.
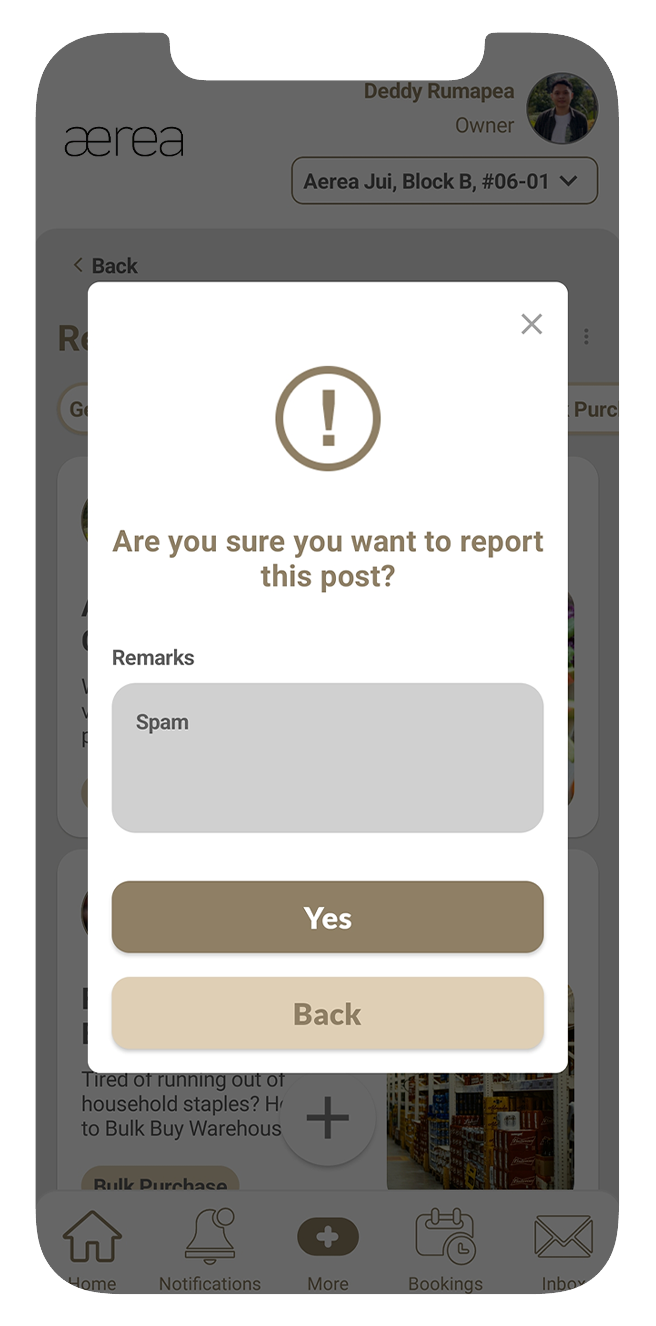
Step 3
Enter your report remarks in the confirmation popup and tap “Yes.”
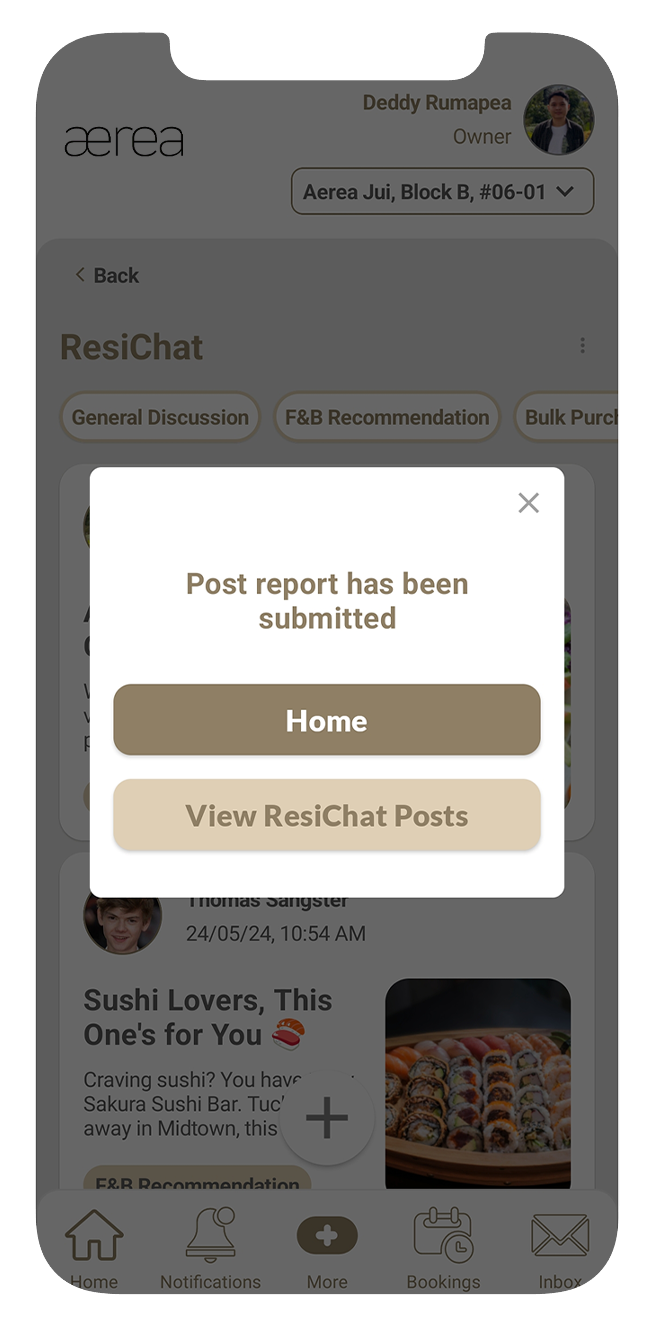
Step 4
If the post is reported successfully, you will see a confirmation popup.
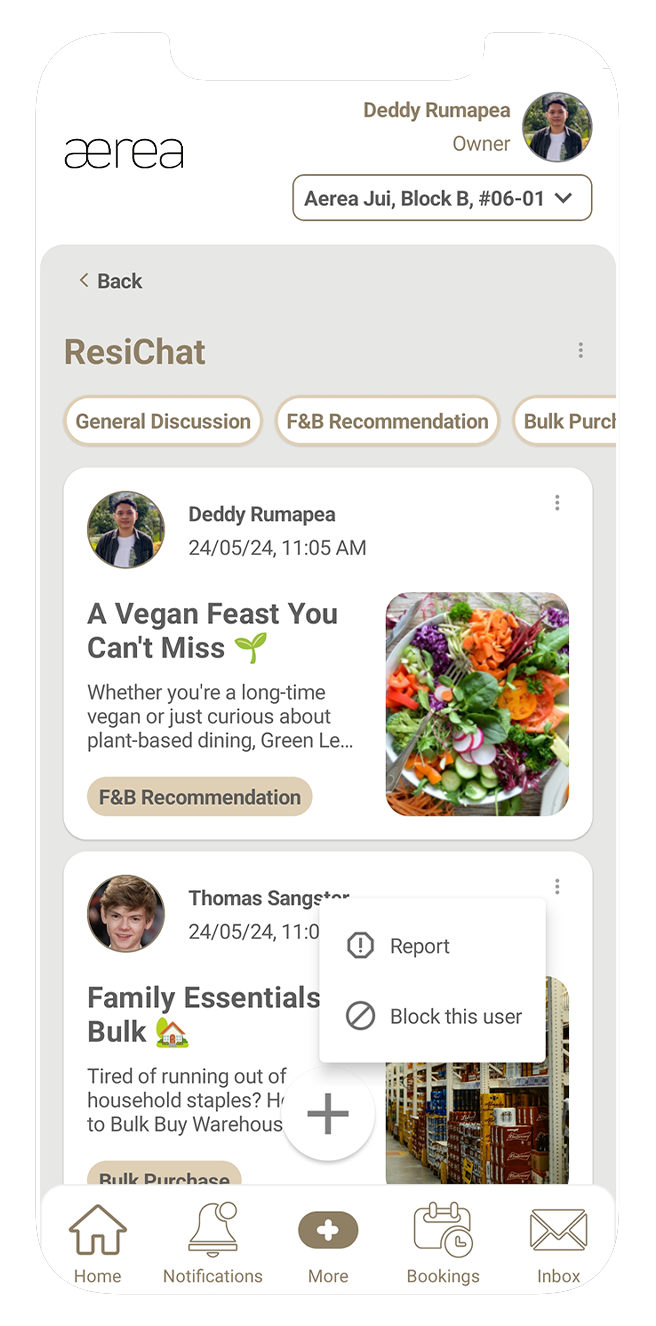
20.5 Blocking a Post Creator
How it works
Step 1
Tap the 3 dots in the top right corner of the post.
Step 2
Select the "Block" option that appears.
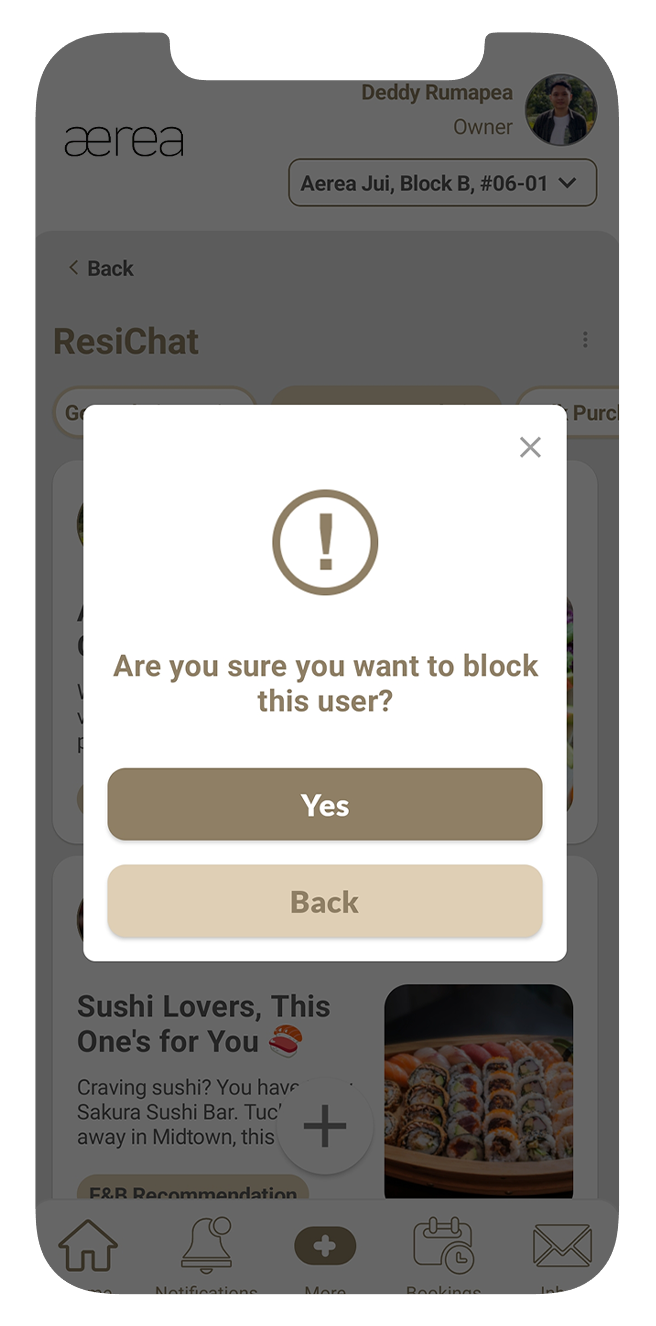
Step 3
Confirm by tapping "Yes" on the popup.
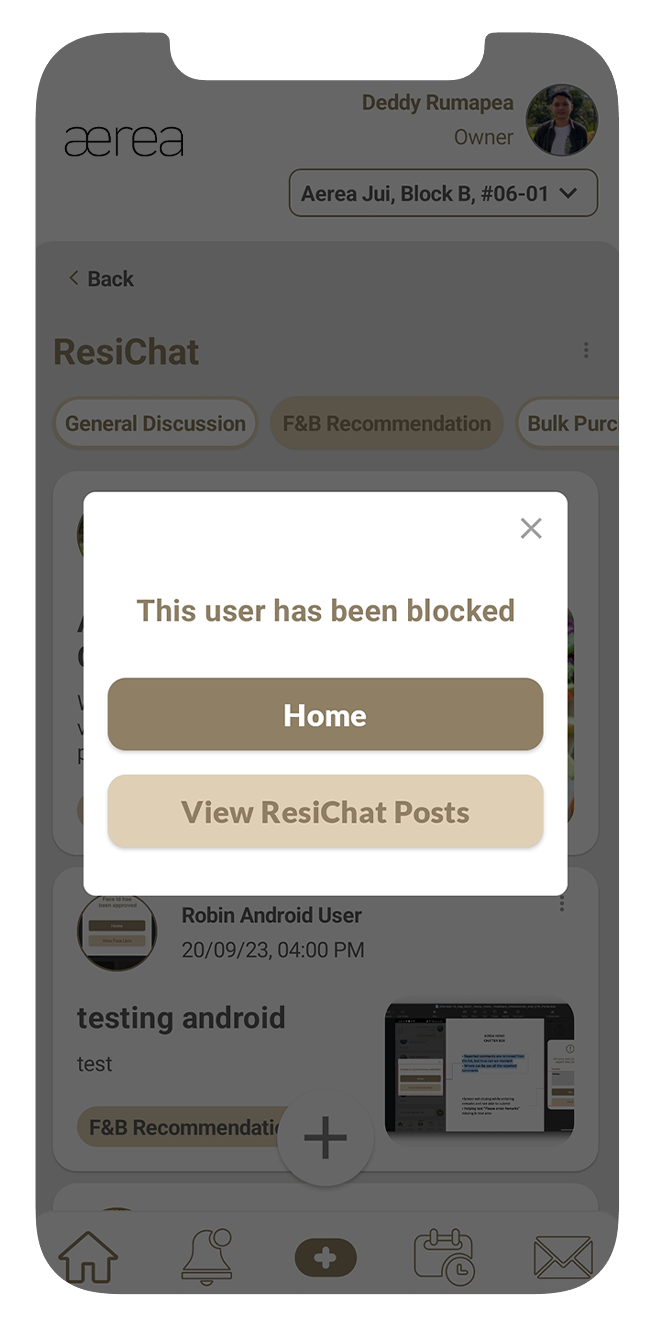
Step 4
You'll receive another popup confirming if the user has been successfully blocked.
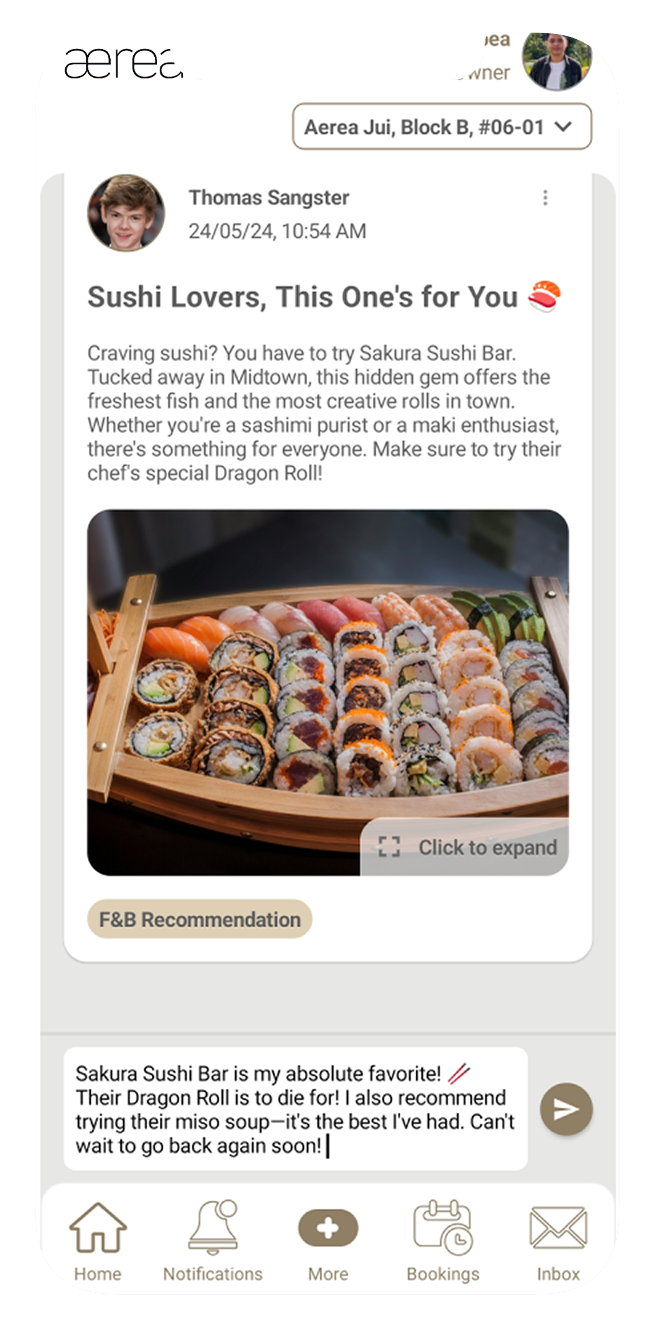
20.6 Posting a New Comment
How it works
Step 1
You'll receive another popup confirming if the user has been successfully blocked.
Step 2
Type your comment in the designated comment field and tap “Send”.
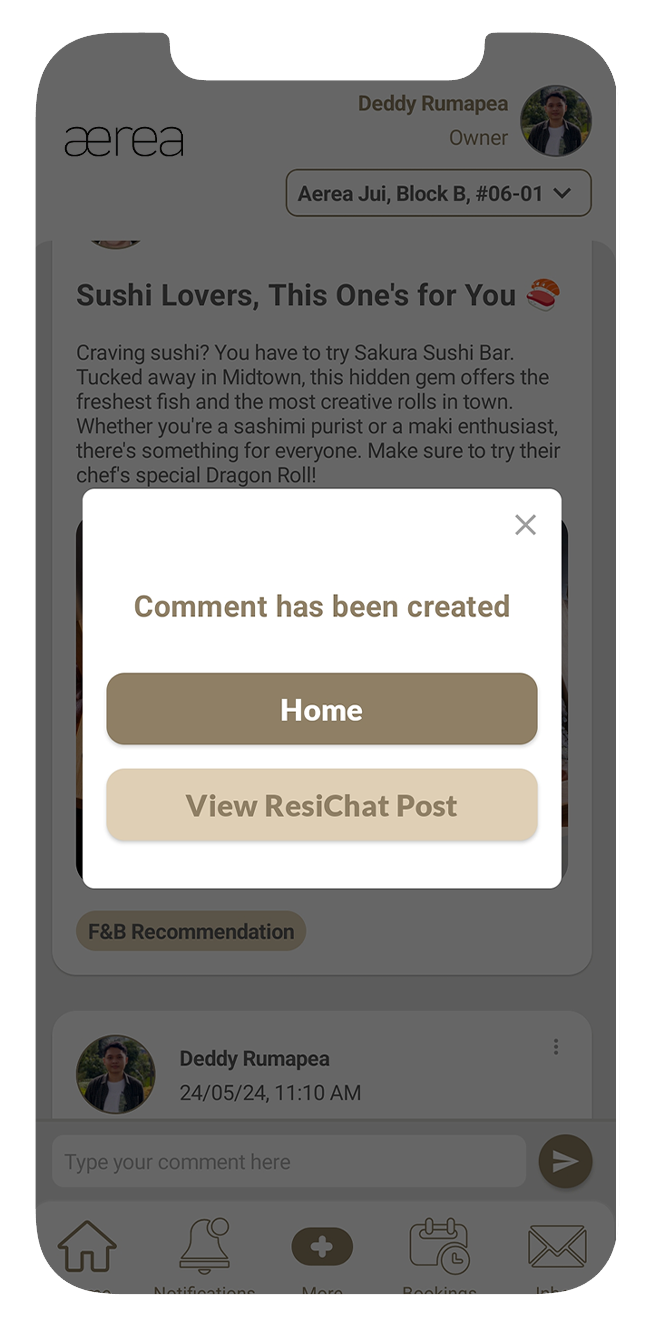
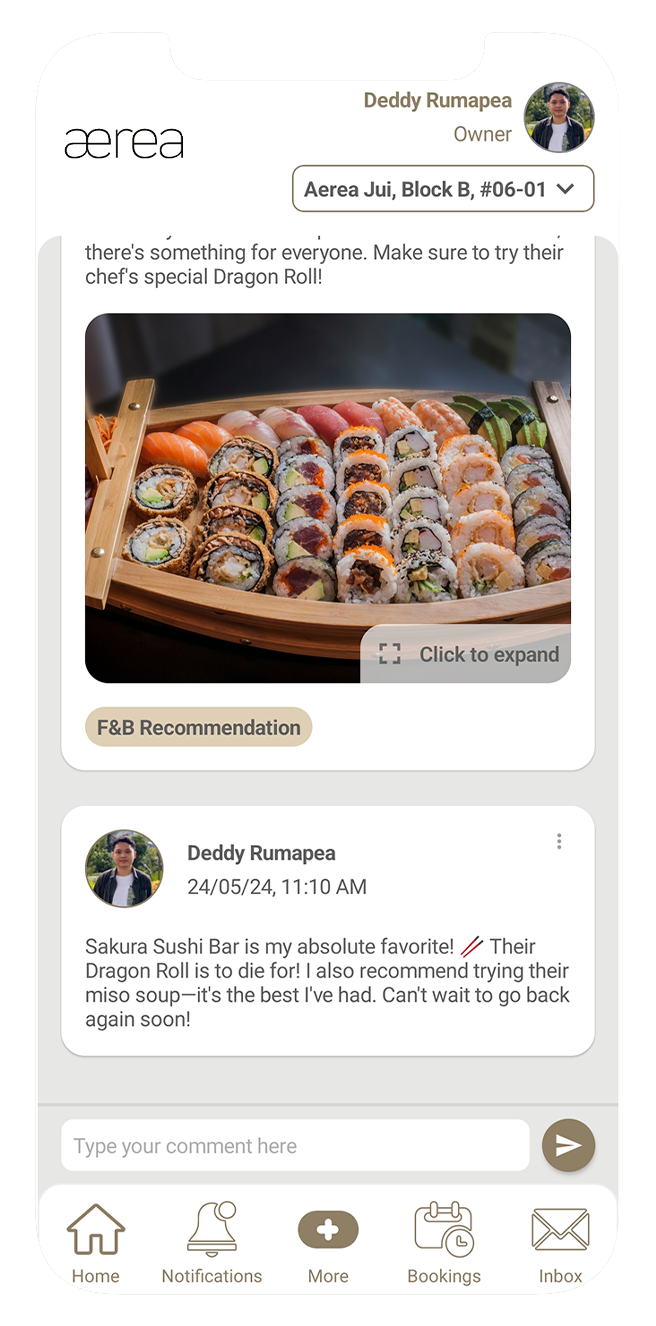
Step 3
A confirmation popup will appear once your comment has been successfully posted.
20.7 Deleting a Comment
How it works
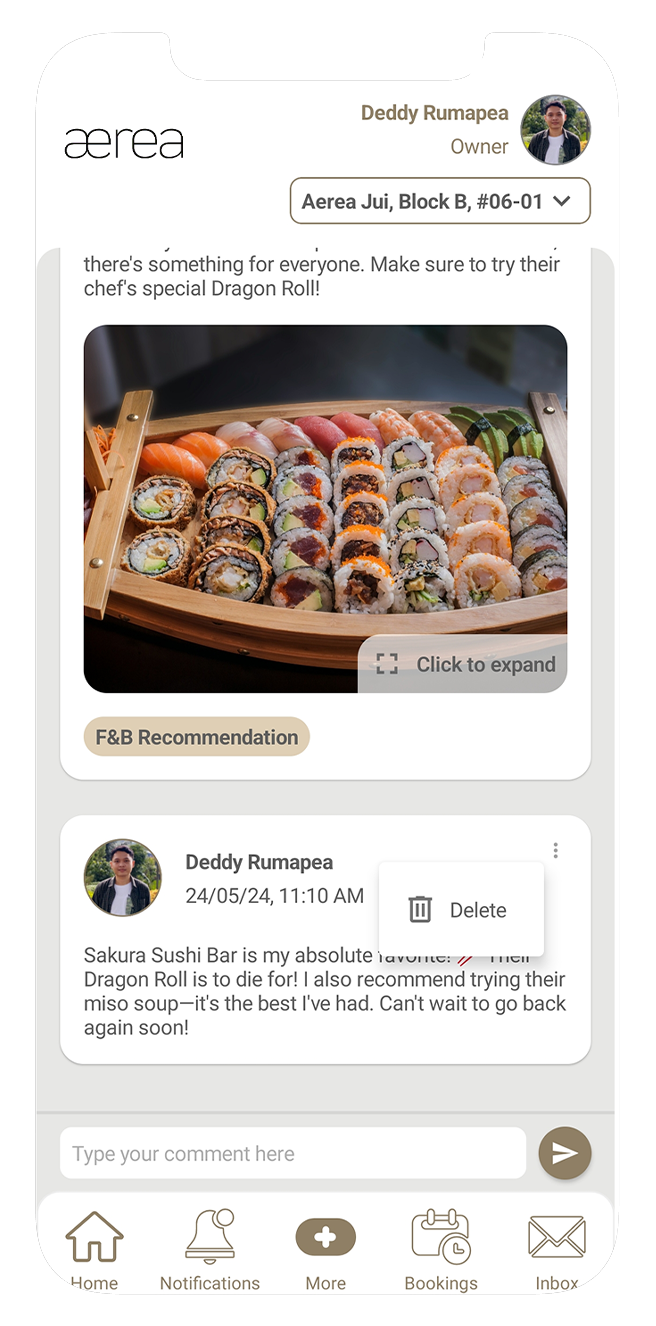
Step 1
Tap the 3 dots located at the top right corner of your comment.
Step 2
From the options that appear, select "Delete."
Step 3
Confirm the deletion by tapping "Yes" on the popup that appears.
Step 4
Once your comment has been successfully deleted, you'll see another confirmation popup.
20.8 Reporting a Comment
How it works
Step 1
Tap the 3 dots located in the top right corner of the comment.
Step 2
Choose the “Report” option from the menu that appears.
Step 3
Enter your report remarks in the confirmation popup and tap “Yes.”
Step 4
If the comment is successfully reported, you’ll see a confirmation popup.
20.9 Blocking a Comment Creator
How it works
Step 1
Tap the 3 dots located at the top right of the comment.
Step 2
Choose the "Block" option from the menu that appears.
Step 3
Confirm your choice by tapping "Yes" on the popup that appears.
Step 4
You'll then see another popup confirming if the user has been successfully blocked.
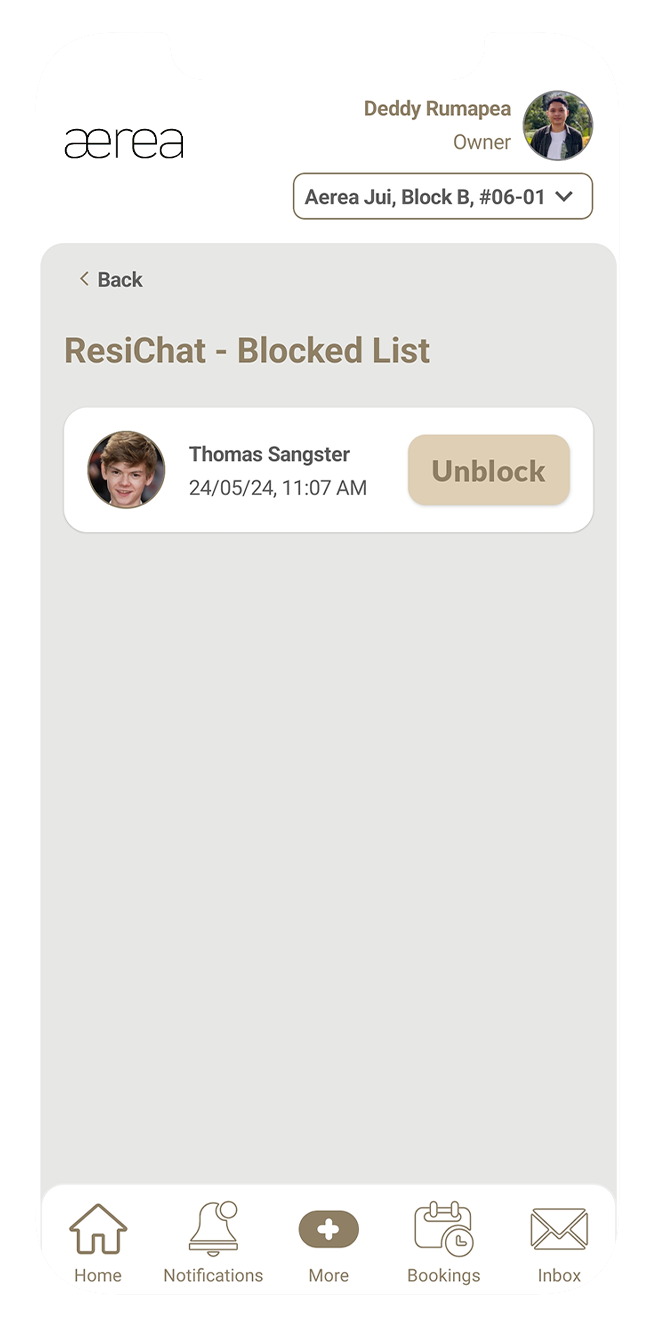
20.10 Unblocking a User
How it works
Step 1
Tap the 3 dots located at the top right corner of the ResiChat feed screen.
Step 2
Select "Blocked List" from the menu that appears.
Step 3
You'll see a list of blocked users. For each user, there's an "Unblock" button. Tap the "Unblock" button next to the user you want to unblock.
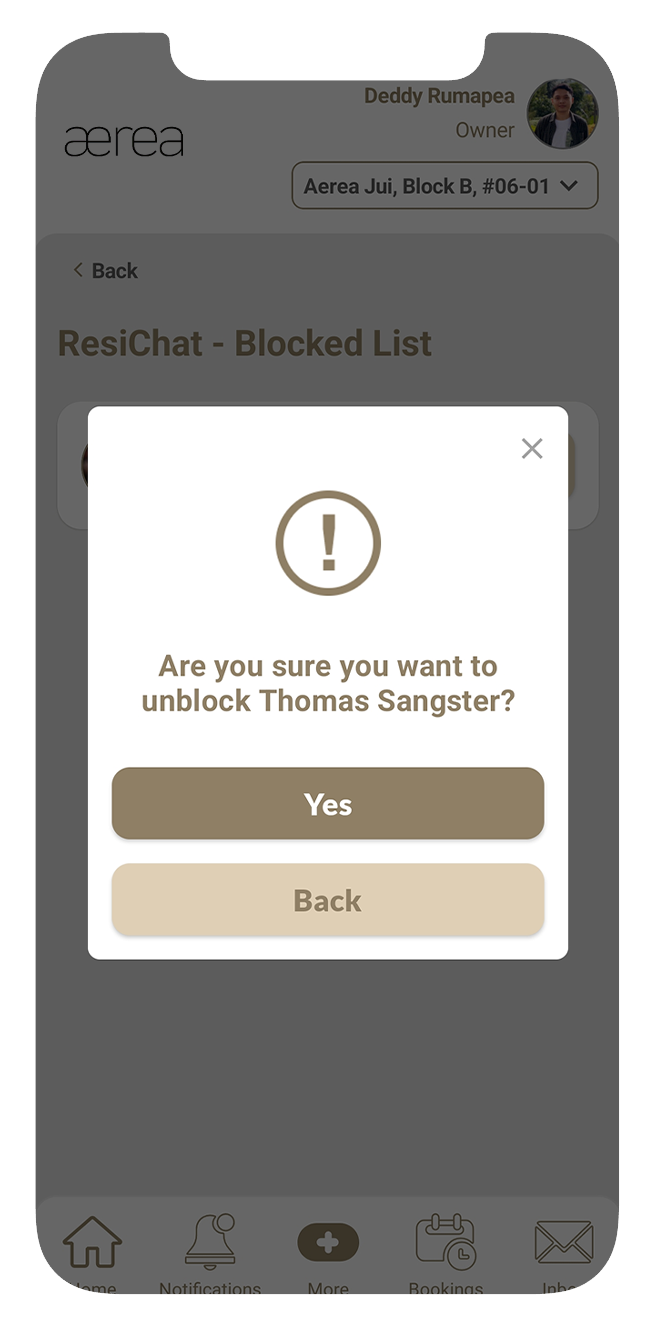
Step 4
Confirm your choice by tapping "Yes" on the popup that appears.
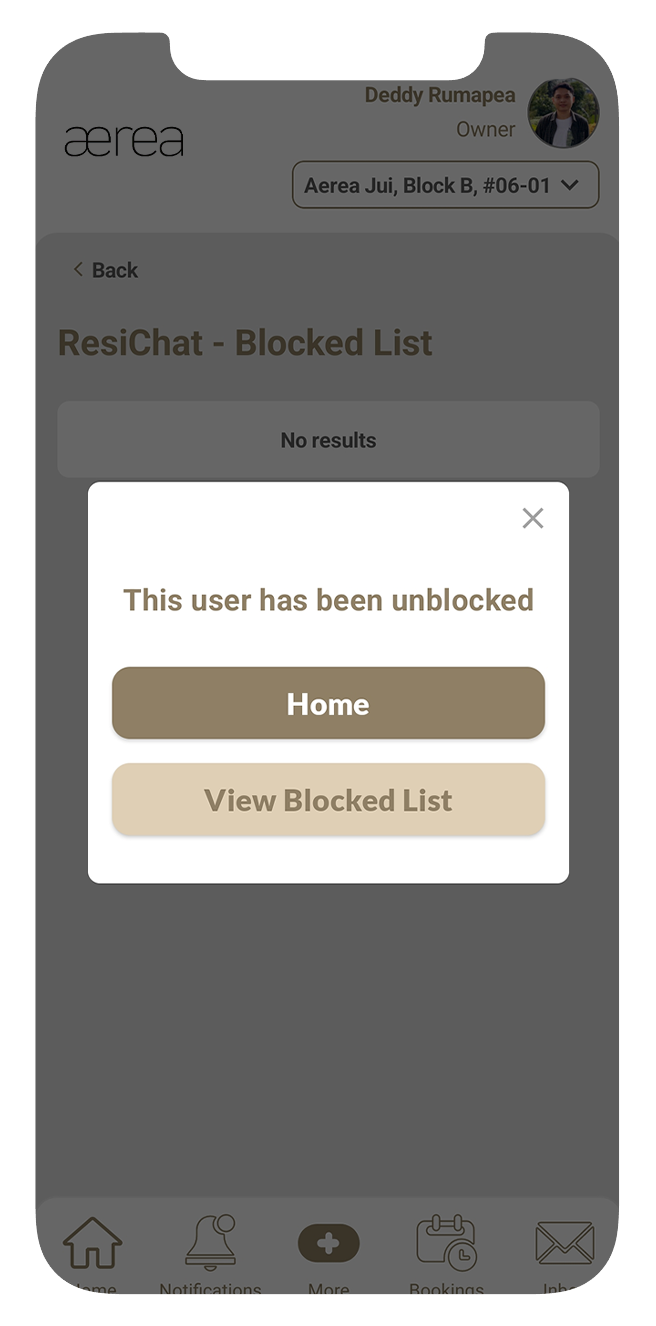
Step 5
You'll then receive another popup confirming if the user has been successfully unblocked.
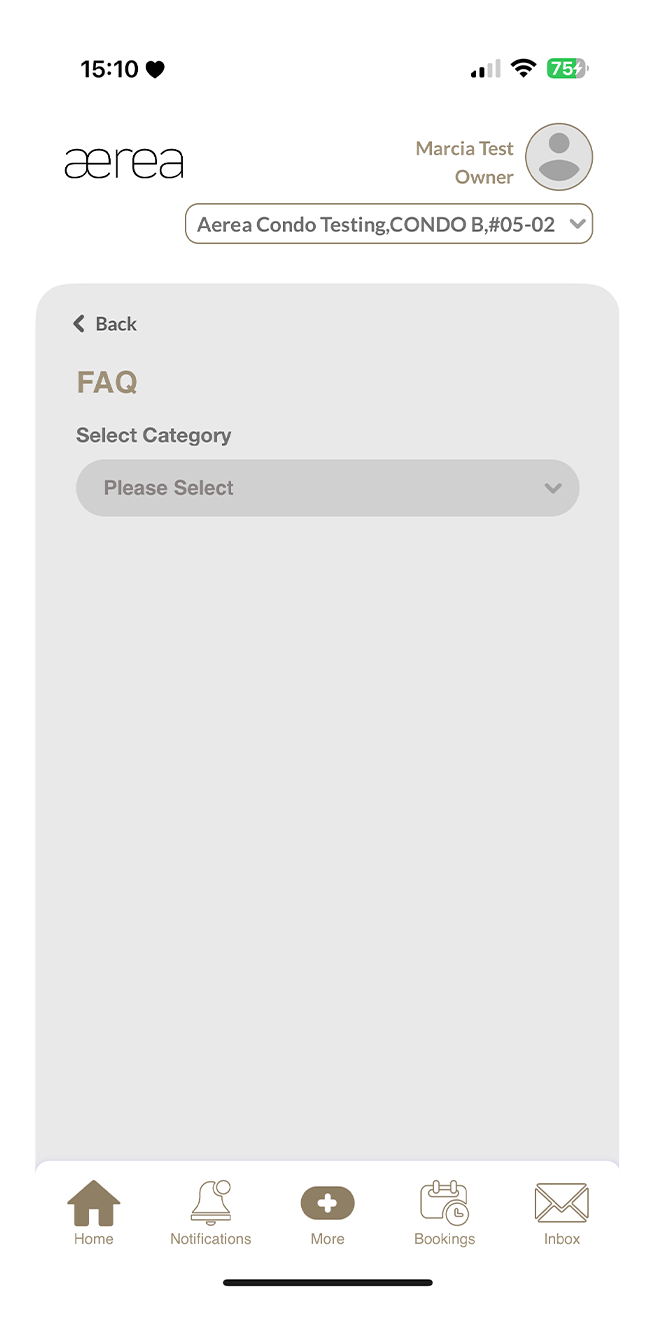
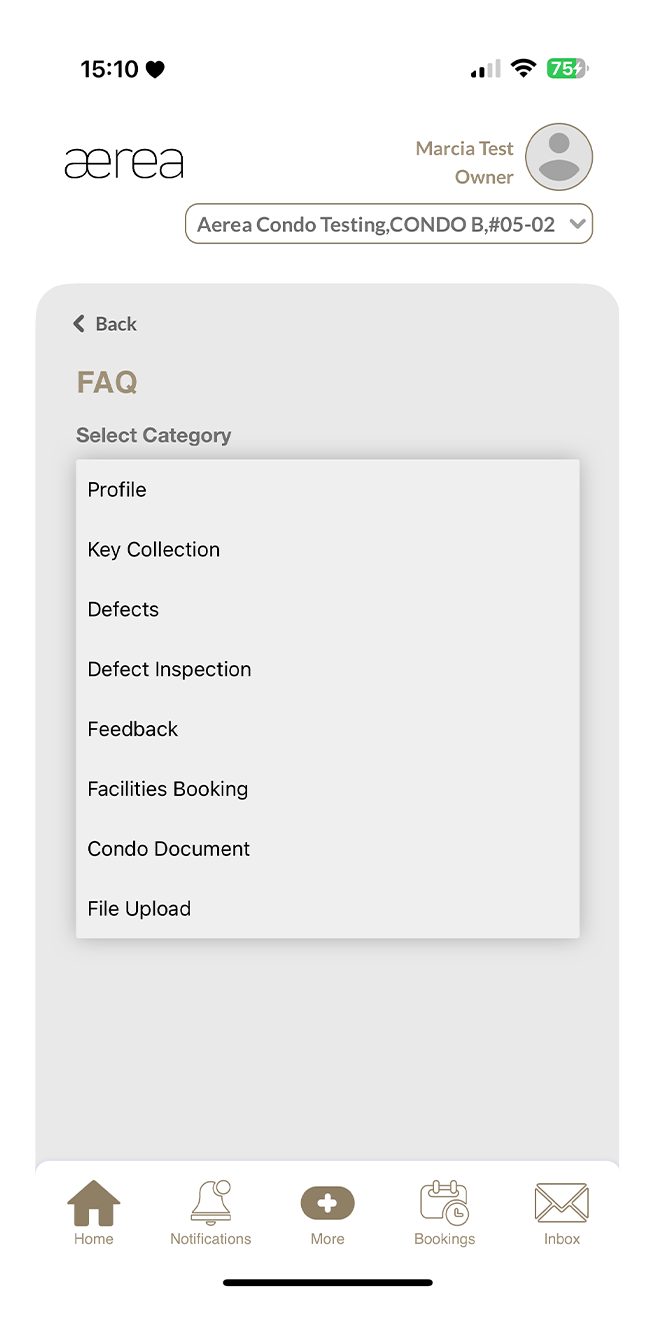
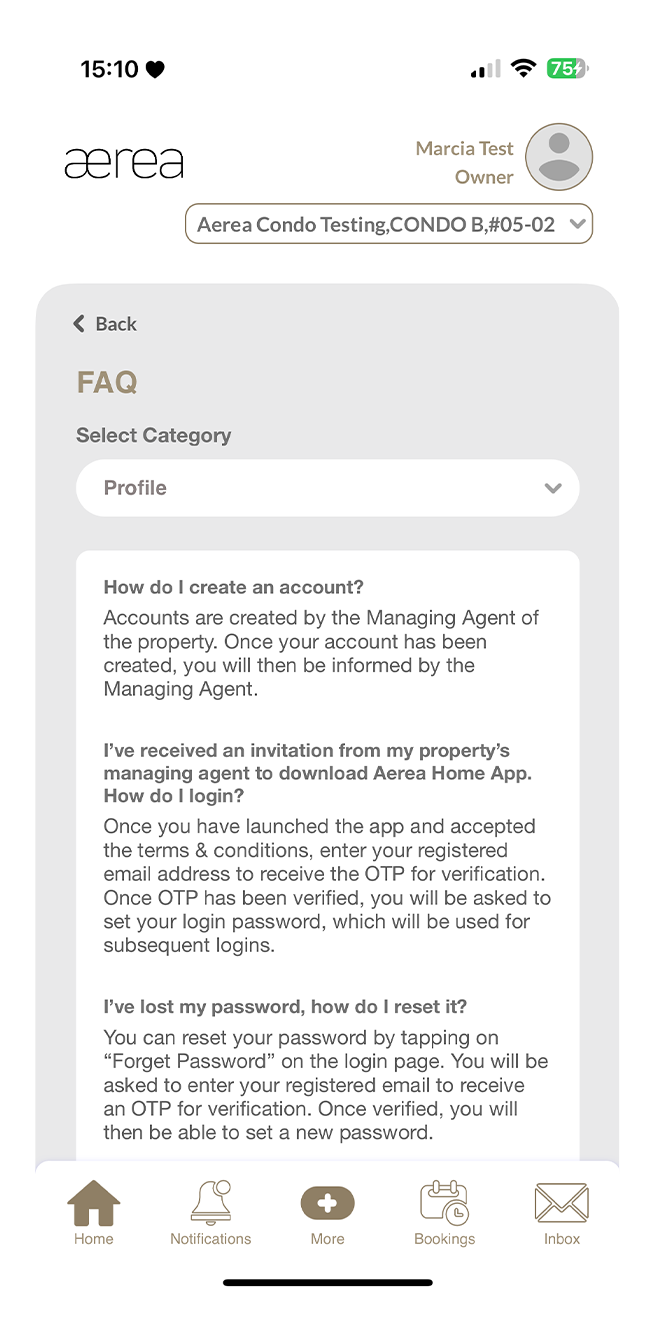
21.1 Frequently Asked Questions
How it works
Step 1
Tap on the category dropdown
Step 2
Select the relevant category (e.g., Profile).
Step 3
The questions and answers for the selected category will appear.
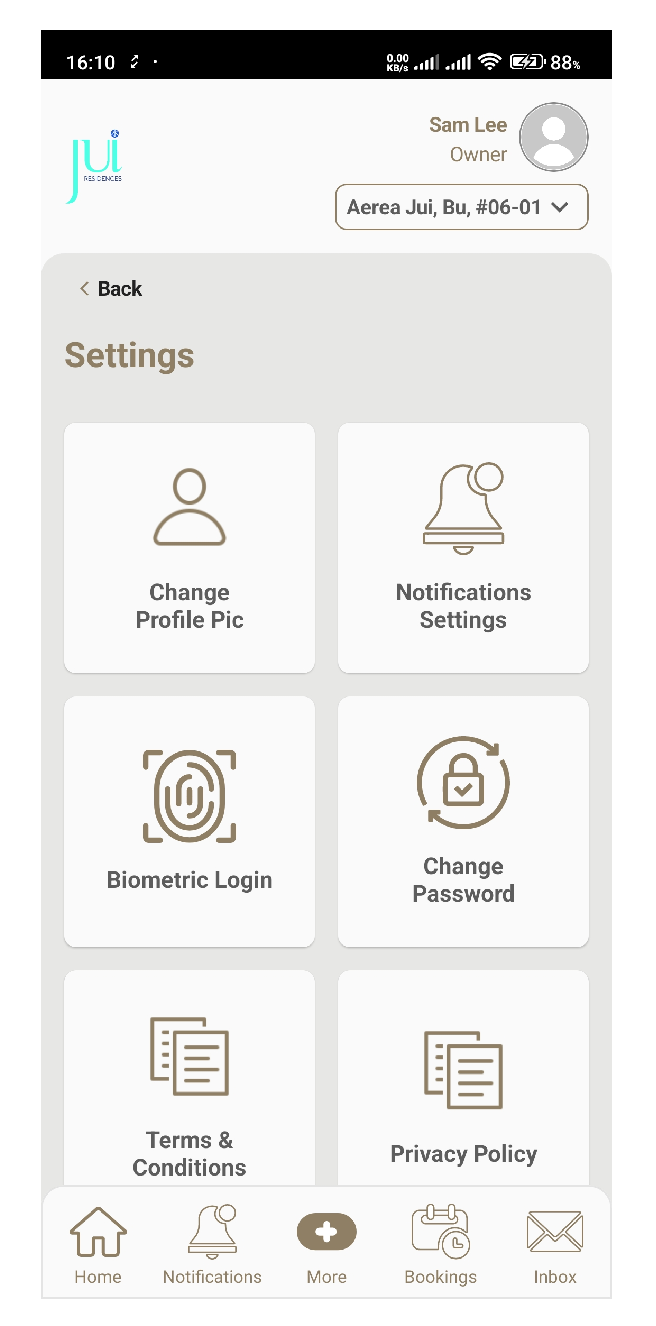
22.1 Settings menu
How it works
Step 1
Tap on the desired option to access its settings.
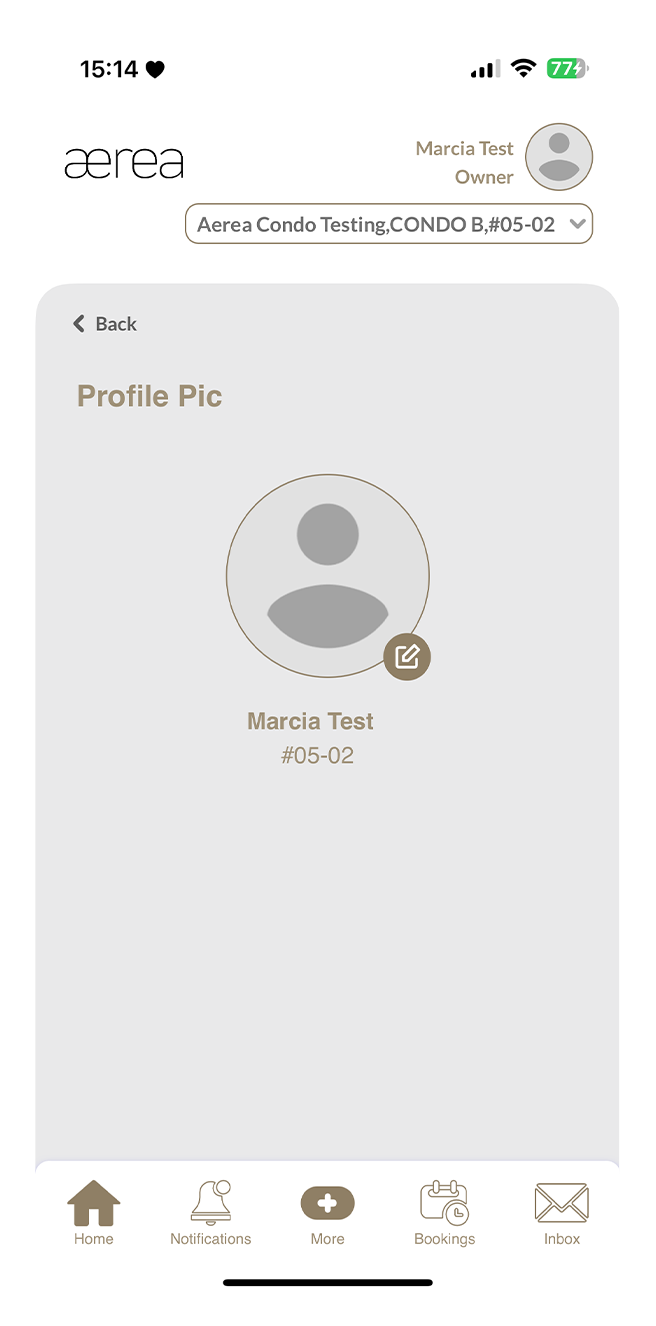
22.2 Changing profile picture
How it works
Step 1
Tap the Edit icon at the bottom left of your current profile picture and choose a new picture from your camera or gallery.
Step 2
Tap Submit to save your changes.
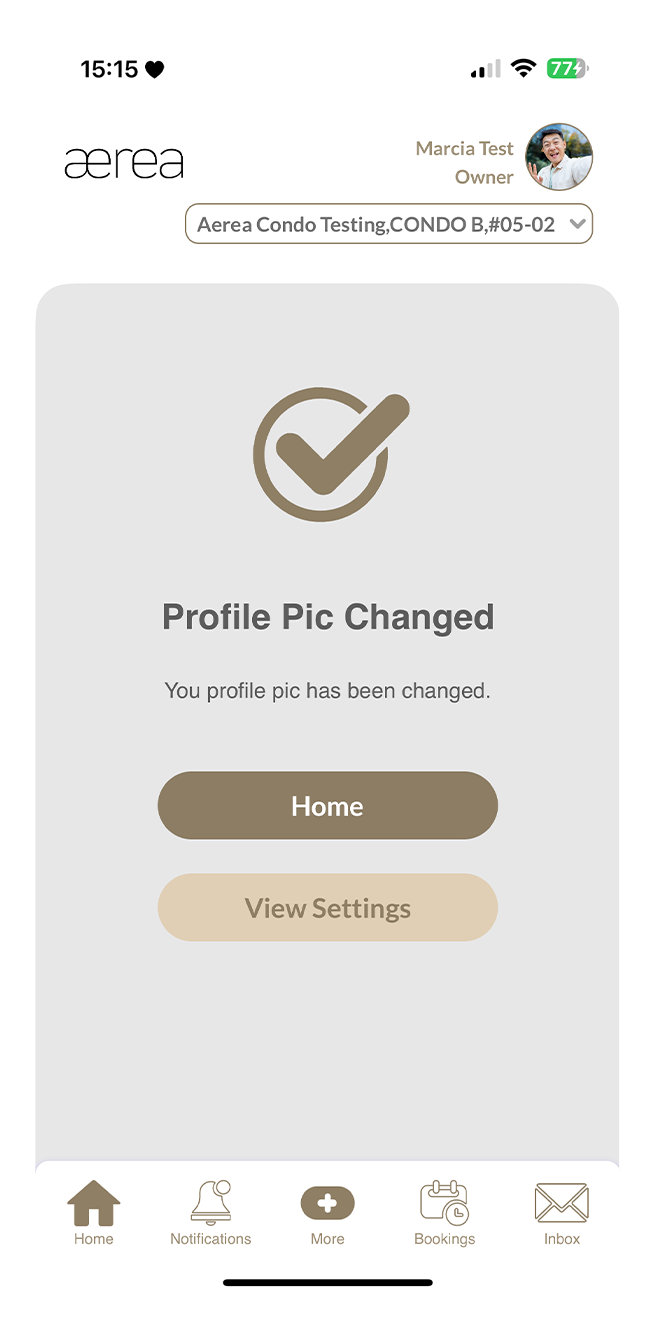
Step 3
A confirmation message will appear once your new profile picture is saved.
22.3 Customizing notifications
How it works
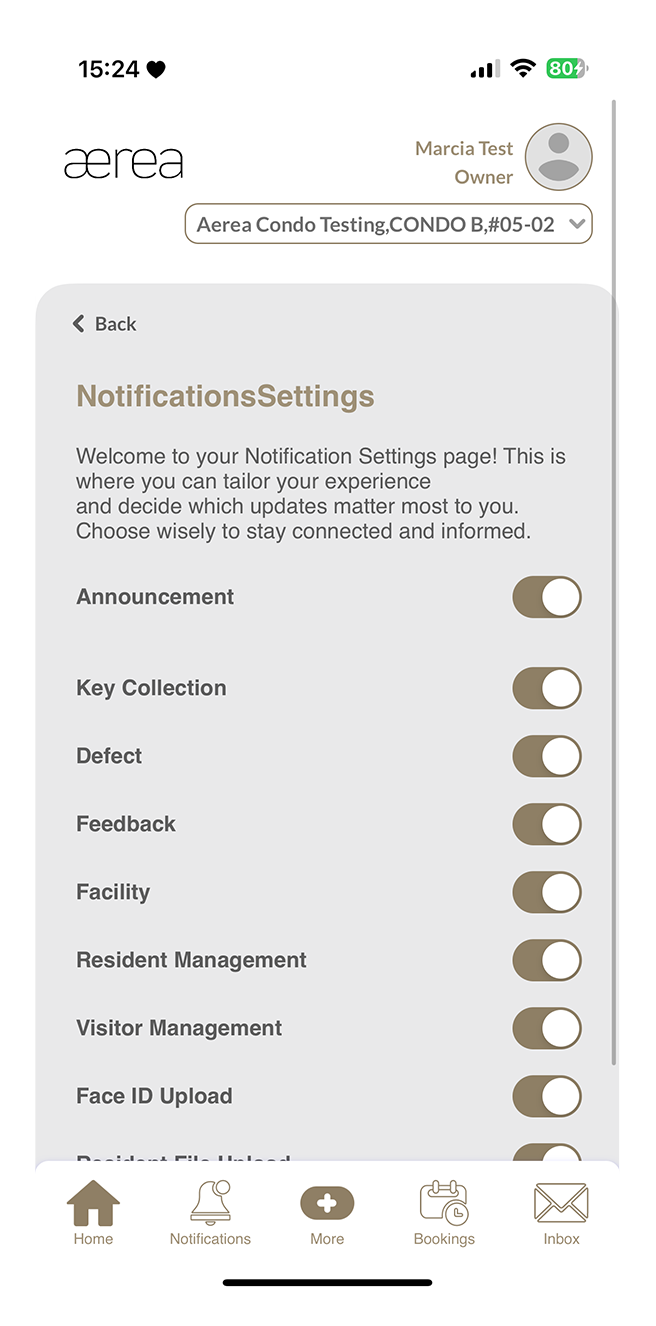
Step 1
Tap the switch to enable or disable notifications for each menu option.
22.4 Changing password
How it works
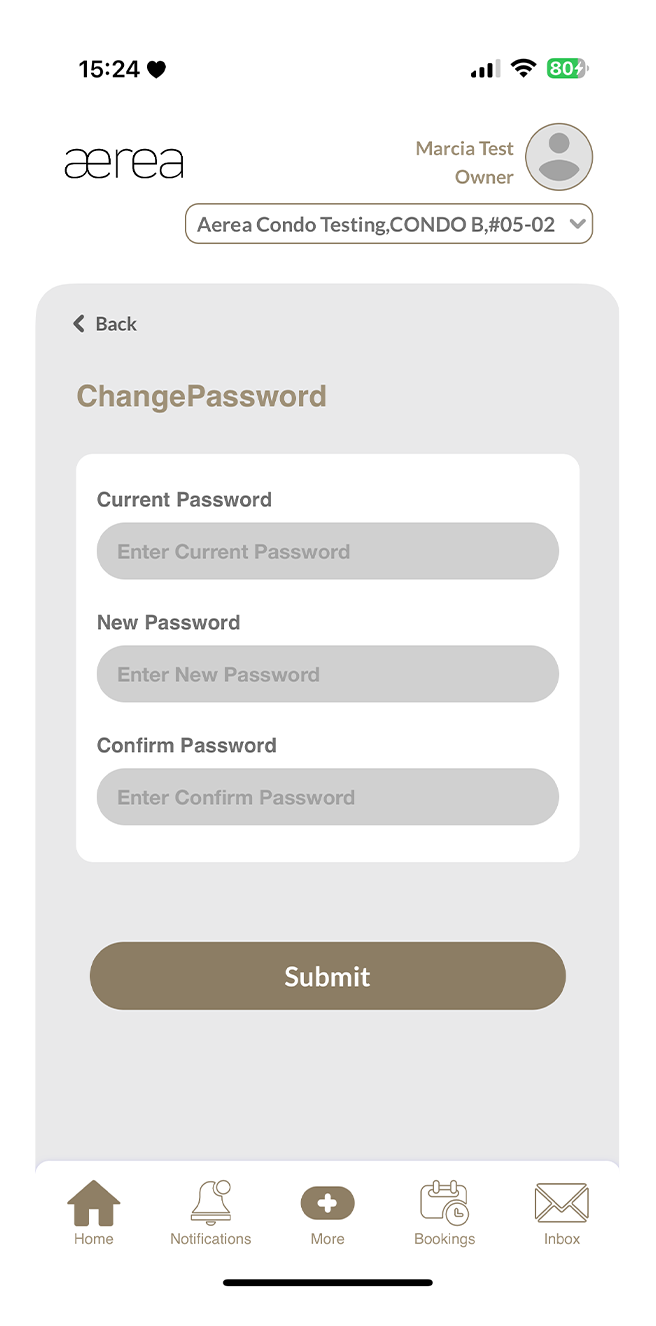
Step 1
Enter your current password, then your new password and confirm it in the designated fields.
Step 2
Tap Submit to save the changes, and a confirmation message will appear once your password is updated.
22.5 Terms and conditions
How it works
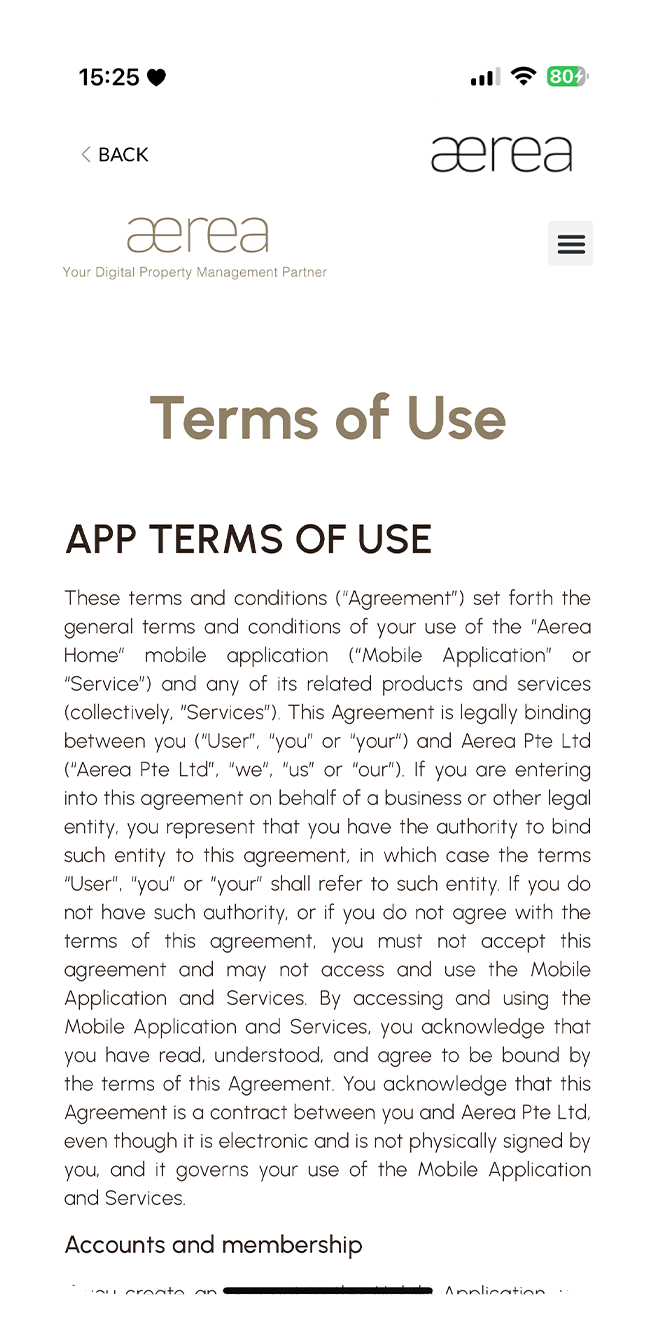
Step 1
Read through the terms to understand your rights, responsibilities, and how your data is handled.
22.6 Enabling_disabling biometric login
How it works
Step 1
Read through the terms to understand your rights, responsibilities, and how your data is handled.